
Generator Training Manual
Welcome to the Generator platform training guide. Use the tabs above to navigate between sections. Each section provides detailed step-by-step instructions for every feature of the platform.
How to Use This Manual
This manual covers every page and feature of the Generator admin panel. Click any section tab above or any module card to jump directly to that section's documentation.
- Each section opens with an overview and a table of contents.
- Click any table-of-contents link to jump to that specific feature.
- Step-by-step instructions are provided for every action.
- Tips (green callouts) highlight best practices.
- Warnings (yellow callouts) flag actions that require extra care.
Sales
Manage the full order lifecycle — from new order entry through fulfillment, shipping, returns, and customer account management. The Sales section is the daily command center for your sales and customer-service teams.
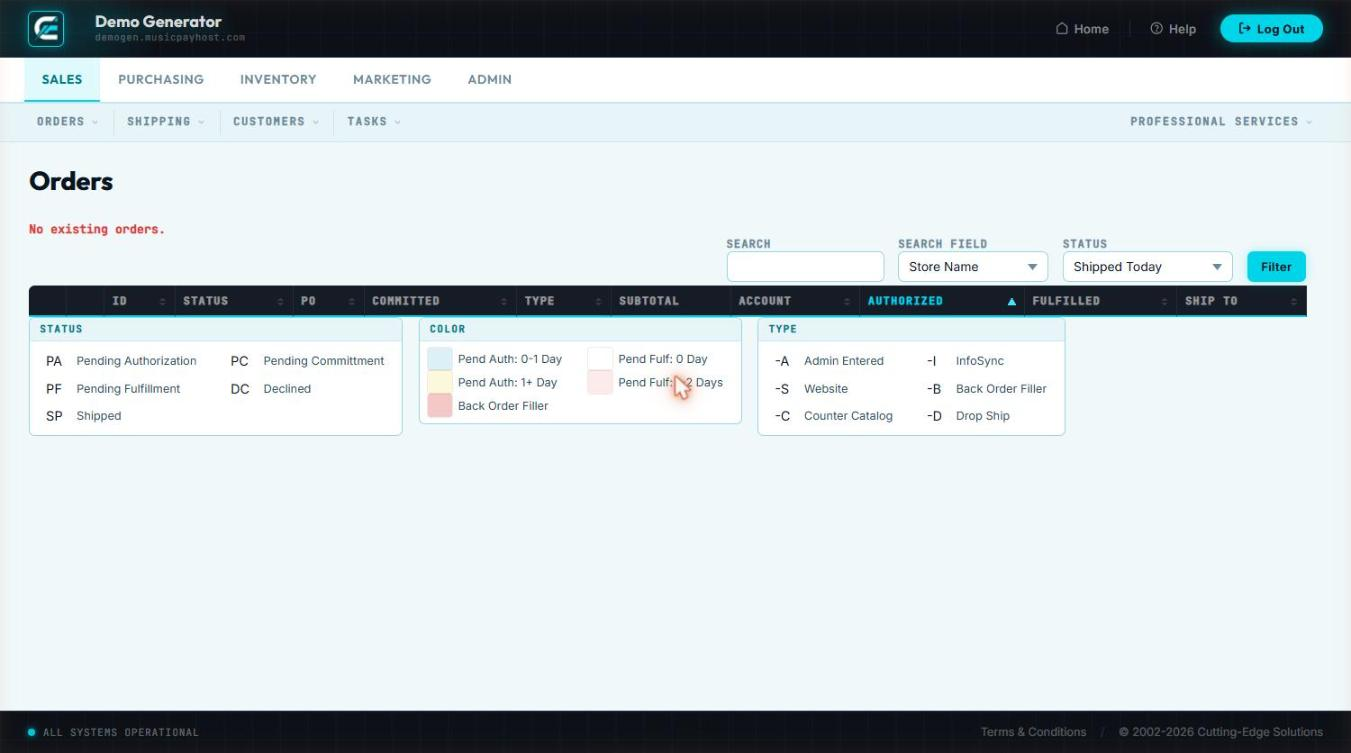
Orders Overview Understanding Order Statuses & Types
Every order in Generator moves through a defined lifecycle. Understanding the status system is essential for managing your queue efficiently.
Order Status Definitions
| Status | Meaning | Next Action |
|---|---|---|
| Active | Order placed and payment authorized; ready for fulfillment | Pick, pack, and ship |
| Pending Auth | Order placed but payment not yet authorized | Authorize or contact customer |
| Pending Fulfillment | Payment captured but order on hold | Resolve hold condition, then release |
| Back Order | One or more items out of stock | Receive stock or notify customer of ETA |
| Shipped | All items have tracking numbers assigned | Monitor delivery via Ship Monitor |
| Partially Shipped | Some but not all items have shipped | Ship remaining items |
| Closed | Fully shipped and delivered; order complete | No action required |
| Cancelled | Order voided before shipment; payment reversed | No action required |
| Refunded | Order returned and refund issued | No action required |
Order Type Color Codes
| Color | Order Type | Description |
|---|---|---|
| ⬜ White | Standard | Normal retail or wholesale order |
| 🟦 Blue | Phone / Manual | Entered by staff via New Order form |
| 🟩 Green | Paid in Full | Payment fully captured with no issues |
| 🟨 Yellow | Needs Attention | Requires staff review |
| 🟥 Red | Problem / Error | Payment failed, fraud flag, or system error |
| 🟪 Purple | Proposal / Quote | Not yet a live order; pending customer approval |
Active Orders Ready-to-Fulfill Order Queue
Active Orders shows every order that has been placed and paid — your primary fulfillment queue. Work through this list daily to ensure timely shipment.
Viewing Active Orders
- Click the Sales tab then click Active Orders.
- Orders display in a sortable table: Order #, Customer, Date, Items, Total, Shipping Method, Status.
- Click any column header to sort ascending/descending.
- Use the Search bar to find a specific order by order number, customer name, or e-mail.
- Use the Date Range filter to narrow to a specific period.
Opening an Order
- Click any order row to open the order detail page.
- The detail page shows: customer info, billing/shipping addresses, line items, payment summary, order notes, and history log.
- From the detail page you can: Edit Order, Add Tracking, Print Packing Slip, Issue Refund, or Cancel Order.
Printing a Packing Slip
- Open the order detail page and click Print Packing Slip in the action bar.
- A print-formatted version opens in a new tab — use Ctrl+P to send to your warehouse printer.
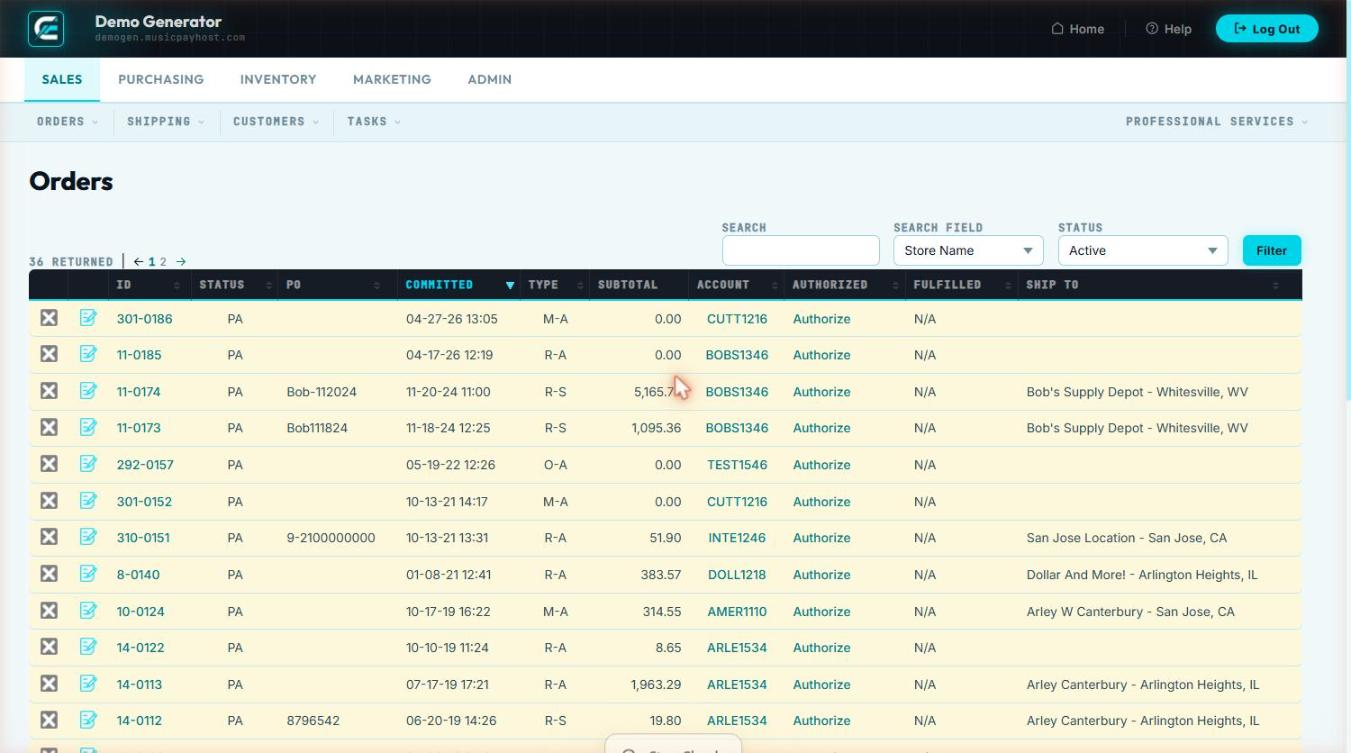
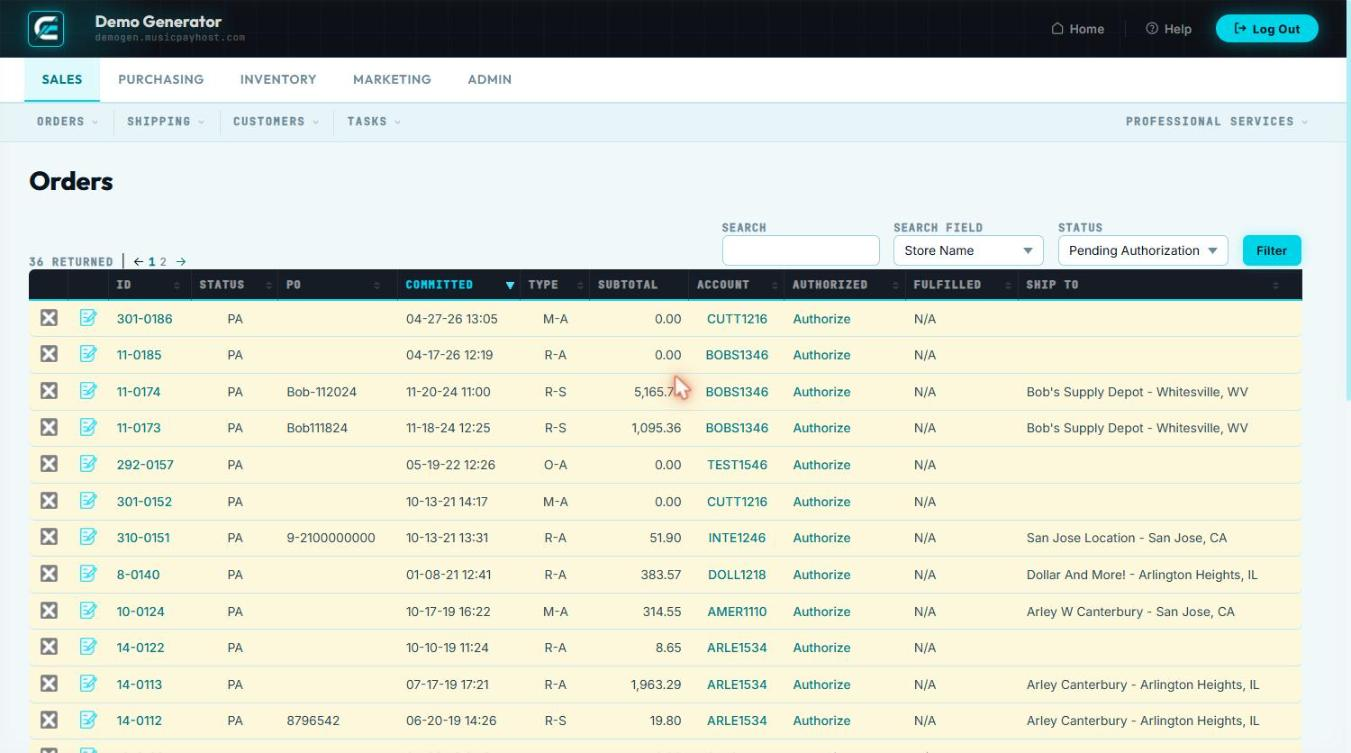
Pending Auth Orders Awaiting Payment Authorization
Pending Auth contains orders where the customer's payment method, ship to location, or some other issue has not yet been successfully resolved. These orders must be resolved before fulfillment can begin.
Common Reasons for Pending Auth
- No payment method on file
- Expired credit card
- Waiting on additional information from client
Resolving a Pending Auth Order
- Click Pending Auth in the Sales section.
- Click the order to open the detail page.
- Read the Notes in the Notes section.
- Choose the appropriate action:
- Contact Customer: call or e-mail to request a new payment method.
- Cancel Order: if unable to collect payment, cancel and send a cancellation notice.
Pending Fulfillment Paid Orders on Hold
Pending Fulfillment contains orders where payment informationn has been collected but fulfillment is intentionally on hold. Unlike Pending Auth, these orders are blocked by a deliberate hold.
Common Hold Reasons
- Customer requested a specific ship date
- Order awaiting a custom or special-order item
- Fraud review hold placed by a manager
- Address could not be verified — awaiting customer confirmation
- Combined shipping hold — waiting to consolidate multiple orders
Releasing a Fulfillment Hold
- Click Pending Fulf in the Sales section.
- Open the order and read the Hold Reason note.
- Resolve the hold condition (confirm address, receive the special-order item, etc.).
- Click Release Hold — the order moves to Active status.
- Add a note to the order explaining the resolution.

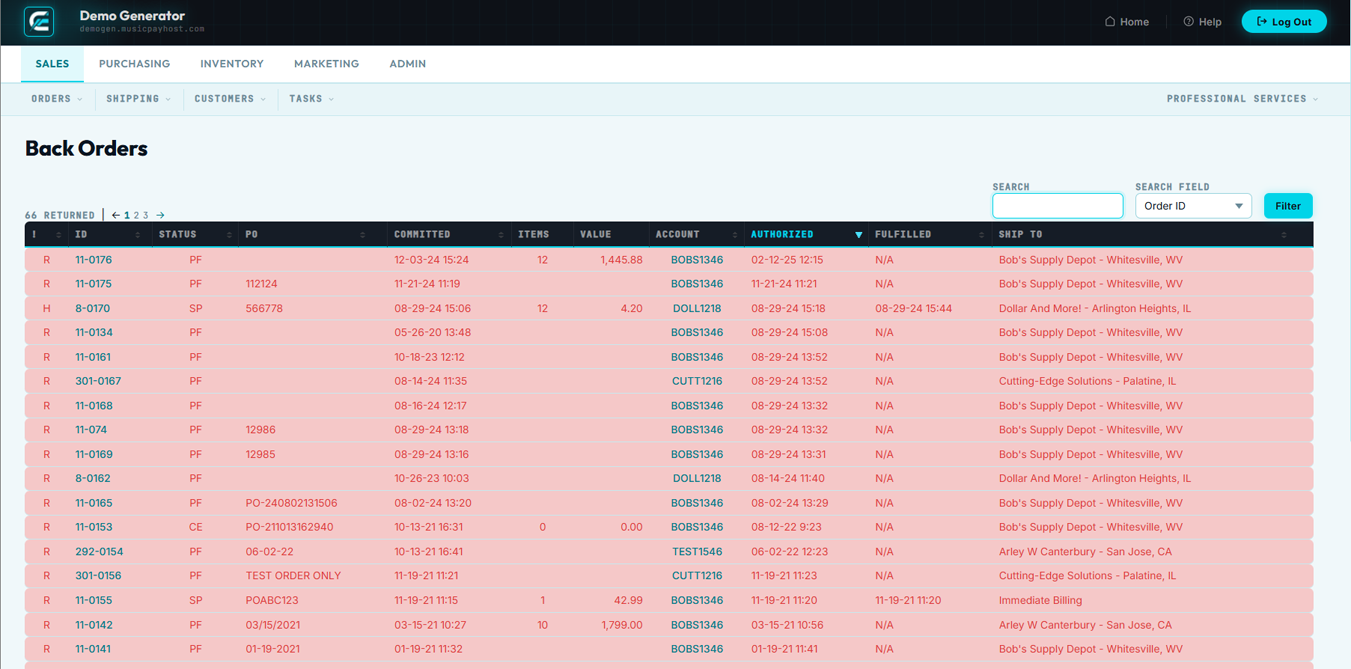
Back Orders Orders Waiting for Stock
Back Orders lists every order containing at least one item currently out of stock. Generator automatically moves orders to Back Order status when an ordered item's inventory reaches zero.
Managing Back Orders
- Click Back Orders in the Sales section.
- Each row shows the order, the specific back-ordered item(s), and the current stock level (0).
- Check the Purchasing section to verify whether a PO is open for the back-ordered item and note the expected delivery date.
- Notify the customer: click Send Back Order Notice from the order detail to e-mail the customer with the expected ship date.
- Partial shipment: if some items ARE in stock, click Ship Available Items to create a partial shipment while the back-ordered item remains on hold.
- Once the item is received into inventory via Purchasing → Receiving, the system automatically moves the order back to Active status.
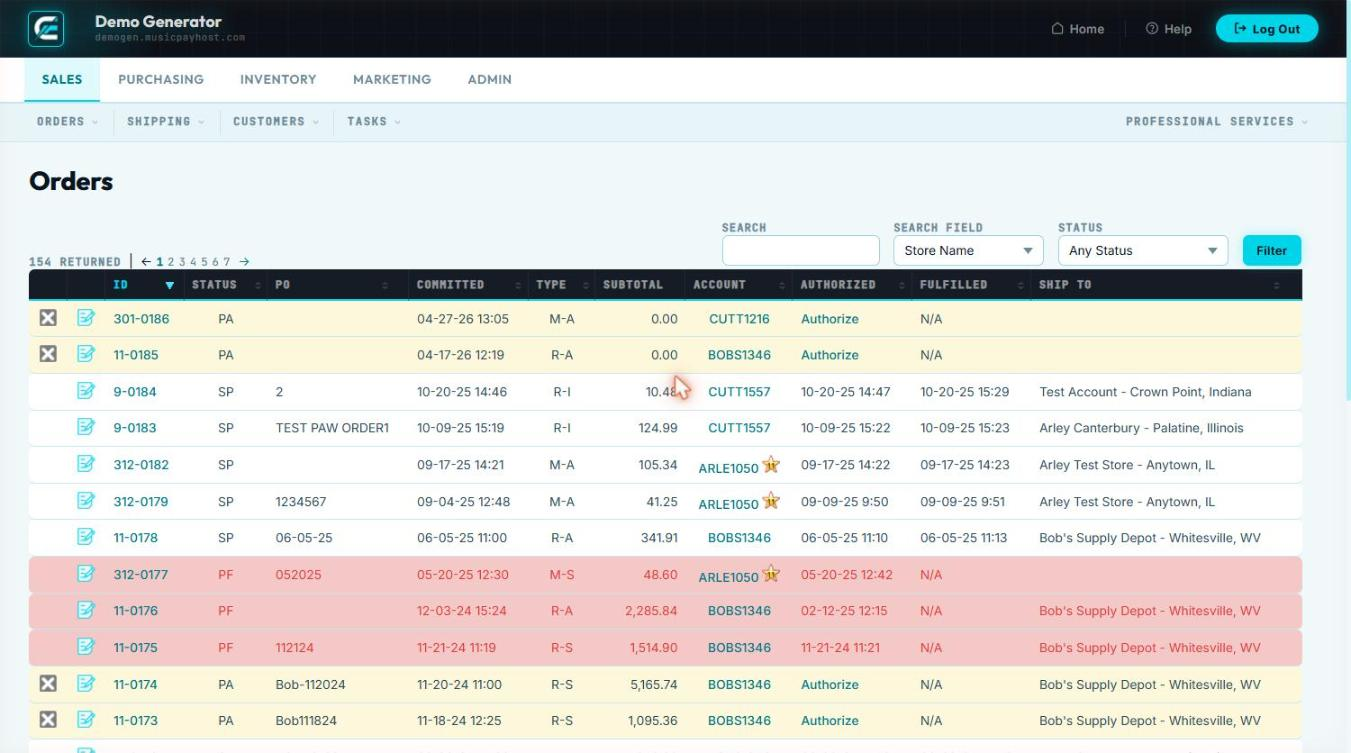
Browse All Orders Complete Order History
Browse All Orders is the master order archive — every order ever placed, regardless of status, is searchable here.
Searching Orders
- Click Browse All in the Sales section.
- Search by: Order #, Customer Name, E-mail, Phone, Product SKU, or Tracking Number.
- Apply filters: Status, Date Range (order placed or ship date), Sales Rep, Customer Group, Shipping Method, Amount Range.
- Click any row to open the full order detail.
Exporting Search Results
- After applying filters, click Export Results in the top-right.
- Choose CSV or Excel format. The export includes all filtered results, not just the current page.
Shipped Today Today's Outbound Shipments
Shipped Today is a real-time snapshot of every order that received a tracking number today. Use it as your end-of-day fulfillment audit.
Using Shipped Today
- Click Shipped Today in the Sales section.
- The list shows: Order #, Customer, Items, Carrier, Tracking #, Ship Time.
- Click any tracking number to open the carrier's tracking page in a new tab.
End-of-Day Reconciliation
- Compare the Shipped Today count against your physical carrier manifest.
- If an order appears here but was NOT tendered to the carrier: click the order → Void Shipment to return it to Active status.
- If an order was shipped but does NOT appear: open it via Browse All and click Add Tracking Number.
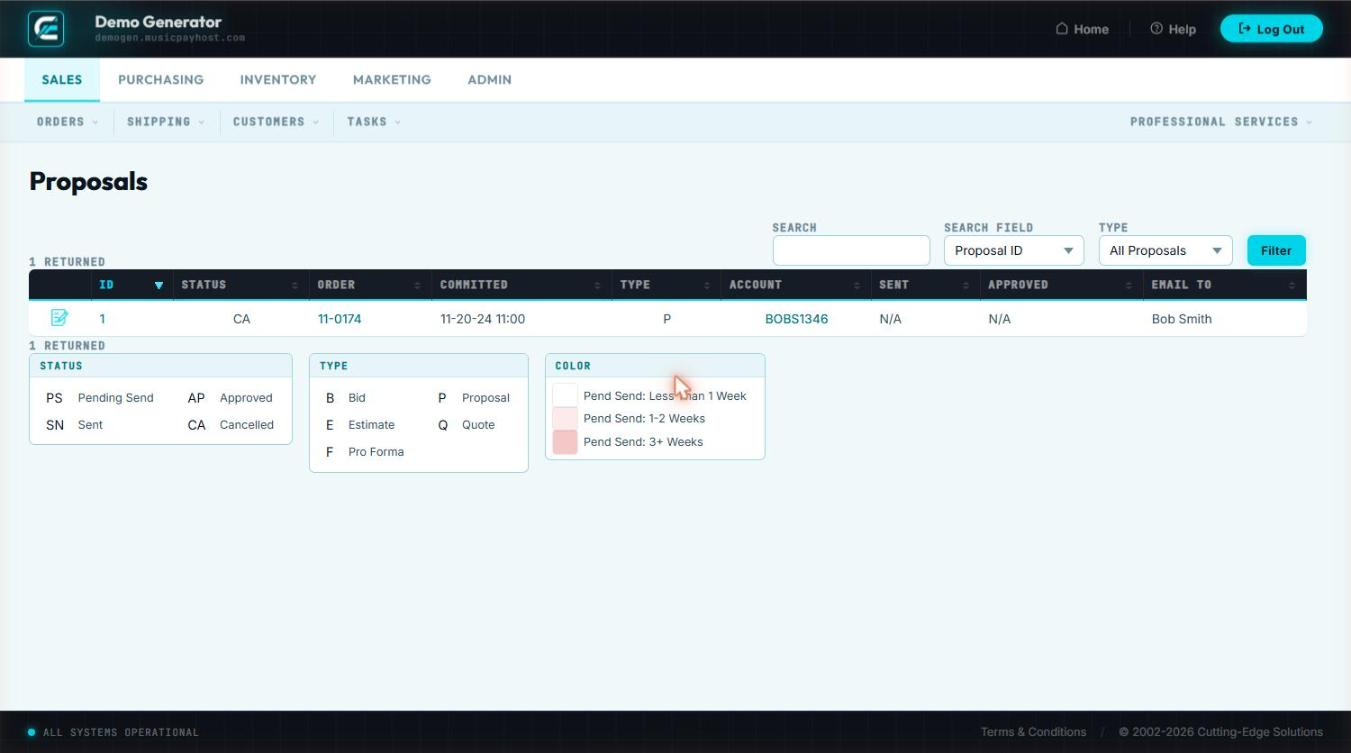
Proposals Quotes & Price Estimates
Proposals let you create a formal price estimate for a customer without placing a live order or charging a payment method. Once approved, convert the proposal to an active order with one click.
Creating a New Proposal
- Click Proposals in the Sales section, then click New Proposal.
- Customer lookup: search by name, e-mail, or phone. For a new prospect, click Create Customer inline.
- Expiration Date: set a date by which the quoted prices are valid (default 30 days).
- Add Products: search by SKU or name, set quantities, override prices if needed, add per-line notes.
- Shipping Estimate: run the rate shopper or enter a manual flat estimate.
- Proposal Notes: enter terms or special instructions that appear on the printed PDF.
- Click Save Proposal — system assigns a Proposal number.
- Click Send to Customer to e-mail the PDF, or click Download PDF to send manually.
Converting a Proposal to an Order
- Open the proposal from the Proposals list.
- Click Convert to Order.
- Select or enter the payment method.
- Click Place Order — a new order is created with all proposal items pre-filled. The proposal status changes to Converted.
Proposal Statuses
| Status | Meaning |
|---|---|
| Draft | Saved but not yet sent to the customer |
| Sent | E-mailed or delivered; awaiting response |
| Accepted | Customer approved; ready to convert to order |
| Converted | Converted to a live order |
| Declined | Customer rejected the quote |
| Expired | Expiration date passed without a response |
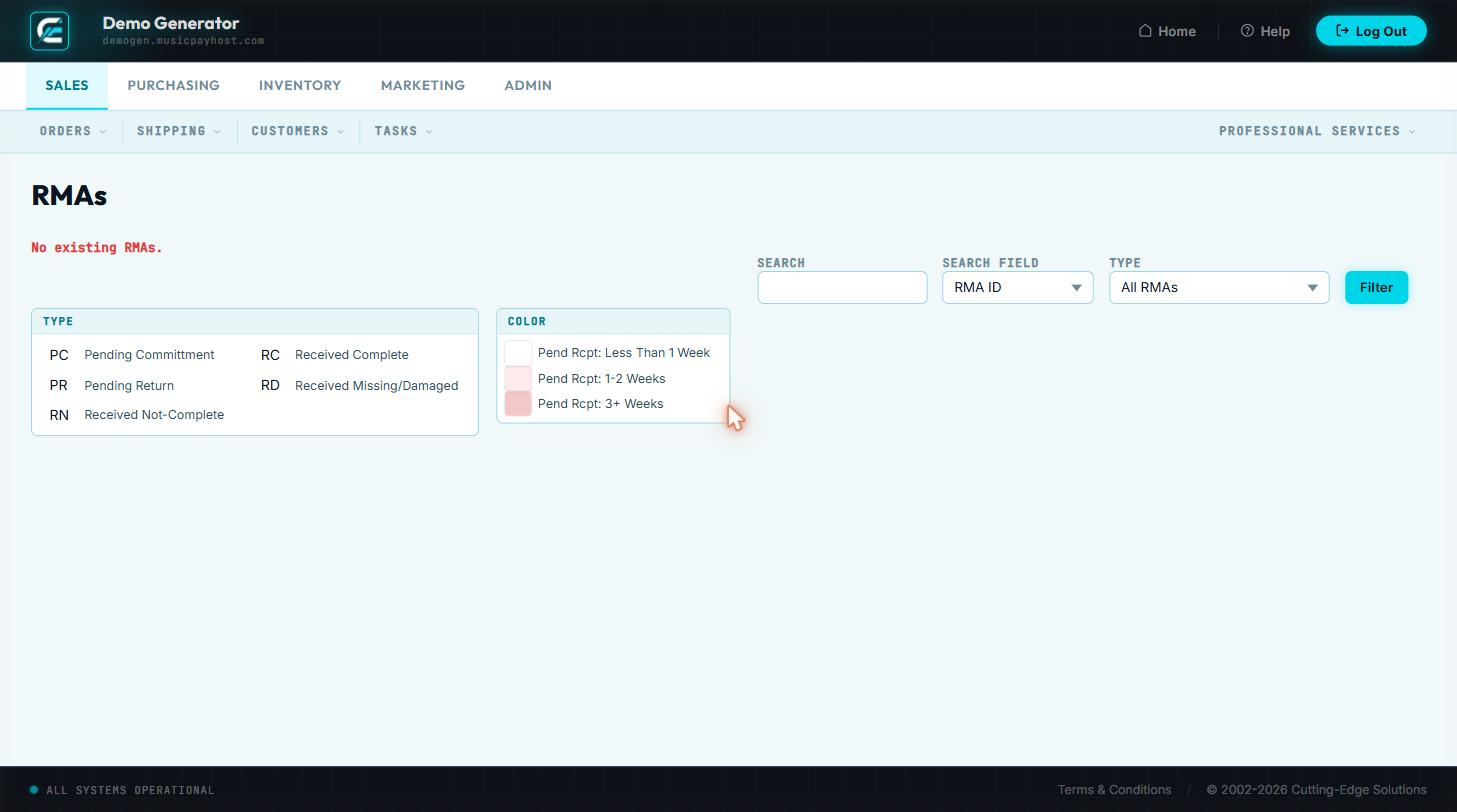
RMAs Return Merchandise Authorizations
An RMA formally authorizes a customer to return goods. Generator tracks each return through the full cycle — authorization, receipt, inspection, and resolution.
Creating a New RMA
- Click RMAs then New RMA.
- Enter or look up the original Order #.
- Select the line items being returned and enter quantities.
- Choose a Return Reason: Defective, Wrong Item, Customer Change of Mind, Damaged in Shipping, Other.
- Select the Resolution: Refund to original payment, Exchange, or Store Credit.
- Set an RMA Expiration Date (default 30 days).
- Click Save RMA — system assigns an RMA number and e-mails return instructions to the customer.
Processing a Received Return
- When goods arrive, open the RMA and click Mark Received.
- Enter the condition of each item (Good, Damaged, Missing Parts).
- If Refund: click Issue Refund.
- If Exchange: click Create Exchange Order.
- If Store Credit: credit is automatically added to the customer's account balance.
- Click Close RMA to finalize.
| Status | Meaning |
|---|---|
| Open | RMA issued; awaiting return shipment |
| Received | Goods received; pending resolution |
| Resolved | Refund issued, exchange created, or credit applied |
| Expired | Customer did not return goods before expiration date |
| Closed | Fully processed and archived |
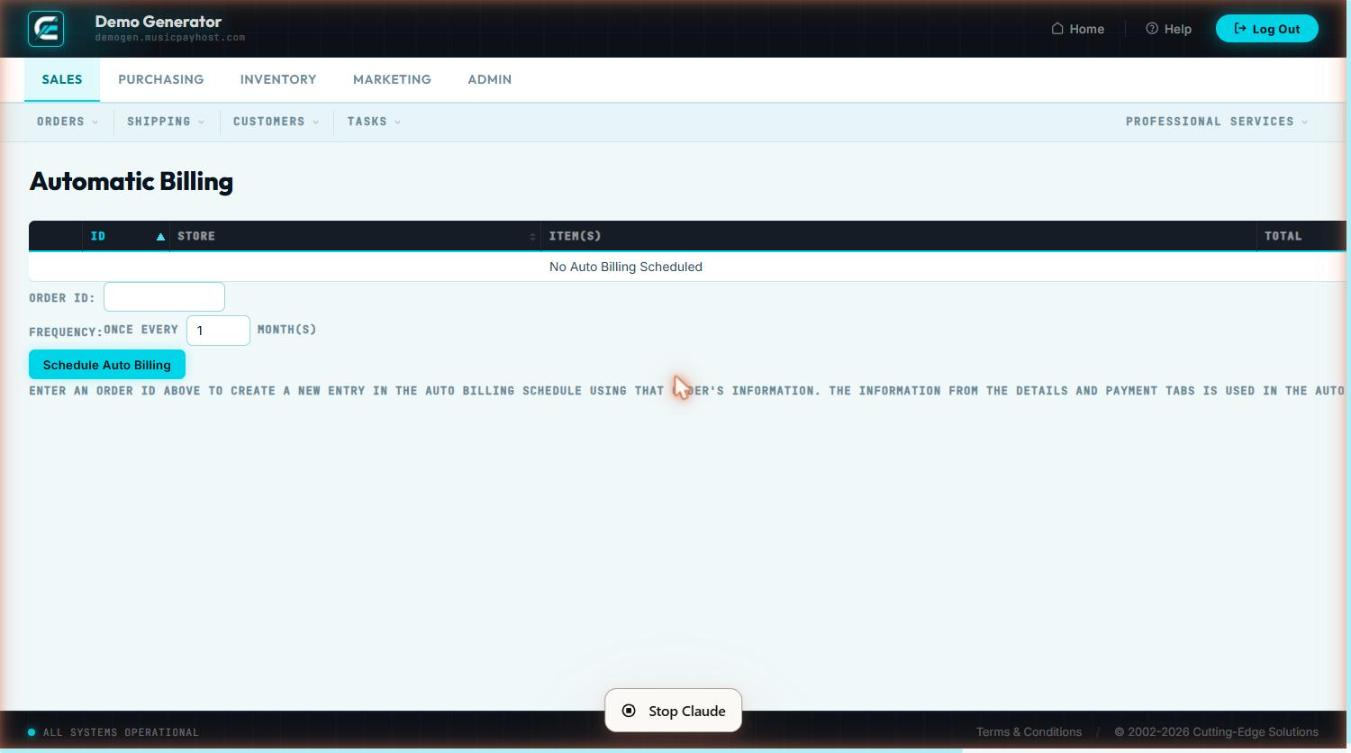
Auto Billing Recurring Charge Management
Auto Billing automates recurring charges for subscription products, maintenance agreements, and membership plans using tokenized payment methods.
Viewing Active Agreements
- Click Auto Billing under the Sales tab.
- Dashboard shows: Customer, Product, Amount, Frequency, Next Bill Date, Last Charged, Status.
- Filter by status (Active, Paused, Failed, Cancelled) or customer name/ID.
Creating an Agreement
- Open the customer's order with the recurring product and click Setup Auto Bill.
- Confirm product, amount, and billing frequency (Weekly, Monthly, Quarterly, Annually).
- Verify the tokenized payment method or enter a new card.
- Set the Start Date and optional End Date, then click Activate.
Managing an Agreement
- Click any agreement row to open its detail.
- Pause: suspends future charges; resume at any time.
- Update Payment Method: enter new card details; old token is replaced.
- Change Amount/Frequency: edits apply from the next billing cycle.
- Cancel: stops all future charges and sends a cancellation confirmation.
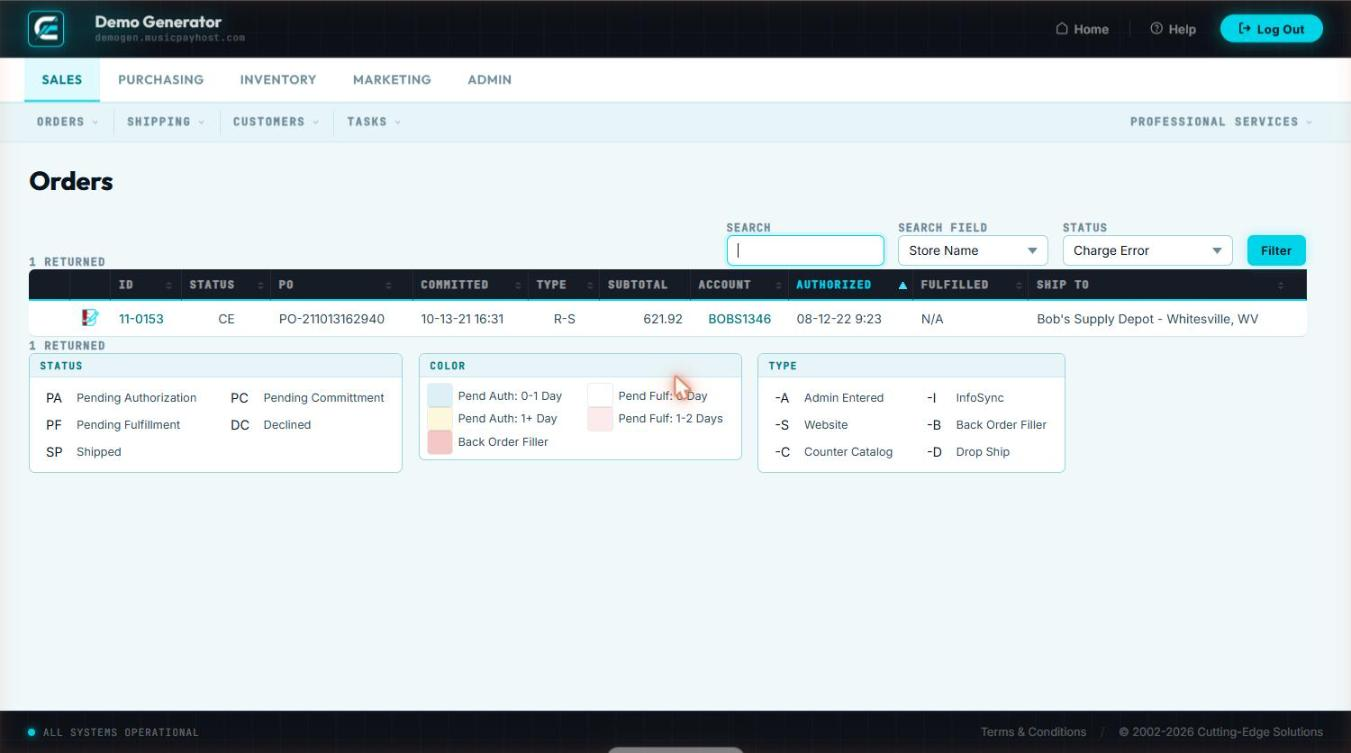
Charge Error Failed Payment Resolution
The Charge Error queue collects every auto-billing attempt that was declined or errored. Prompt resolution prevents service interruption for subscription customers.
Viewing Charge Errors
- Click Charge Error under the Sales tab.
- Each row shows: Customer, Agreement, Amount, Error Code, Error Message, Attempt Date, # Retries.
- Common codes:
do_not_honor,insufficient_funds,card_expired,invalid_number,gateway_timeout.
Resolving a Charge Error
- Click the error row to open the detail panel.
- Option A — Retry: click Retry Now (suitable for temporary timeouts).
- Option B — Update card: click Update Card, enter new details, then Charge Now.
- Option C — Contact customer: click Send Payment Request — e-mails a secure card-update link.
- Option D — Cancel: click Cancel Agreement and note the reason.
| Attempt | Timing |
|---|---|
| 1st (original) | Scheduled billing date |
| 2nd retry | 3 days after failure |
| 3rd retry | 7 days after failure |
| Final retry | 14 days — if still failing, agreement flagged Suspended |
New Order Manual Order Entry
Use New Order to enter phone orders, counter sales, or any order originating outside the online storefront.
Step-by-Step Order Entry
- Click New Order in the Sales section.
- Customer lookup: type name, e-mail, or phone; select from auto-complete. For a new customer click Create Customer inline.
- Ship-to address: choose a saved address or enter a new one. Check Residential for accurate carrier rating.
- Add Products: search by SKU or name, set quantity, optionally override price (manager permission required). Repeat for all items.
- Shipping method: select from rate-shopper results or enter a flat amount manually.
- Discounts & coupons: enter a coupon code or select a manual discount with a reason.
- Payment: Credit card (tokenized), Account terms (Net-30/60), or Check/COD.
- Review the order summary and click Place Order.
- System assigns an order number, charges payment, decrements inventory, and sends an order confirmation e-mail.

Edit Order Modify an Existing Order
Edit Order lets you modify an order after placement — adding/removing items, changing quantities, updating the shipping address, or adjusting payment — provided the order has not been fully shipped.
Opening an Order for Edit
- Locate the order via Browse All or any status queue and click it.
- Click Edit Order in the action bar — an edit lock prevents simultaneous editing by other users.
| Operation | Steps |
|---|---|
| Add item | Type SKU in Item Search → select → set qty → Add Line |
| Remove item | Click trash icon on the line → confirm |
| Change quantity | Click qty cell → type new value → Tab |
| Override price | Click price cell → enter new price → select reason |
| Change ship-to | Click Address panel → select or enter new address |
| Change shipping method | Re-run rate shopper or enter manual amount |
| Apply/remove coupon | Enter coupon code or click × on existing discount |
Saving Changes
- Click Save Changes.
- If total increased and card is on file, system charges the difference automatically.
- If total decreased, click Issue Refund → Partial Refund for the difference.
- An order-update e-mail is sent to the customer.

Export Download Order Data
The Export tool generates CSV or Excel files of order data for use in accounting systems, shipping software, or external reporting tools.
Running an Export
- Click Export in the Sales section.
- Choose Export Type: Orders Summary, Order Line Items, Shipping Labels, or Accounting Export.
- Set Date Range and apply optional filters: Status, Shipping Method, Sales Rep, Customer Group.
- Select Output Format: CSV or XLSX, then click Generate Export.
Scheduled Exports
- Click Schedule Export, set frequency (Daily/Weekly/Monthly), delivery time, and recipient e-mail addresses.
- System generates and attaches the export on schedule automatically.

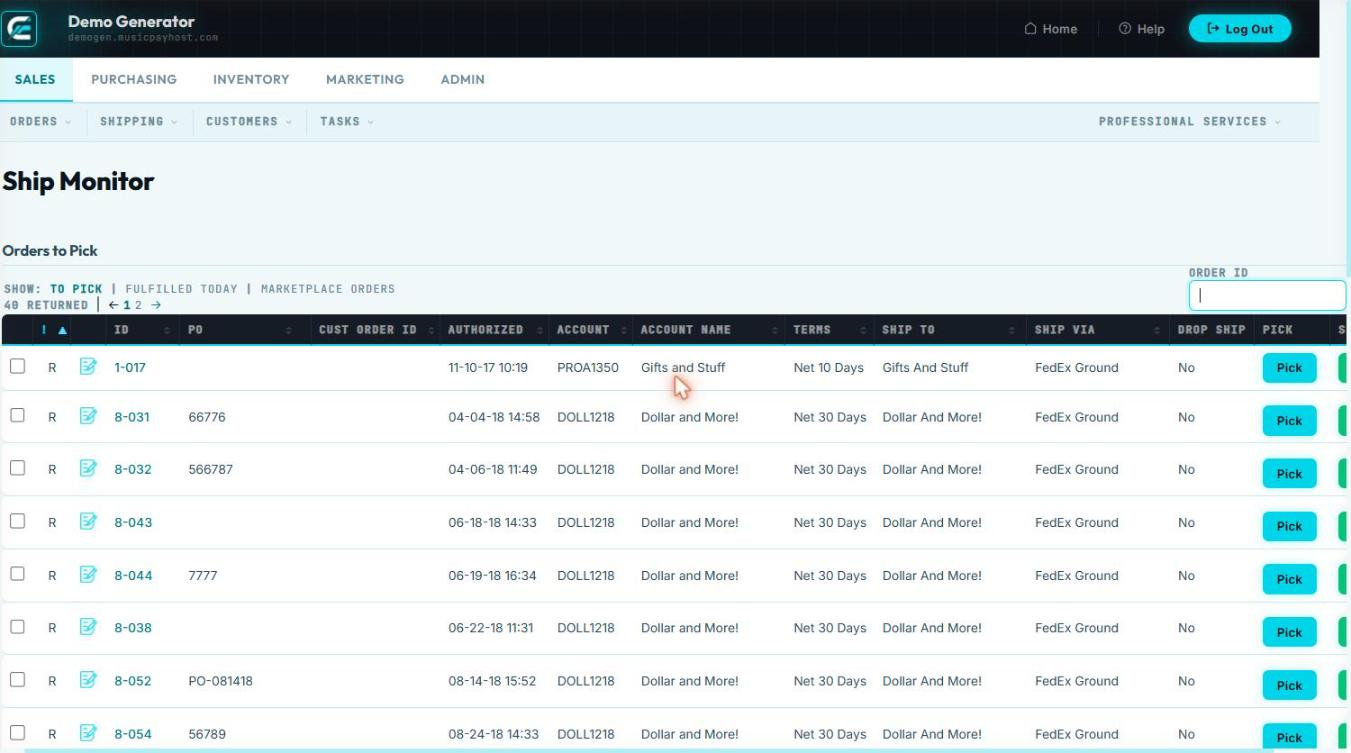
Ship Monitor Real-Time Shipment Tracking
Ship Monitor provides a live dashboard of all outbound shipments, pulling tracking data directly from carrier APIs.
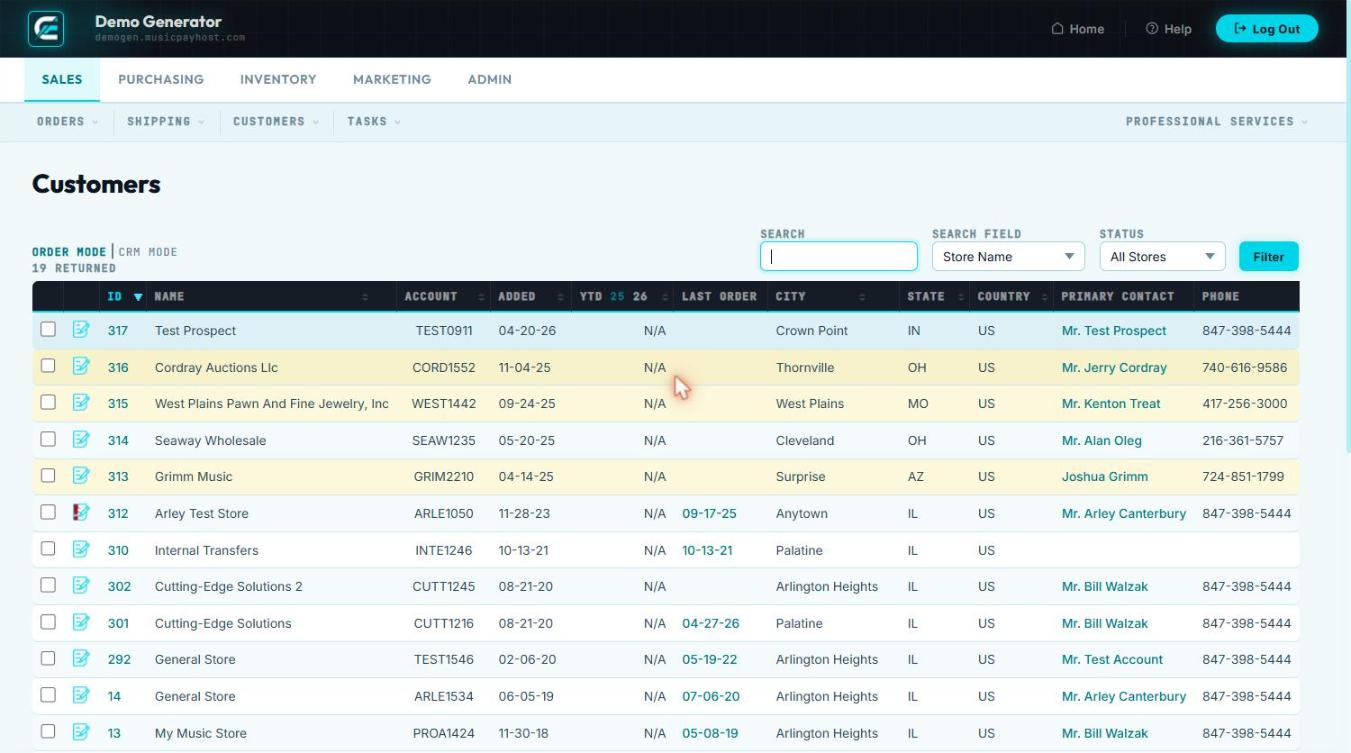
Browse Customers Customer Search & List View
Browse Customers is the master customer directory. Every account — retail, wholesale, or internal — is accessible here.
Searching for a Customer
- Click Browse Customers in the Sales section.
- Search by: Name, E-mail, Phone, Customer ID, or Company.
- Filter by: Customer Group, State/Province, Account Status (Active, Inactive, On Hold), Date Range.
- Click any customer row to open the full account view.
| Tab | Contents |
|---|---|
| Overview | Name, contact info, customer group, account balance, credit limit, tax-exempt status |
| Orders | Complete order history with links to each order detail |
| Addresses | All saved ship-to and bill-to addresses |
| Payment Methods | Tokenized cards on file (last 4 digits only) |
| Notes | Internal staff notes with timestamps and author names |
| Activity Log | Every interaction — logins, orders placed, e-mails sent |
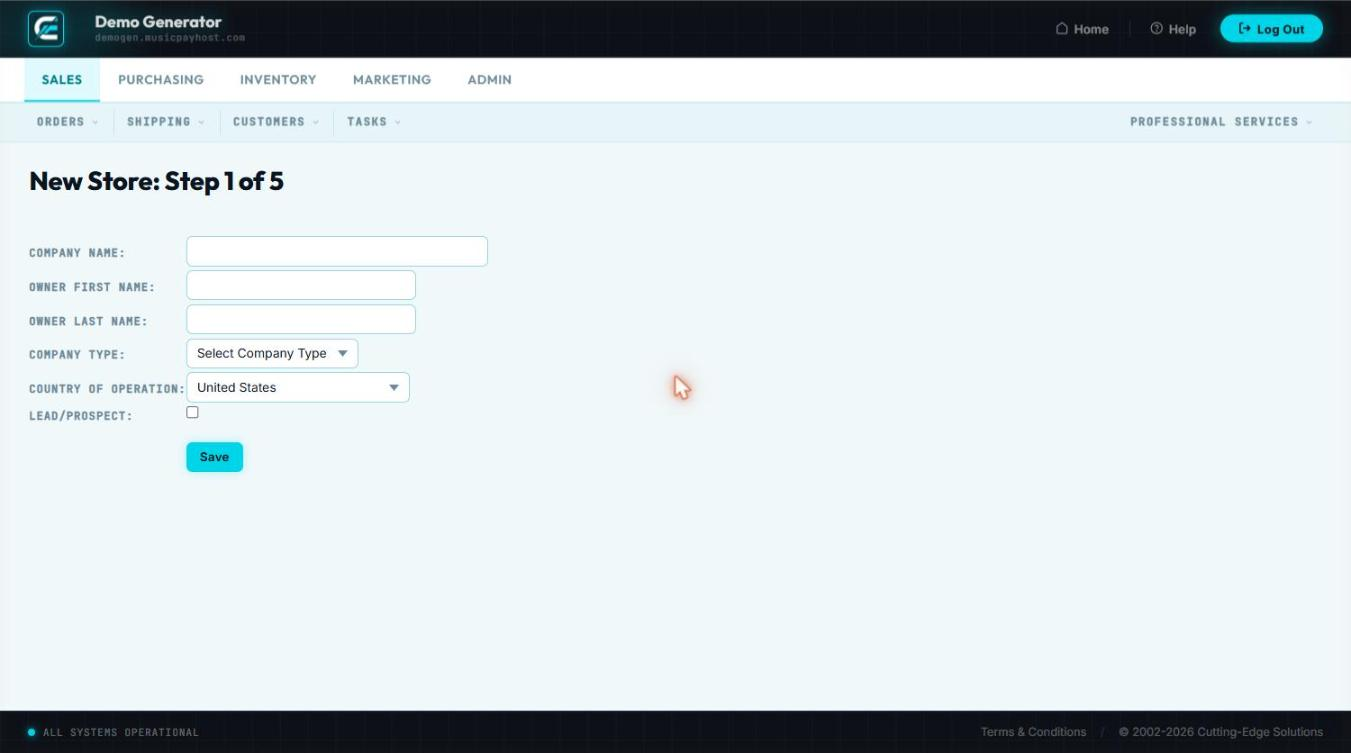
New Customer Create a Customer Account
Create a customer account manually when a customer calls in, walks in, or requests an account set up by a sales representative.
Creating the Account
- Click New Customer in Sales → Customers.
- Required fields: First Name, Last Name, E-mail Address (must be unique), Phone Number.
- Optional fields: Company, Customer Group, Tax-Exempt status + certificate number, Credit Limit, Payment Terms, Sales Rep assignment.
- Under Primary Address enter the billing address. Add ship-to addresses using + Add Address.
- Set an initial password or check Send Welcome E-mail to let the customer set their own.
- Click Create Account.
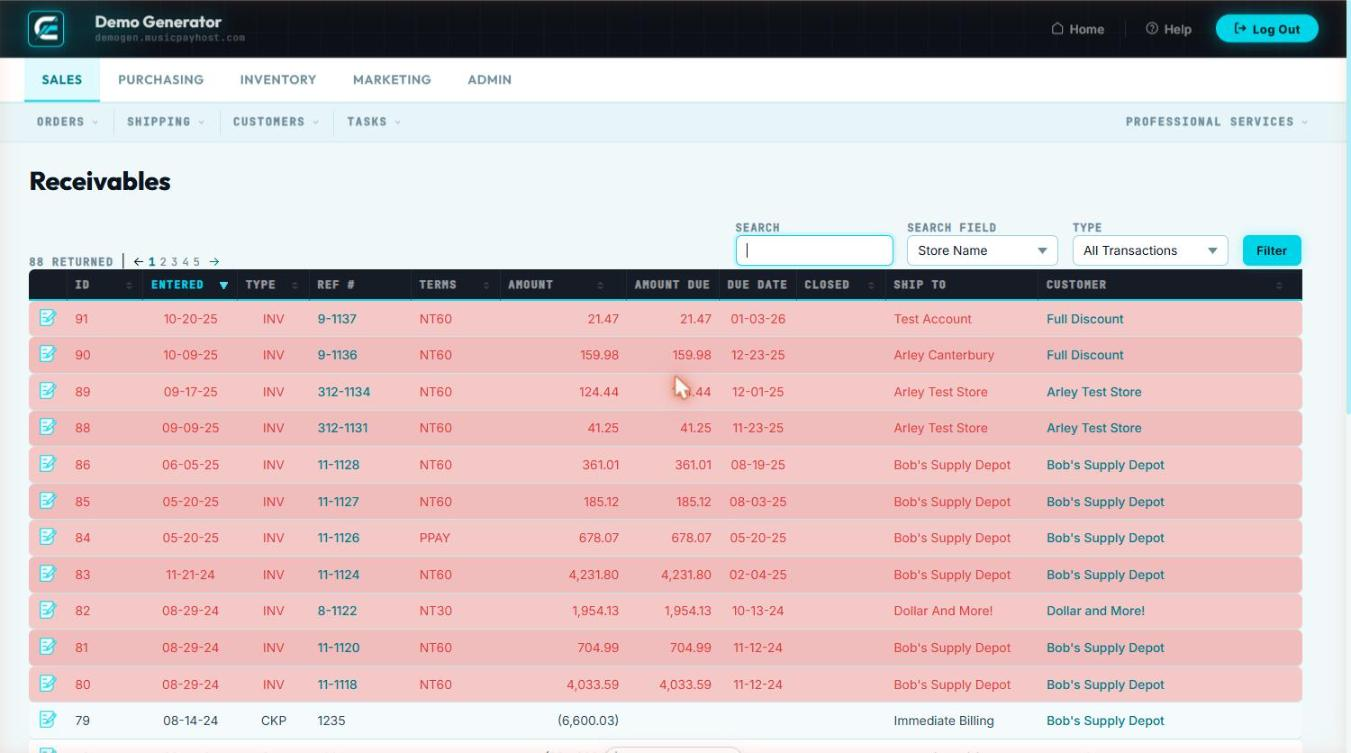
Receivables Accounts Receivable & Invoicing
Receivables tracks outstanding balances for customers on account terms. Use this view to monitor who owes money, apply payments, and send invoice reminders.
Viewing Outstanding Receivables
- Click Receivables in Sales → Customers.
- The aging report shows balances bucketed by: Current, 1–30 Days, 31–60 Days, 61–90 Days, 90+ Days.
- Click any customer row to open the full invoice ledger.
Applying a Payment
- Open the customer ledger and click Apply Payment.
- Enter the payment amount and select the method: Check, ACH, Credit Card, or Wire Transfer.
- Click Auto-Apply for oldest-first, or manually select specific invoices.
- Click Post Payment — the ledger updates and the balance decreases.
Sending Invoice Reminders
- Check boxes next to overdue customers.
- Click Send Reminder, select the template (Friendly Reminder, Past Due Notice, Final Notice), review the preview, and click Send.
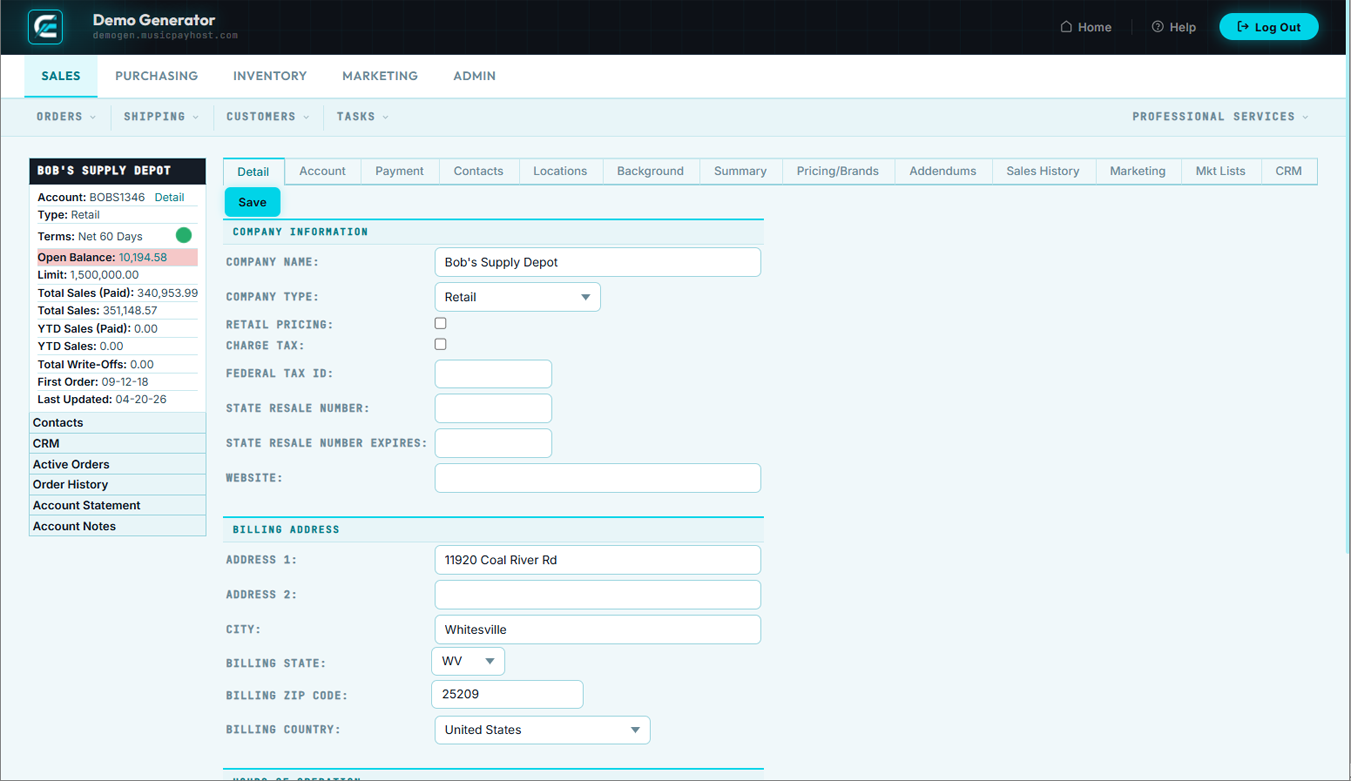
Edit Account Modify Customer Account Details
Edit Account lets you update any aspect of a customer's profile — contact information, billing address, account settings, pricing group, credit limit, and more.
Editing a Customer Account
- Find the customer via Browse Customers and open their record.
- Click Edit Account in the top-right action bar.
- Update fields across: Contact Info, Account Settings (Status, Customer Group, Sales Rep), Pricing & Terms (Price Level, Credit Limit, Payment Terms, Tax-Exempt), Addresses, Password, and Notes.
- Click Save Account — changes take effect immediately for new orders.
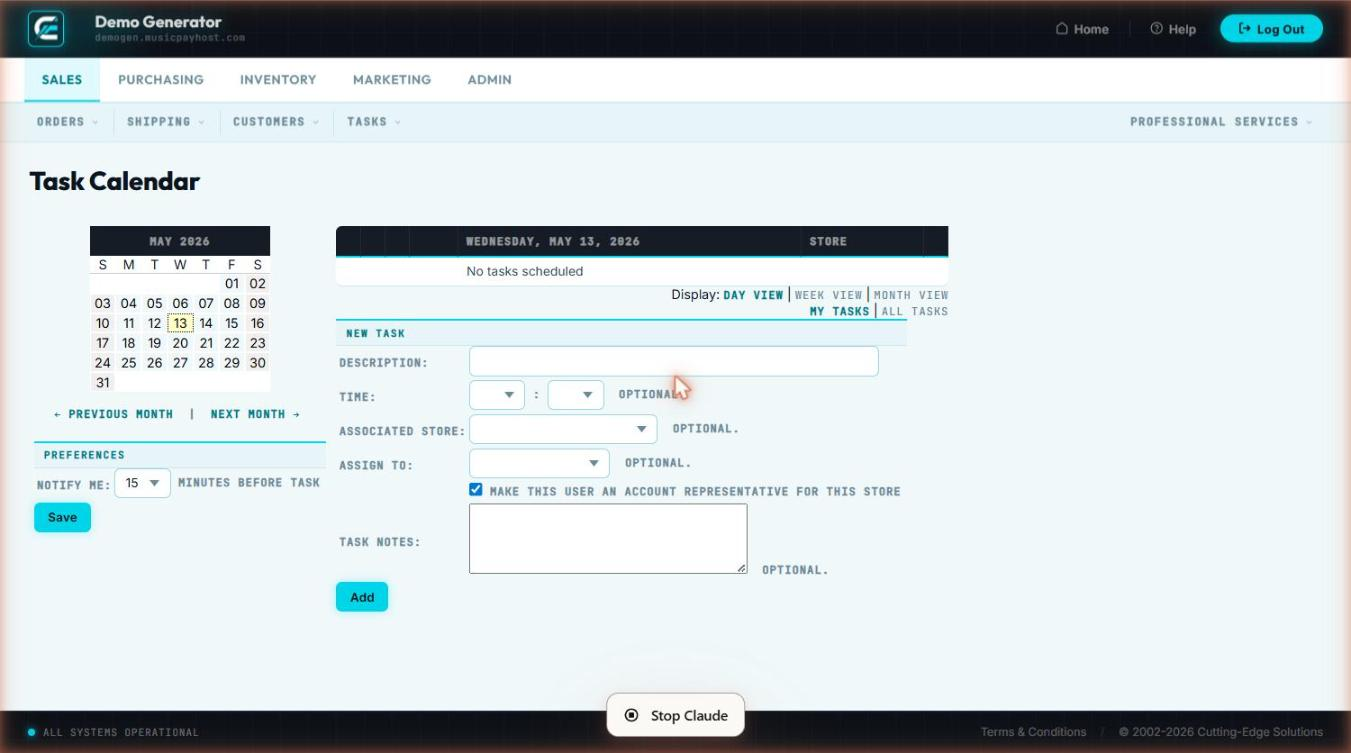
Task Calendar Schedule & Track Follow-Up Tasks
The Task Calendar gives sales representatives a visual, day-by-day view of all scheduled follow-up activities so nothing falls through the cracks.
Navigating the Calendar
- Click Task Calendar in Sales → Tasks.
- Toggle between Day, Week, and Month views.
- Use < and > arrows to move through dates, or click Today.
- Filter by Assigned Rep — managers can view any rep's calendar.
Creating a Task
- Click any open calendar cell or click + New Task.
- Fill in: Task Type (Call, E-mail, Meeting, Follow-Up, Demo, Other), Subject, Customer (optional), Order # (optional), Due Date & Time, Assigned To, and Notes.
- Click Save Task.
Completing a Task
- Click the task on the calendar to open it.
- Record the outcome in Completion Notes.
- Click Mark Complete.
- Optionally click Schedule Follow-Up to immediately create the next task.
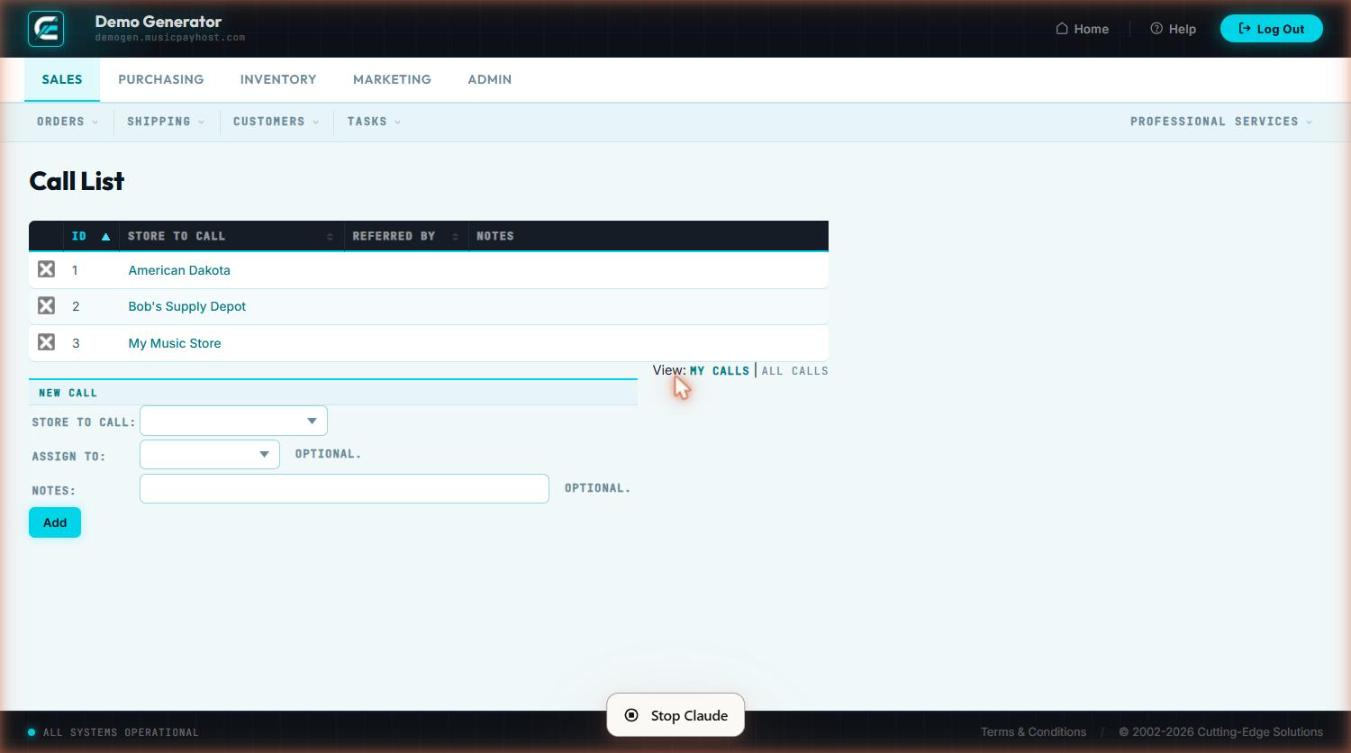
Call List Daily Outbound Call Queue
The Call List aggregates all tasks of type "Call" that are due today or overdue, giving sales reps a focused queue of calls to work through each morning.
Working the Call List
- Click Call List in Sales → Tasks.
- List shows: Customer Name, Phone, Company, Task Subject, Due Date, Assigned Rep.
- Click a row to expand: see full task notes and customer order history summary.
- After the call, click Log Call: enter duration, select outcome (Reached — Positive/Neutral/Negative, Voicemail, No Answer, Wrong Number), enter call notes, optionally schedule a follow-up.
- Click Save — the task moves to Completed and the next call displays.
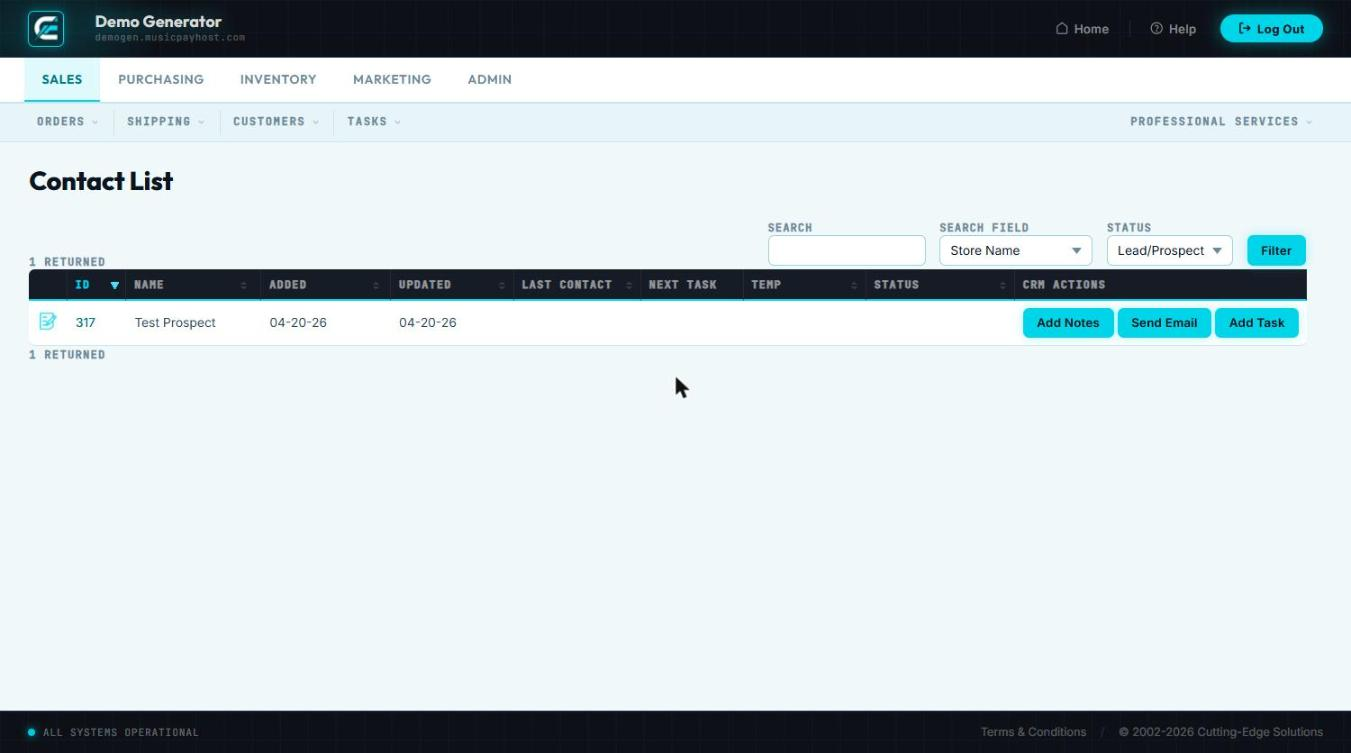
Contact List Company-Wide Contact Directory
The Contact List is a searchable directory of all contacts associated with customer accounts — buyers, AP contacts, and decision-makers.
Searching Contacts
- Click Contact List in Sales → Tasks.
- Search by: Name, E-mail, Phone, Company, Title, or Customer Group.
- Results show: Name, Title, Company, E-mail, Phone, Last Contacted.
Adding a Contact
- Click + New Contact.
- Link to an existing customer account using the account search field.
- Enter: First Name, Last Name, Title, E-mail, Phone, Mobile, Notes.
- Check Primary Contact if this person is the main decision-maker.
- Click Save Contact.
Editing or Removing a Contact
- Click the contact row to open detail view.
- Click Edit to update fields or Delete to remove. Deleting a contact does not affect the customer account or order history.
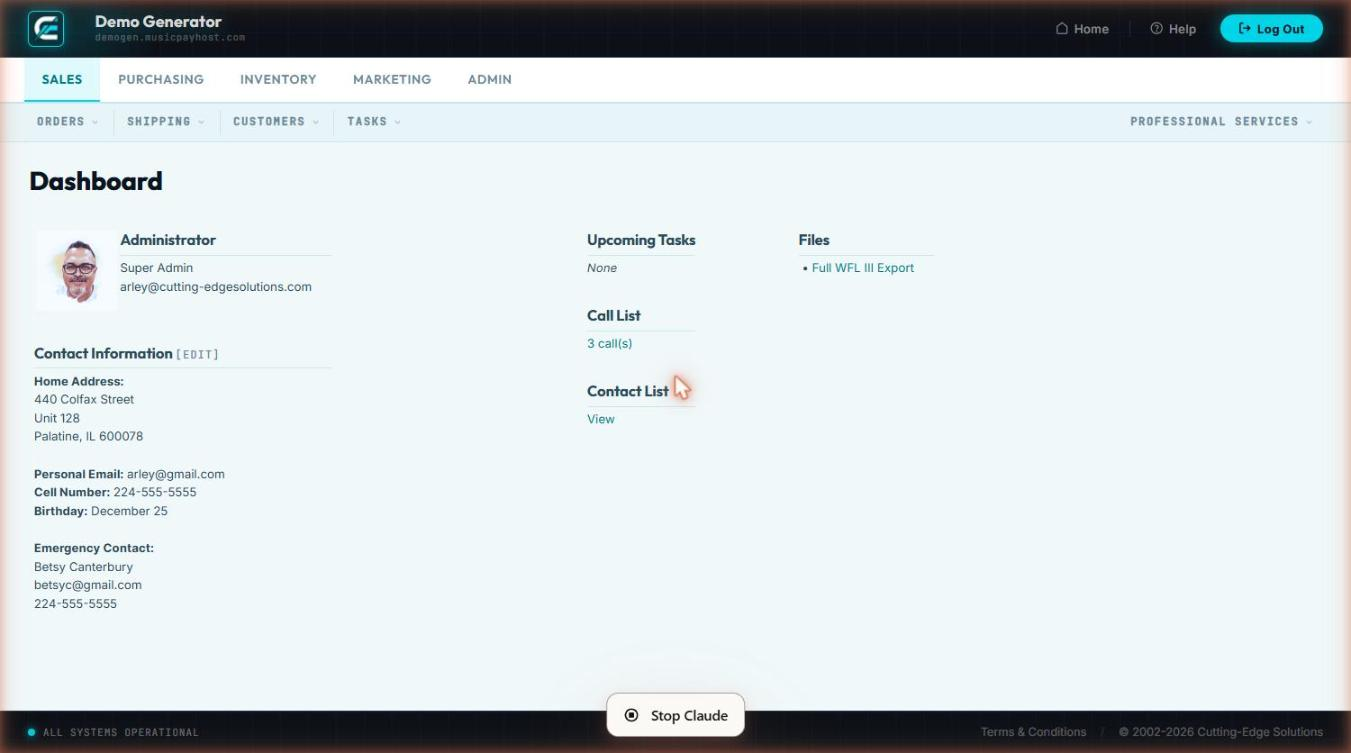
Sales Dashboard Performance at a Glance
The Sales Dashboard provides a real-time overview of sales performance for the current day, week, and month.
| Panel | What It Shows |
|---|---|
| Today's Revenue | Total dollar value of orders placed today; compares vs. same day last week |
| Orders Today | Count of new orders by channel (web, phone, EDI) |
| Open Orders | Total active orders not yet shipped or closed |
| Pending Auth | Orders awaiting payment authorization — requires immediate attention |
| Back Orders | Count of orders on hold due to out-of-stock items |
| Top Products | Best-selling SKUs by revenue and unit count for the selected period |
| Top Customers | Highest-spending customers for the selected period |
| Sales by Rep | Revenue attributed to each sales representative |
| Conversion Rate | Ratio of completed orders to abandoned carts (web channel only) |
Changing the Date Range
- Use the Period Selector: Today, This Week, This Month, Last Month, or Custom.
- For Custom, enter From and To dates and click Apply. All panels update simultaneously.
Drilling Down
- Click any metric number to navigate to the filtered order list for that metric.
- Click a product name in Top Products to open its inventory detail.
- Click a customer name in Top Customers to open their account record.
Sales Quick Reference
| Task | Where to Go | Key Action |
|---|---|---|
| View all open orders | Sales → Active Orders | Filter by date / customer as needed |
| Authorize a held order | Sales → Pending Auth | Click order → Authorize Payment |
| Release a fulfillment hold | Sales → Pending Fulf | Click order → Release Hold |
| Check back-ordered items | Sales → Back Orders | Note ETA; notify customer |
| Enter a phone order | Sales → New Order | Look up customer → add items → Place Order |
| Modify an existing order | Sales → Browse All → order # | Click Edit Order; save changes |
| Create a price quote | Sales → Proposals → New Proposal | Add items → Save Proposal → Send to Customer |
| Convert proposal to order | Sales → Proposals → open proposal | Convert to Order → Place Order |
| Authorize a return | Sales → RMAs → New RMA | Enter order # → select items → Save RMA |
| Process a received return | Sales → RMAs → open RMA | Mark Received → Issue Refund / Exchange |
| Pause a recurring charge | Sales → Auto Billing → agreement | Click Pause |
| Resolve a failed charge | Sales → Charge Error → error row | Retry / Update Card / Send Payment Request |
| Track a shipment | Sales → Ship Monitor | Click red-badge row → take action |
| Export order data | Sales → Export | Choose type, date range, format → Generate |
| Add a new customer | Sales → New Customer | Fill required fields → Create Account |
| Update customer details | Sales → Browse Customers → customer | Edit Account → Save |
| Apply a payment to invoice | Sales → Receivables → customer ledger | Apply Payment → Post Payment |
| Schedule a follow-up call | Sales → Task Calendar → + New Task | Set type Call → assign rep → Save |
| Work today's call queue | Sales → Call List | Click row → Log Call → next |
| Check today's revenue | Sales → Dashboard | View Today's Revenue panel |
Purchasing
Manage purchase orders, receive inventory, and maintain vendor relationships. All inbound inventory flows through the Purchasing module to ensure accurate stock counts and cost tracking.
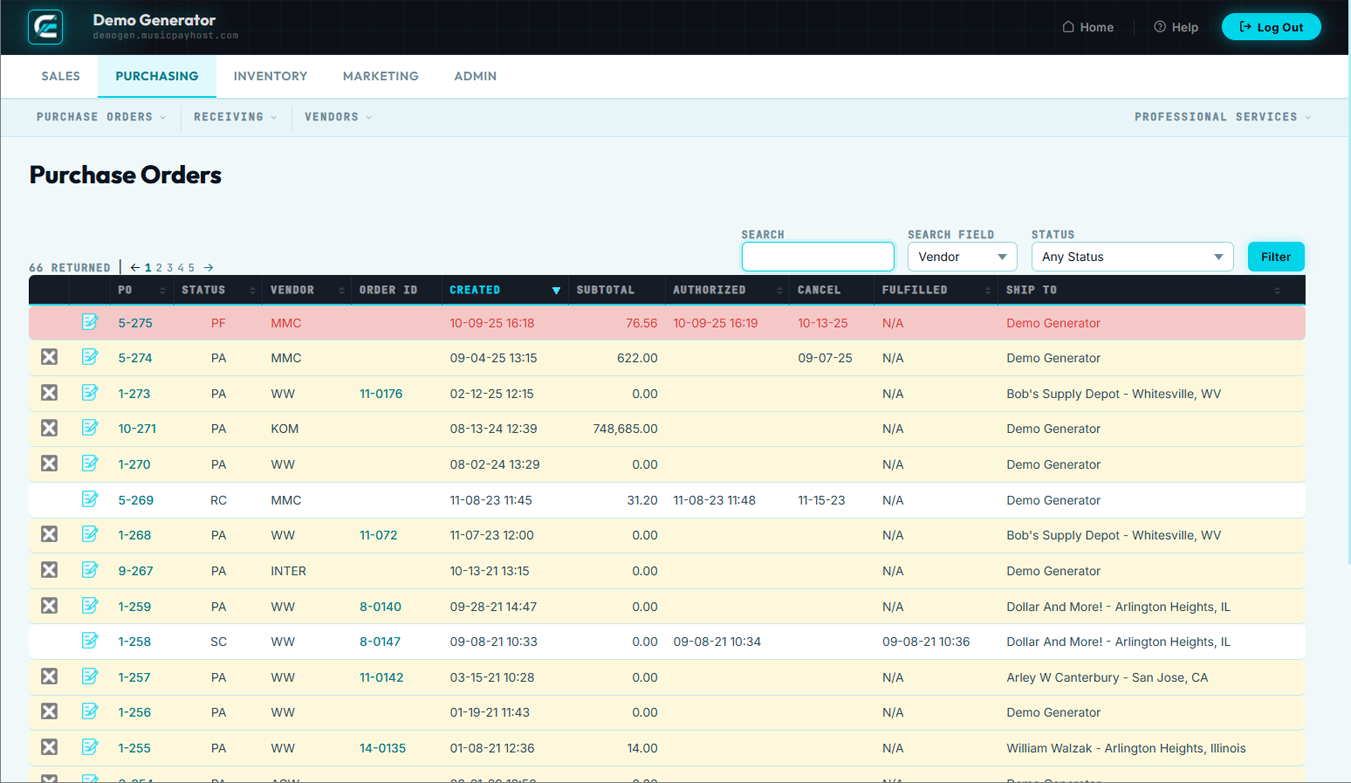
Browse Purchase Orders
Browse POs is the master list of all purchase orders — open, received, partially received, and closed.
Accessing the PO List
- Click the Purchasing tab then click Browse POs.
- List displays: PO #, Vendor, Order Date, Expected Date, Items, Total Cost, Status.
- Use the Status Filter: All, Open, Partially Received, Received, Closed, Cancelled.
- Use the Vendor Filter or Date Range to narrow results.
| Status | Meaning |
|---|---|
| Open | PO sent to vendor; no goods received yet |
| Partially Received | Some but not all line items received |
| Received | All line items received; pending cost reconciliation |
| Closed | Fully received and reconciled; inventory updated |
| Cancelled | PO voided before receipt |
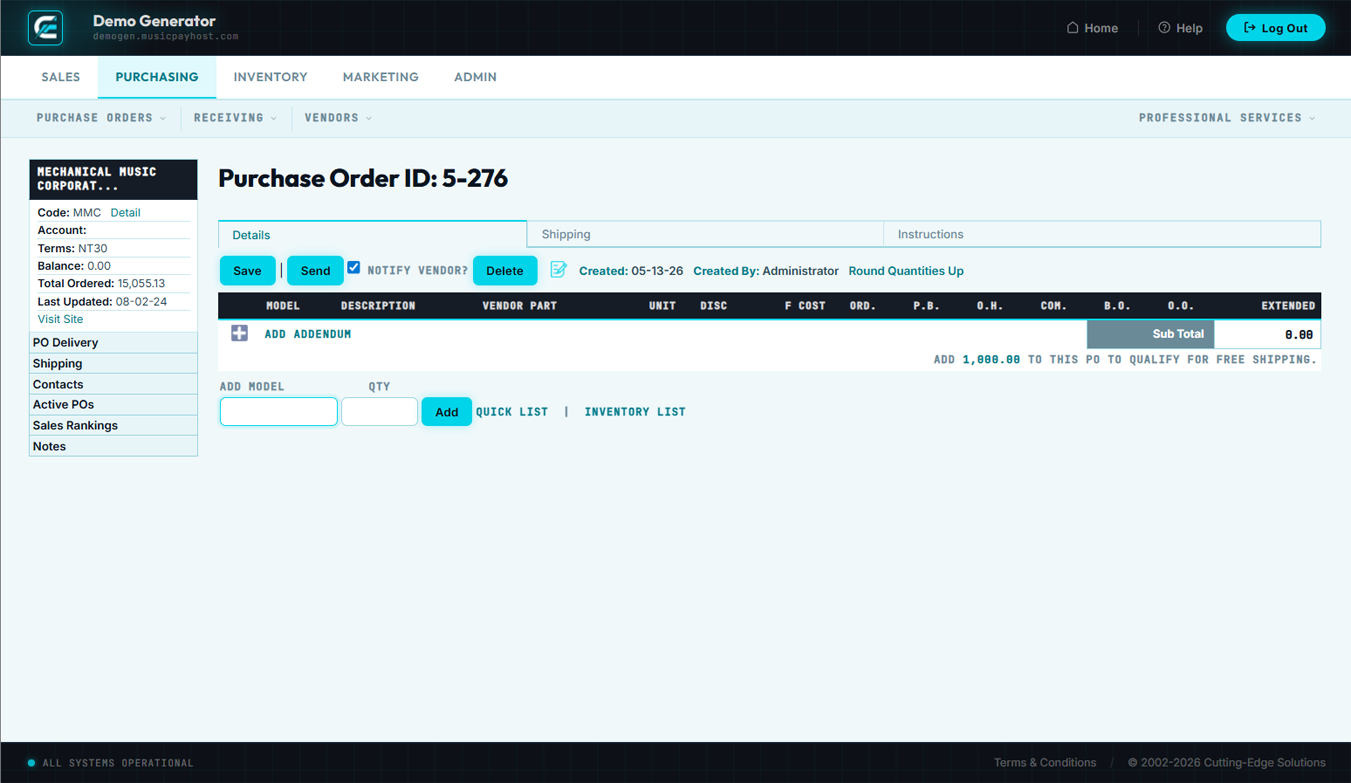
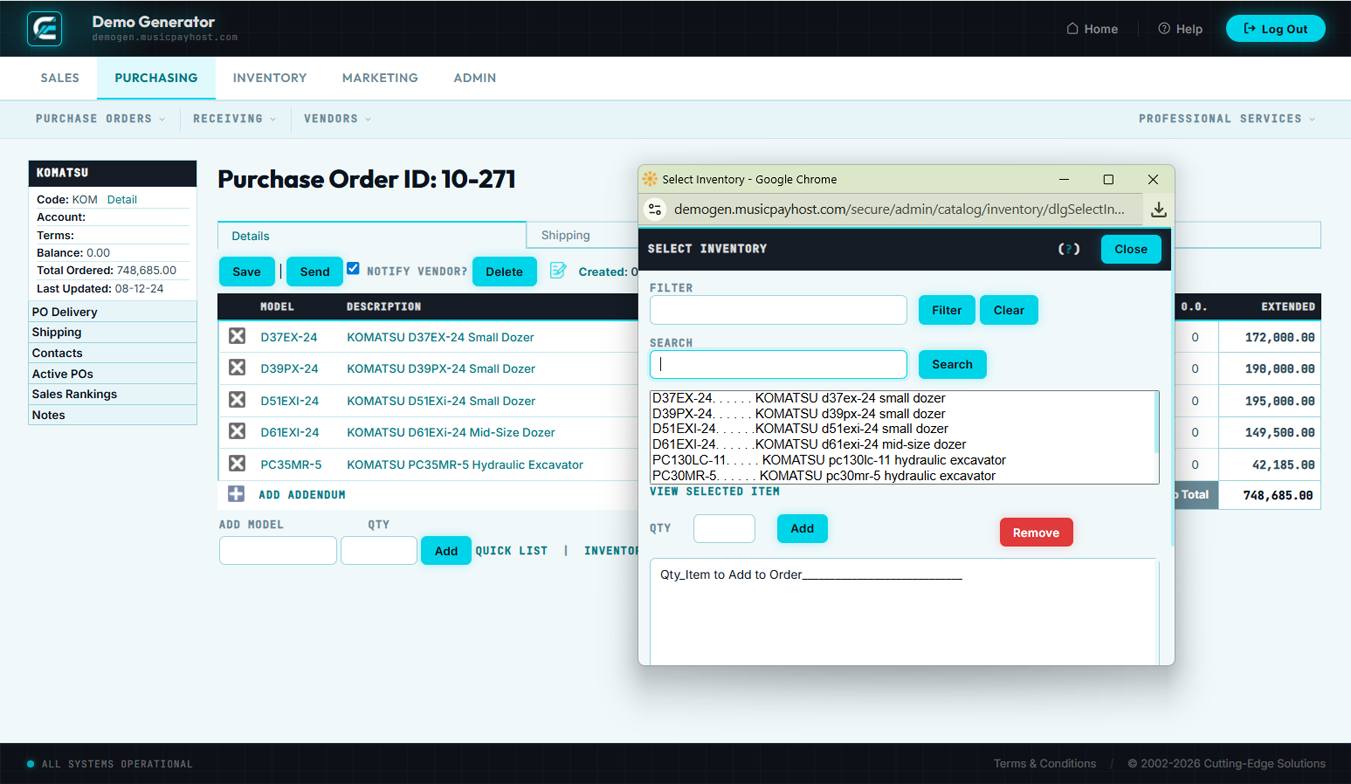
New Purchase Order
Create a new PO to formally request products from a vendor. The PO records the agreed quantity, cost, and expected delivery date for each line item.
- Click New PO in the Purchasing section.
- Select Vendor — contact info, payment terms, and default lead time pre-fill automatically.
- Set the PO Date (defaults today) and Expected Delivery Date.
- Click + Add Item, search by SKU or product name, enter quantity and verify unit cost. Repeat for all items.
- Enter estimated Freight Cost and any Notes for the vendor.
- Click Save PO — system assigns a PO number.
- Click Send to Vendor to e-mail the PO PDF to the vendor's purchasing contact.
Edit Purchase Order
Edit an open PO to adjust quantities, update costs, change the expected delivery date, or add/remove line items. Only Open POs can be fully edited; Partially Received POs allow edits on unreceived lines only.
- Open the PO from Browse POs and click Edit PO.
- Make changes: adjust qty, update unit cost, change expected date, add or remove unreceived lines.
- Click Save Changes.
- If the PO was already sent, click Resend to Vendor to e-mail the updated PO PDF.
Close Purchase Order
Closing a PO finalizes the receiving process, reconciles landed costs, and permanently updates inventory.
- Open the PO from Browse POs and verify all received quantities are accurate.
- Click Close PO.
- Review the reconciliation summary: items ordered vs. received, PO cost vs. invoiced cost, freight actual vs. estimate.
- Enter the Vendor Invoice # for your records.
- Click Confirm & Close — inventory quantities and average costs update; PO status changes to Closed.

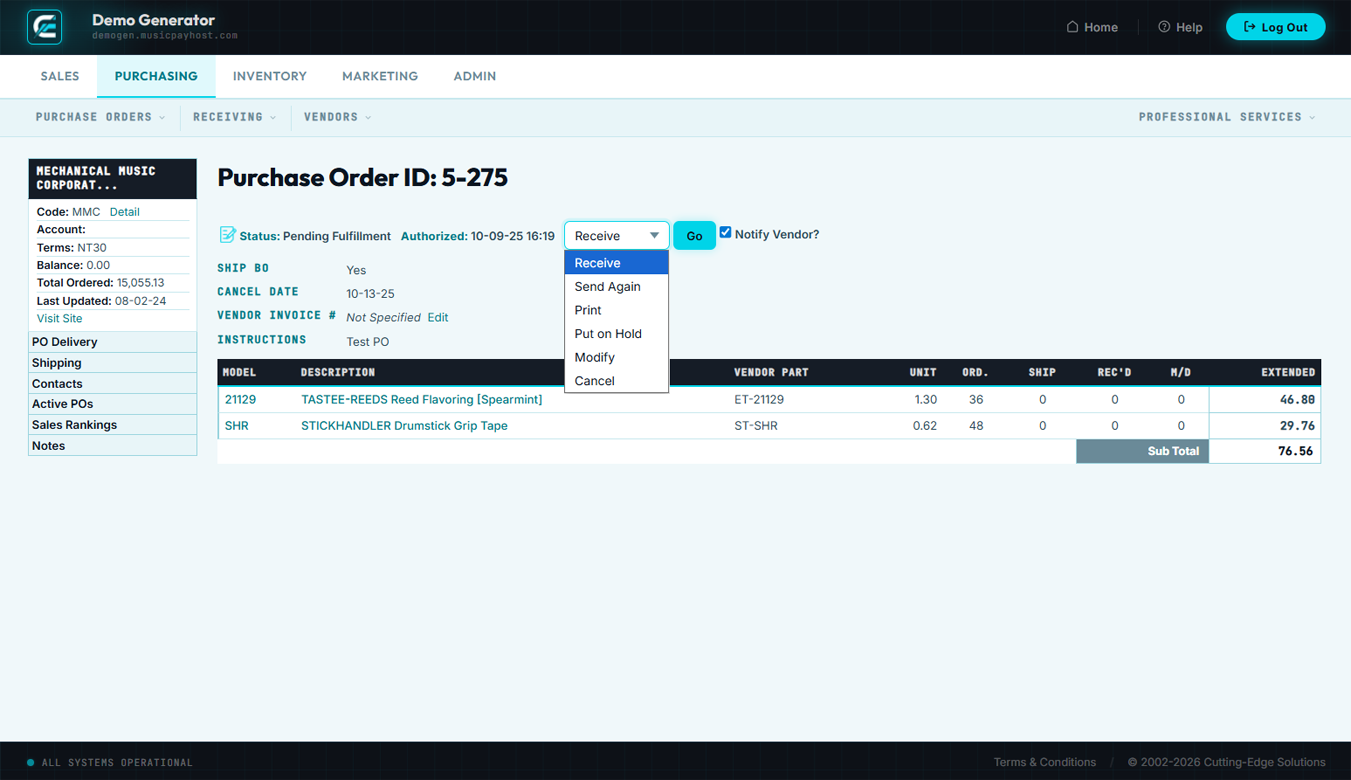
Receiving
The Receiving module logs inbound shipments against open POs. Recording receipts accurately drives inventory quantity updates and cost-of-goods calculations.
Receiving a Shipment
- Click Receiving in the Purchasing section.
- Enter the PO number or vendor name to find the matching open PO.
- The grid shows each line: SKU, Description, QTY Ordered, QTY Previously Received, QTY to Receive.
- Enter the physically counted quantity for each item in the QTY to Receive column.
- If an item arrives damaged, enter the good quantity only and note the discrepancy in the Notes column.
- Enter the Carrier Tracking Number and Packing Slip #.
- Click Post Receipt — inventory increments immediately; PO status updates.
Receiving Without a PO
- Click Receive Without PO, select the vendor, add items (SKU, qty, unit cost), and click Post Receipt.
- Inventory updates and a system-generated PO is created in Closed status for the audit trail.
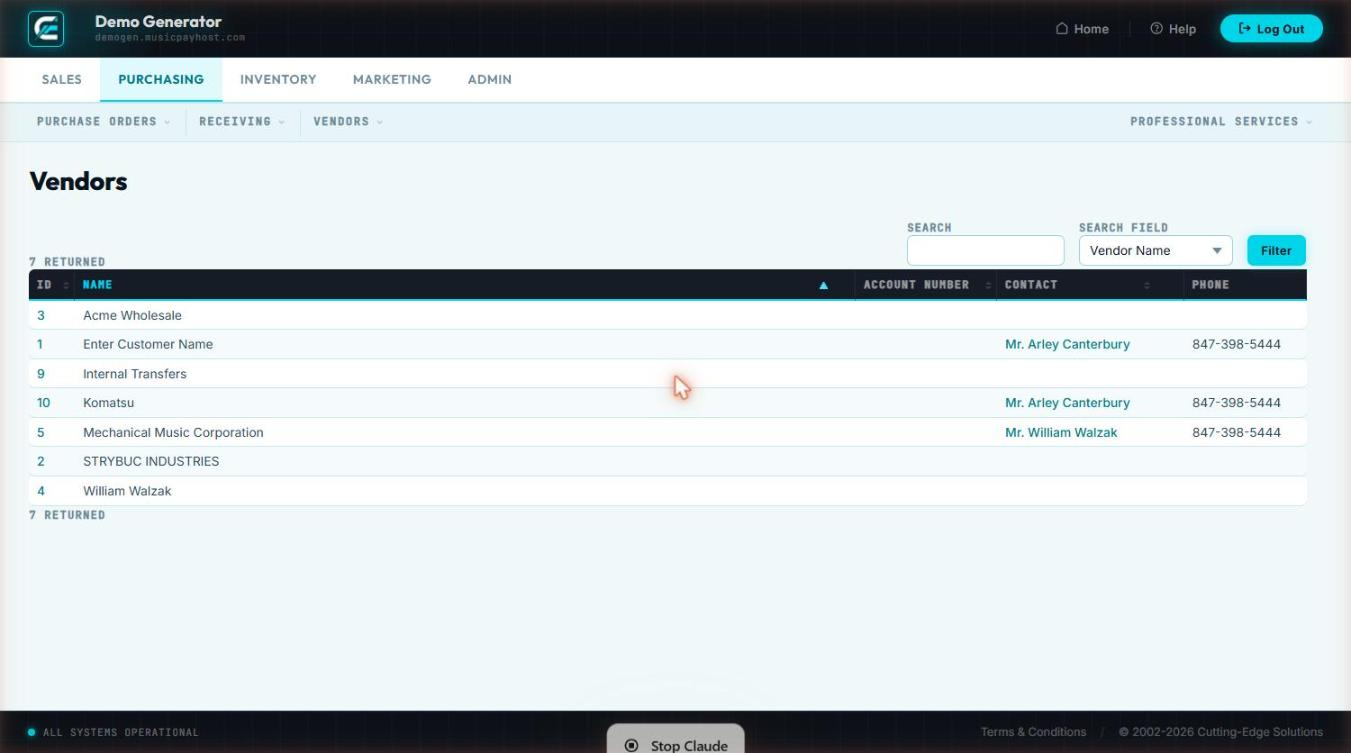
Browse Vendors
Browse Vendors is the master vendor directory — every supplier with contact details, terms, and purchasing history.
- Click Browse Vendors in the Purchasing section.
- Search by Vendor Name, Contact Name, or Phone. Filter by Status or Lead Time range.
- Click any vendor row to open the detail record: Company Name, Primary Contact, E-mail, Phone, Address, Payment Terms, Default Lead Time, Minimum Order Amount, Preferred Carrier, Account Number, Notes, and complete PO history.
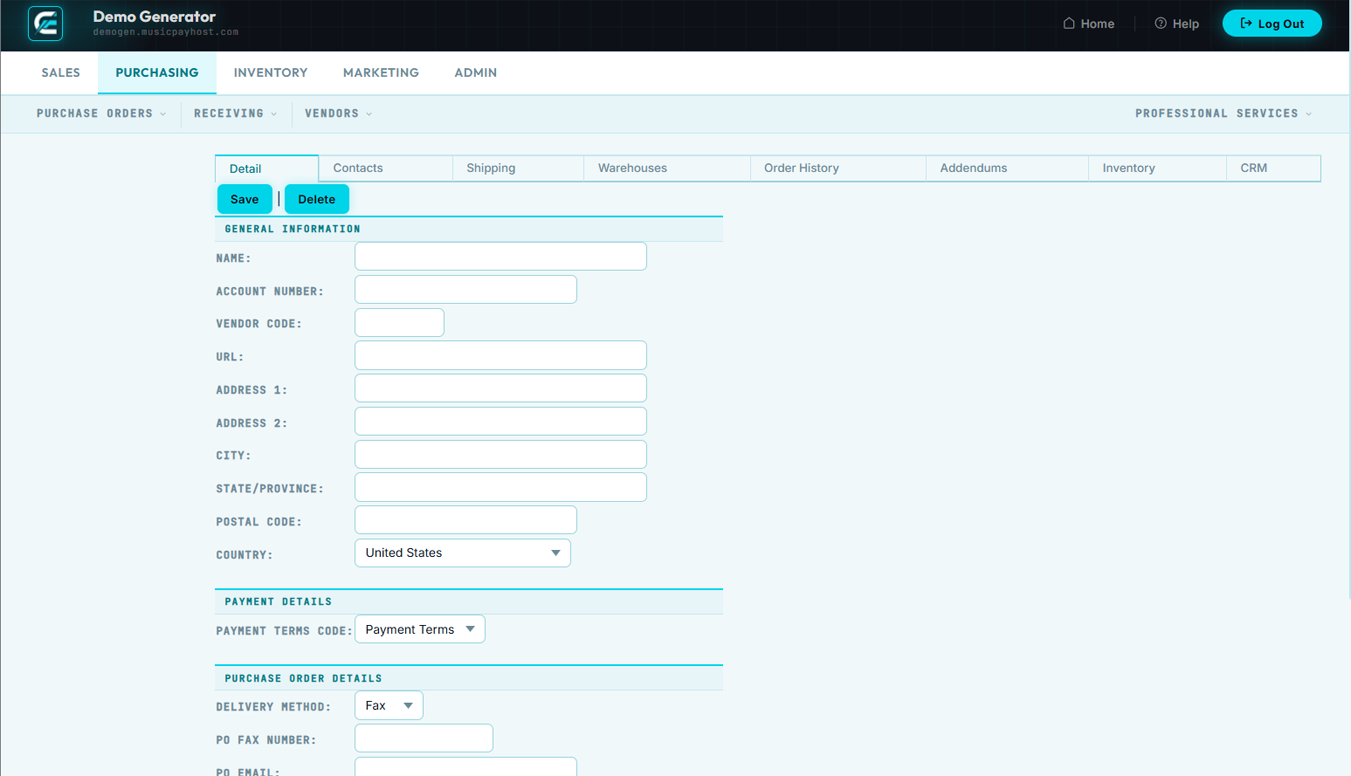
New Vendor
Add a new vendor before creating your first PO with them. The record stores all contact, terms, and shipping preference information that pre-fills on every PO.
- Click New Vendor in the Purchasing section.
- Enter Company Name (required), Primary Contact (First/Last Name, Title, E-mail, Phone), and Billing Address.
- Set Payment Terms, Default Lead Time in business days, and Minimum Order Amount.
- Enter your Account Number with this vendor and Preferred Carrier details.
- Click Save Vendor.
Edit Vendor
Update any vendor information. Changes apply to all new POs; existing closed POs are not affected.
- Find the vendor via Browse Vendors, open the record, and click Edit Vendor.
- Update any fields and click Save Changes.
- To deactivate: change Status to Inactive → Save. Inactive vendors are hidden from PO creation drop-downs but their history remains searchable.

Vendor Items
Vendor Items maps your internal SKUs to each vendor's part numbers and pricing tiers. When configured, this auto-fills on new POs and enables vendor-formatted POs with the supplier's own item codes.
Adding a Vendor Item Mapping
- Open a vendor record via Browse Vendors and click the Vendor Items tab.
- Click + Add Vendor Item, search for your internal SKU, enter the Vendor Part #, Unit Cost, and Min Order Qty.
- Add up to three Price Break tiers (quantity threshold + unit cost), then click Save.
Bulk Import
- Click Import Vendor Items, download the CSV template, fill in SKU / vendor part # / cost columns, upload and click Import.
- Review the import summary; fix errors and re-import if needed.
Purchasing Quick Reference
| Task | Where to Go | Key Action |
|---|---|---|
| View all open POs | Purchasing → Browse POs → filter Open | Monitor expected dates |
| Create a new PO | Purchasing → New PO | Select vendor → add items → Save → Send to Vendor |
| Change a PO quantity | Purchasing → Browse POs → open PO → Edit PO | Edit qty field → Save Changes |
| Receive inbound goods | Purchasing → Receiving | Select PO → enter qty → Post Receipt |
| Finalize a PO | Purchasing → Browse POs → open PO → Close PO | Reconcile costs → Confirm & Close |
| Add a new vendor | Purchasing → New Vendor | Fill fields → Save Vendor |
| Update vendor contact info | Purchasing → Browse Vendors → vendor → Edit Vendor | Update fields → Save Changes |
| Map vendor part numbers | Purchasing → Browse Vendors → vendor → Vendor Items | Add Vendor Item → fill fields → Save |
| Import vendor price list | Purchasing → Browse Vendors → vendor → Vendor Items → Import | Download template → fill → upload → Import |
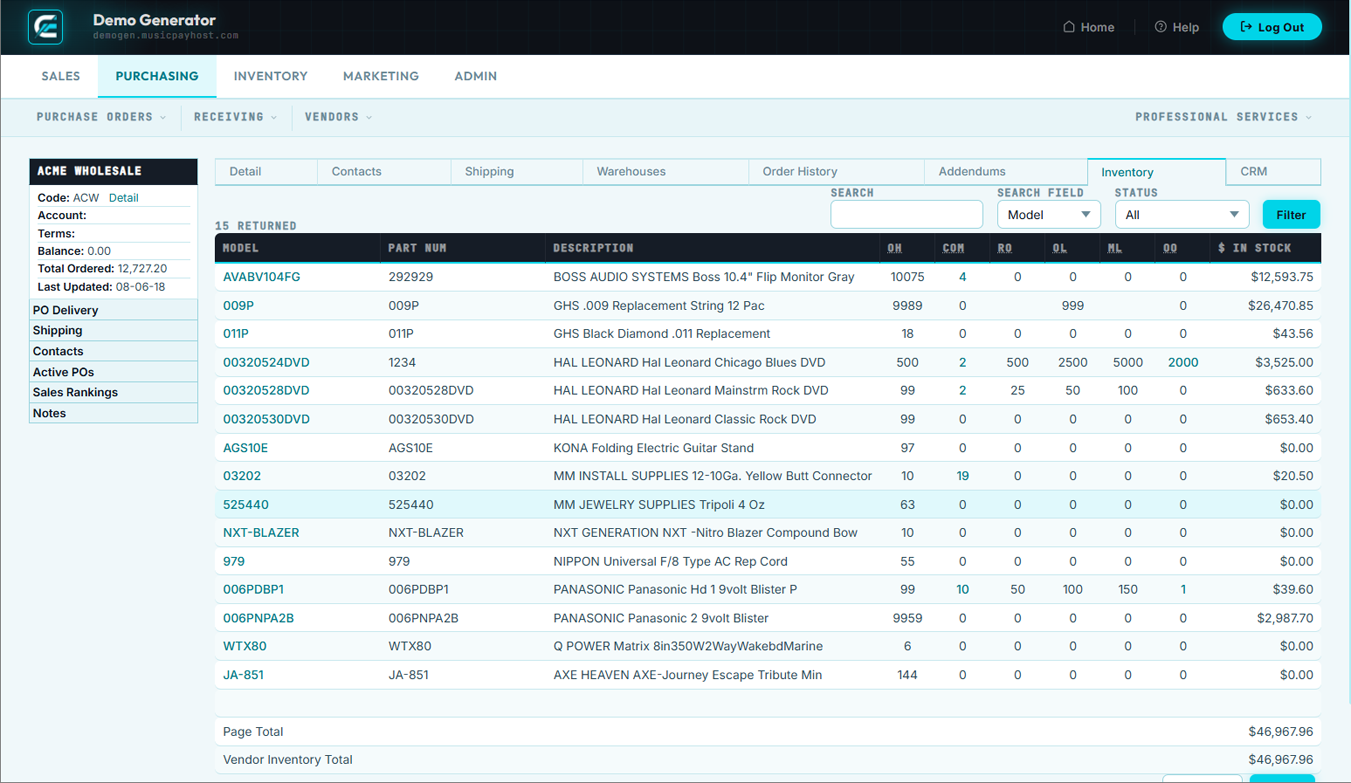
Inventory
Maintain your product catalog, manage stock levels, organize products by class and brand, configure cross-sell relationships, and track physical assets.
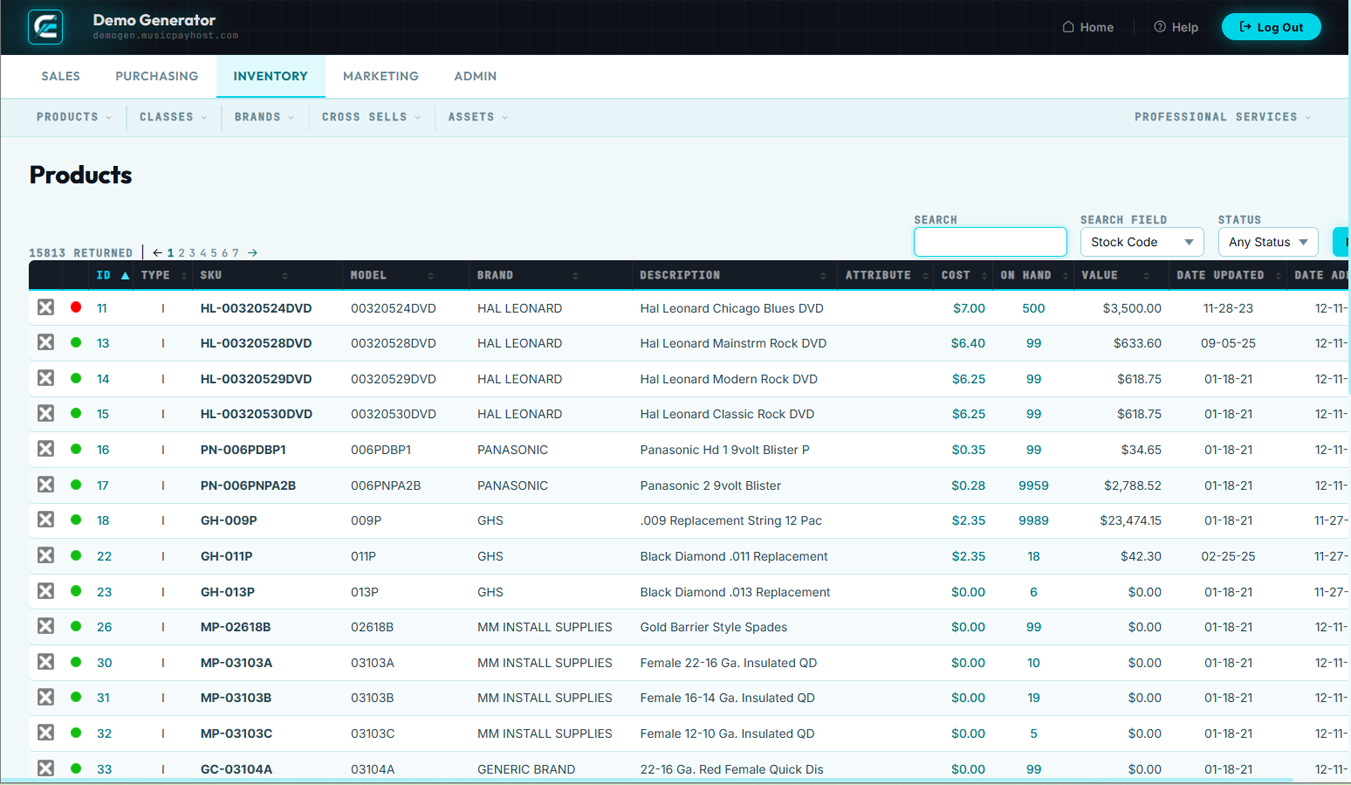
Browse Products
Browse Products is the master product catalog. Every SKU — active, inactive, discontinued — is accessible here.
- Click Browse Products in the Inventory section.
- Search by: SKU, Product Name, UPC/Barcode, or VendorPart #.
- Apply filters: Status (Active/Inactive/Discontinued), Class, Brand, Stock level (In Stock, Low Stock, Out of Stock, Backordered).
- Results show: SKU, Name, Brand, Class, Retail Price, Cost, Stock QTY, Status.
- Click any product row to open the full product detail.
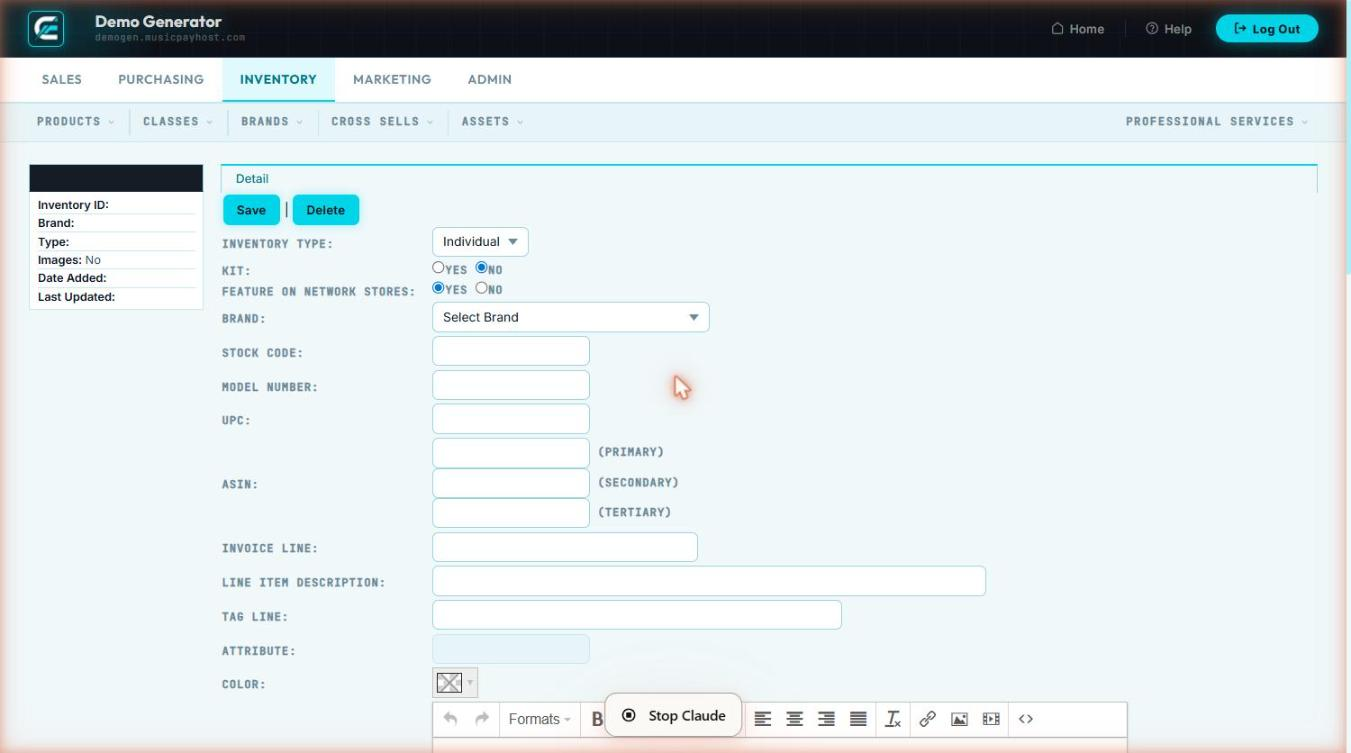
New Product
Add a new SKU to the catalog before it can be ordered, purchased, or sold. Every product must have at minimum a SKU, name, and price before it is active on the storefront.
- Click New Product in the Inventory section.
- Basic Info: SKU (required, unique), Product Name (required), Brand, Class, UPC/Barcode, Short Description, Full Description (rich text).
- Pricing: Retail Price (required), Sale Price with start/end dates, Cost (for margin reporting), MSRP, per-customer-group price overrides.
- Inventory Settings: enable Track Inventory checkbox, Initial QTY on Hand, Reorder Point, Reorder Quantity, Warehouse Location.
- Shipping: Weight (lbs), Dimensions (L×W×H inches), Shipping Class, Country of Origin, Harmonized Tariff Code.
- Images: upload up to 10 product images; drag to reorder; first image becomes the primary thumbnail.
- Set Status: Active, Inactive, or Discontinued.
- Click Save Product.
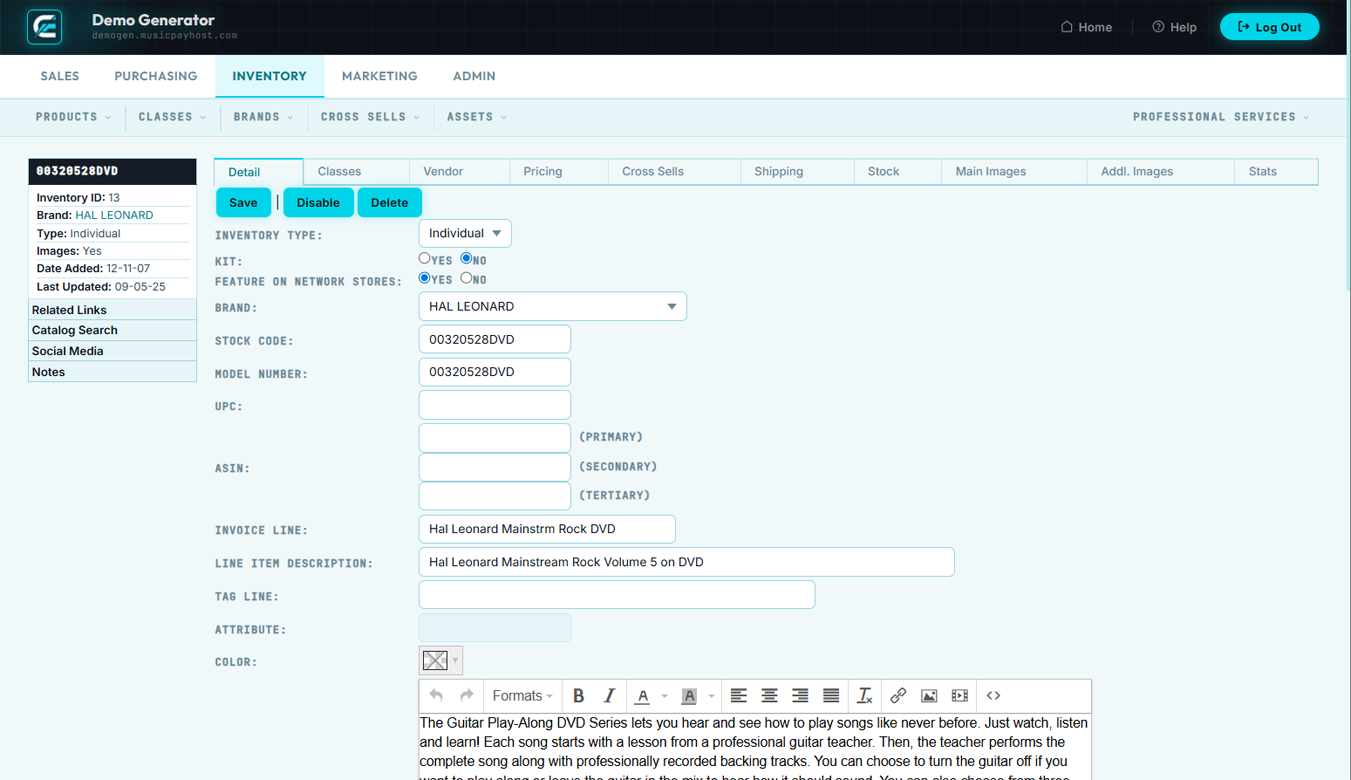
Edit Product
Update any product attribute — price, description, images, status, inventory settings — at any time. Changes to active products are reflected on the storefront immediately after saving.
- Find the product via Browse Products, click the row, then click Edit Product.
- Update fields across tabs: Basic Info, Pricing, Inventory, Shipping, Images, SEO, Related Products.
- Click Save Changes.
Bulk Price Update
- From Browse Products, check boxes on multiple products.
- Click Bulk Actions → Update Prices.
- Choose: Set exact price, Increase by %, Decrease by %, or Round to nearest dollar.
- Click Apply — all selected products update simultaneously.
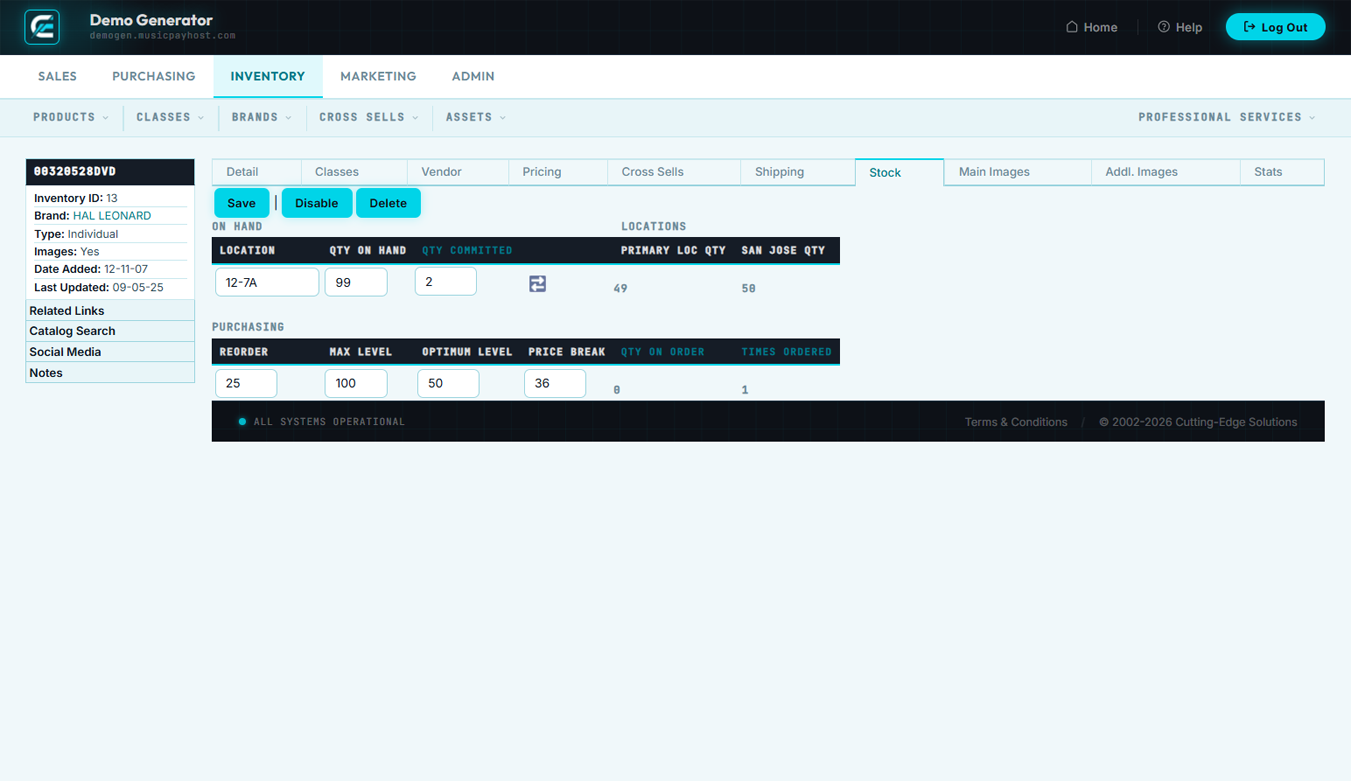
Adjust Stock
Use Adjust Stock to manually correct inventory quantities following a physical count, damage write-off, sample allocation, or data entry error. Every adjustment is logged with a reason and timestamp for audit purposes.
- Open the product via Browse Products and click Adjust Stock.
- Enter the Adjustment Quantity: positive to add (e.g.,
+10), negative to remove (e.g.,-3). - Select an Adjustment Reason: Physical Count Correction, Damaged Goods Write-Off, Sample/Demo, Theft/Shrinkage, Vendor Return, Other.
- Enter any additional Notes.
- Click Post Adjustment — quantity updates immediately and is recorded in the inventory history log.
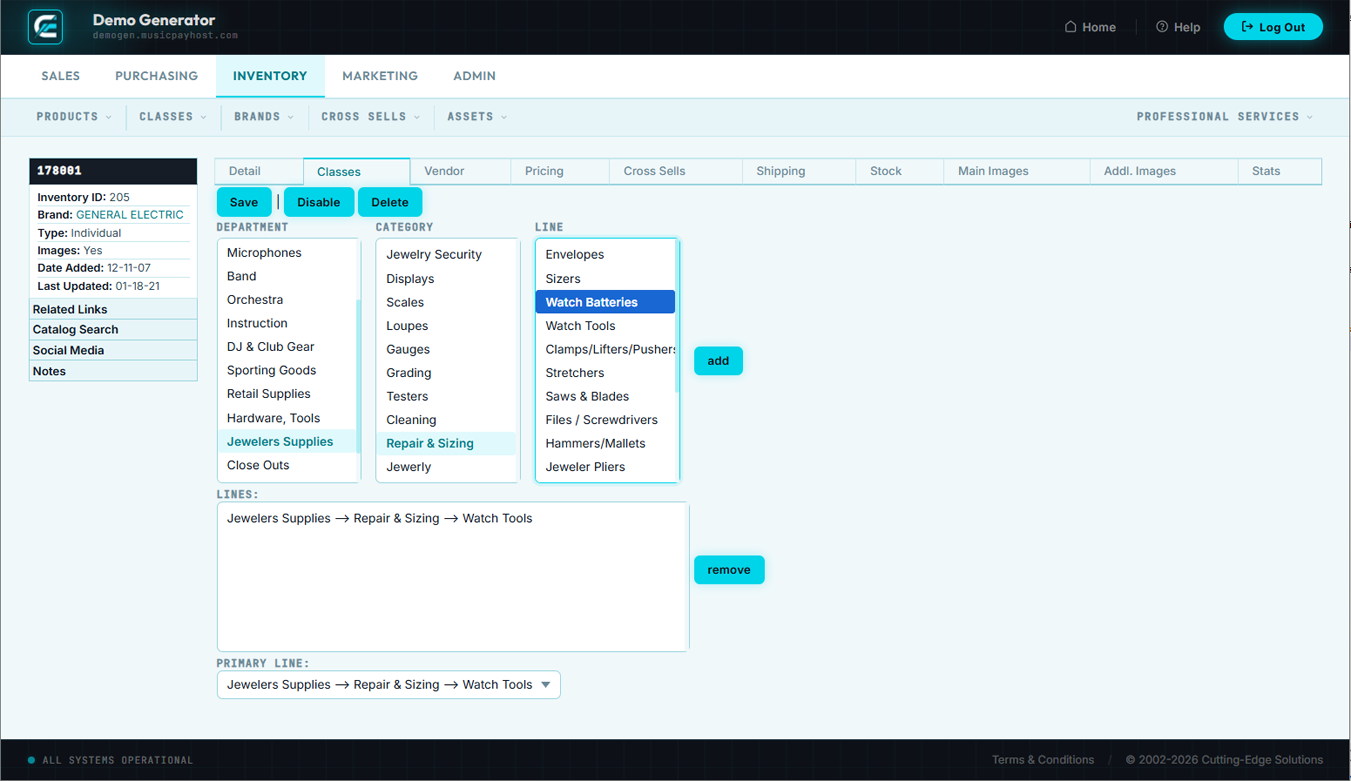
Classes
Classes are the product taxonomy — the category tree that organizes your catalog. Products are assigned to one class; classes can be nested (parent/child) to create a hierarchical structure (e.g., Electronics → Audio → Headphones).
- Click Classes in the Inventory section to view the class tree.
- To Add: click + New Class, enter the Class Name, select a Parent Class (blank for top-level), optionally add a Description and Class Image, click Save Class.
- To Edit: click the class name → Edit → update fields → Save.
- To Delete: only possible if no products are assigned. Click the class → Delete → confirm.
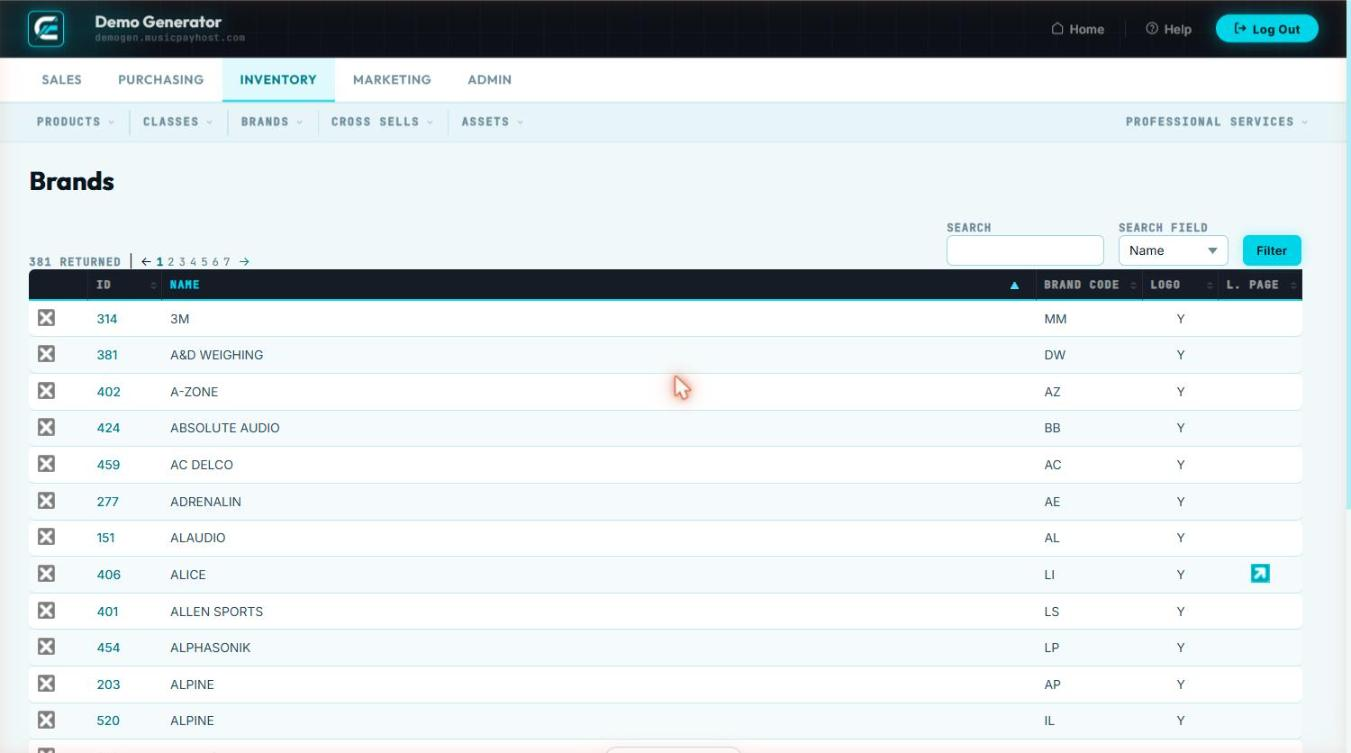
Browse Brands
Brands represent the manufacturers or labels associated with your products. Assigning brands enables brand-filtered browsing on the storefront and brand-level reporting in analytics.
- Click Browse Brands in the Inventory section.
- List shows: Brand Name, Logo, # Products, Status. Click any brand to open its detail.
- To edit: click Edit Brand, update Name, Description, Logo, Status, and SEO fields, then click Save Changes.
New Brand
Add a new brand before assigning it to products. Once created, it appears in the Brand drop-down on all product forms.
- Click New Brand in the Inventory section.
- Enter the Brand Name (required) and a Description for the storefront brand landing page.
- Upload a Brand Logo (recommended: 400×200 px, PNG with transparent background).
- Set the URL Slug (e.g.,
acme-corp) and fill in SEO fields: Meta Title, Meta Description. - Set Status to Active and click Save Brand.

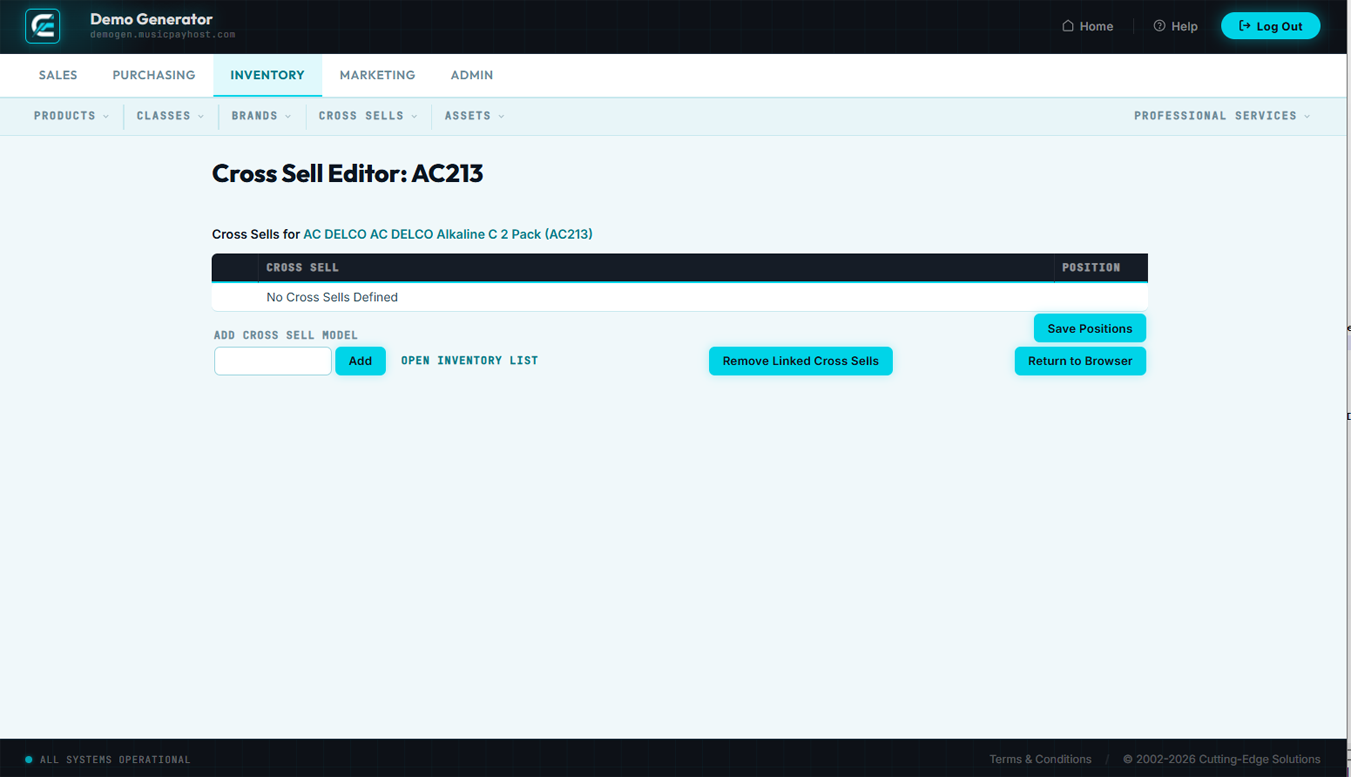
Cross Sells Overview
Cross Sells define relationships between products — "Customers who bought X also bought Y." Recommendations appear on product detail pages and in the cart, increasing average order value.
- Manual Cross Sells: you explicitly link Product A to Products B, C, D. Every time a customer views A, the linked products are shown.
- Automatic Cross Sells: the system analyzes order history and surfaces frequently co-purchased products. Accuracy improves as order volume grows.

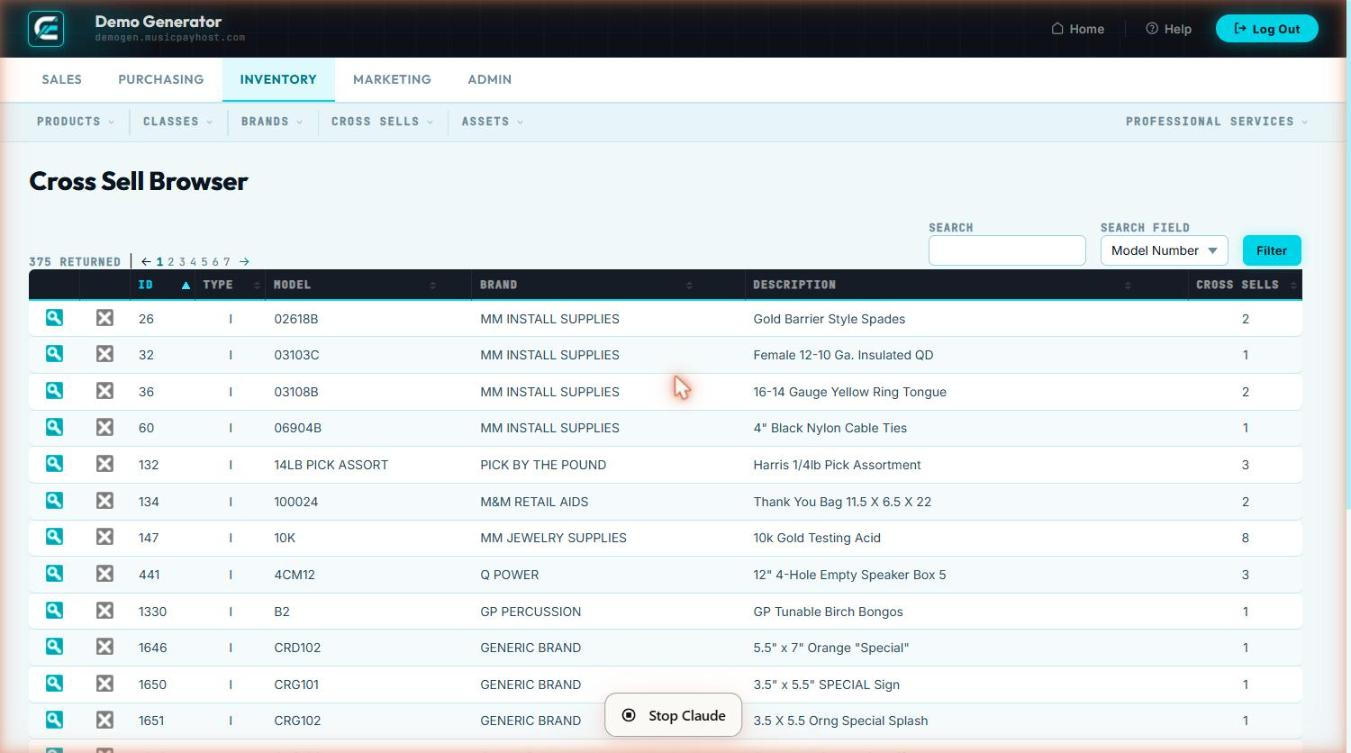
Browse Cross Sells
Browse Cross Sells shows all manual cross-sell relationships currently configured.
- Click Browse Cross Sells in the Inventory section.
- List shows: Source Product (SKU + Name), Linked Products, Date Created.
- Search by source product SKU or name.
- Click any row to open the detail where you can add or remove linked products.
- To remove a link: click the × next to any linked product → click Save.
New Cross Sell
Create a manual cross-sell relationship to link a source product to one or more recommended products.
- Click New Cross Sell in the Inventory section.
- In the Source Product field, search for and select the product to add recommendations to.
- Click + Add Product, search for a recommended product, set its Display Order (1 = shown first).
- Repeat for up to 8 recommended products.
- Click Save Cross Sell.
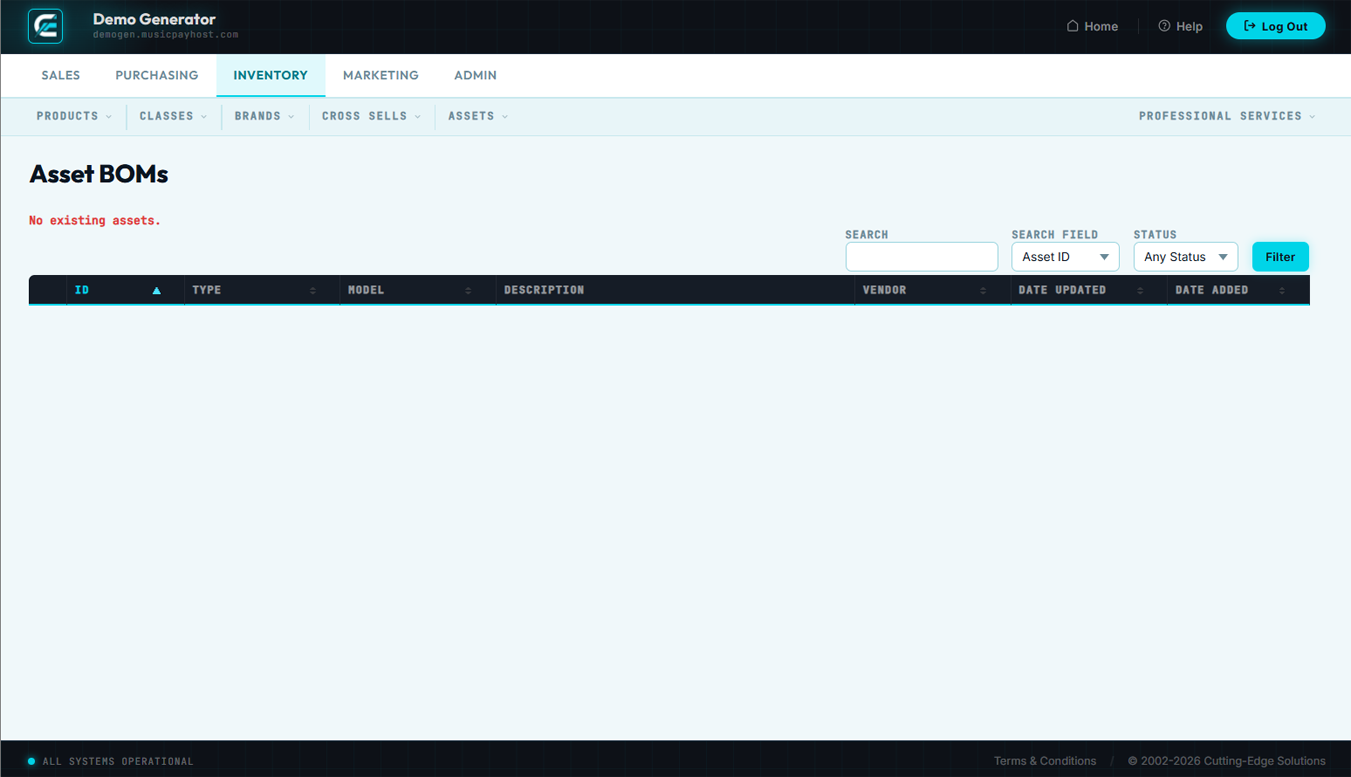
Assets Overview
Assets tracks serialized or high-value physical items that require individual identification beyond standard inventory quantity tracking. Each asset has a unique Asset ID, assigned status, and full history.
| Use Inventory for… | Use Assets for… |
|---|---|
| Fungible products tracked by quantity only | Serialized items where each unit has a unique ID |
| Consumables, standard retail products | Equipment, tools, demo units, loaner items |
| Items sold and not returned | Items that are leased, loaned, or cycled |

Browse Assets
Browse Assets displays the full list of all tracked serialized items with their current status and assignment.
- Click Browse Assets in the Inventory section.
- List shows: Asset ID, Product Name, SKU, Serial #, Status, Assigned To, Location, Last Updated.
- Filter by Status: Available, Assigned, Loaned, In Repair, Retired, Missing.
- Filter by Product to see all units of a specific SKU.
- Click any asset row to open the full detail and history log — every status change, assignment, return, and repair event with timestamps.
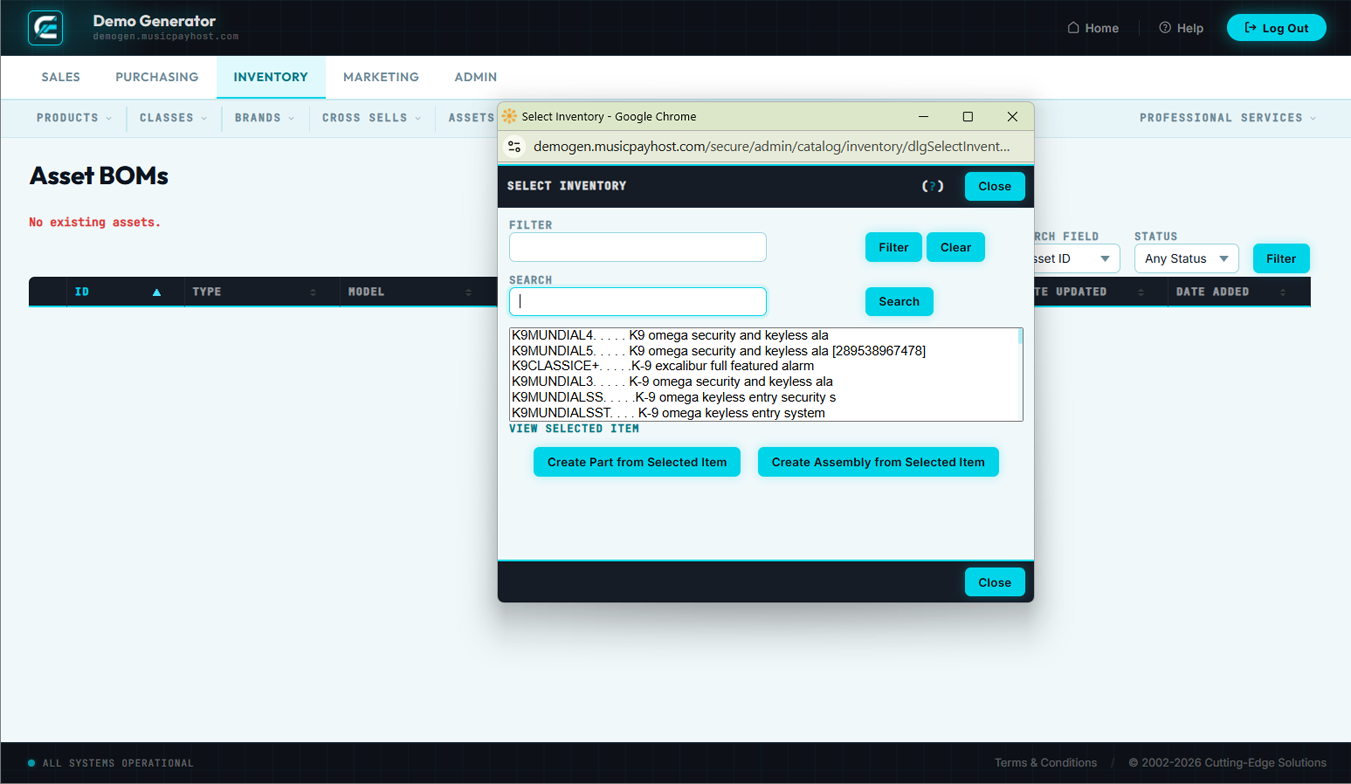
New Asset
Register a new serialized item in the asset tracking system.
- Click New Asset in the Inventory section.
- Select the Product (SKU) this asset corresponds to.
- Enter the Serial Number (from the manufacturer's label) or let the system generate an internal Asset Tag.
- Enter Purchase Date, Purchase Cost, and Warranty Expiration Date.
- Set the initial Status: Available, Assigned, Loaned, or In Repair.
- If Assigned or Loaned: select Assigned To, enter assignment date and expected return date.
- Enter Location and any Notes, then click Save Asset.
Inventory Quick Reference
| Task | Where to Go | Key Action |
|---|---|---|
| Find a product by SKU | Inventory → Browse Products | Type SKU in search bar |
| Add a new product | Inventory → New Product | Fill all required fields → Save Product |
| Update a product price | Inventory → Browse Products → product → Edit Product | Update Retail Price → Save Changes |
| Bulk price update | Inventory → Browse Products → check items → Bulk Actions | Update Prices → choose method → Apply |
| Correct a stock count | Inventory → Browse Products → product → Adjust Stock | Enter qty adjustment → select reason → Post |
| Add a product category | Inventory → Classes → + New Class | Name + parent → Save Class |
| Add a new brand | Inventory → New Brand | Name + logo → Save Brand |
| Set up a cross sell | Inventory → New Cross Sell | Source product → add recommended → Save |
| View all cross sell links | Inventory → Browse Cross Sells | Search by source product |
| Track a serialized item | Inventory → New Asset | Select product → enter serial # → Save Asset |
| Find an asset by serial # | Inventory → Browse Assets | Search in Asset ID / Serial # field |
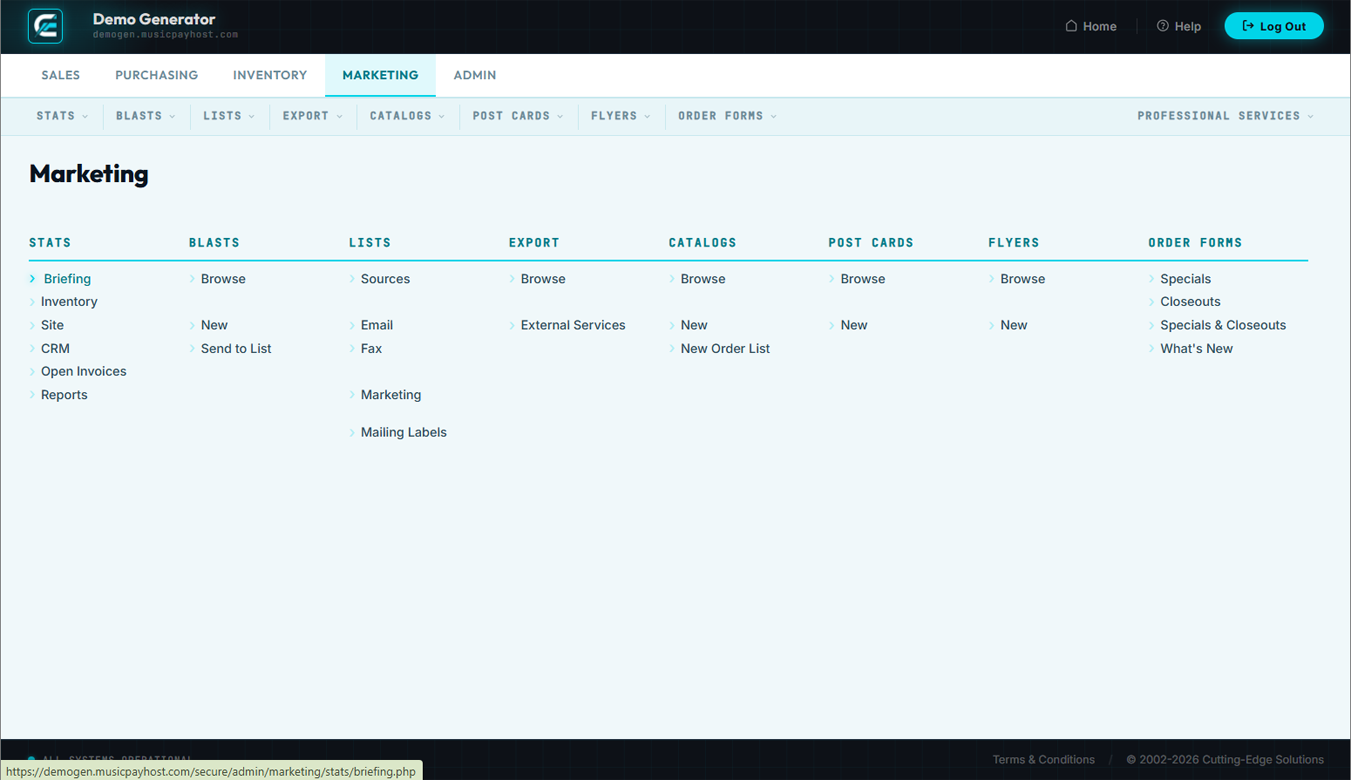
Marketing
Drive sales through e-mail campaigns, targeted customer lists, printed catalogs, postcards, flyers, and order forms.
Stats Overview
The Stats section aggregates performance metrics across all marketing channels — e-mail, orders, products, customers, campaigns, and website traffic — in one central reporting hub.
E-mail Stats
E-mail Stats shows aggregate and per-campaign performance metrics for all e-mail blasts sent through Generator.
| Metric | Definition | Healthy Benchmark |
|---|---|---|
| Delivered | Emails accepted by recipient mail servers | >98% |
| Open Rate | Unique opens ÷ Delivered | 20–30% |
| Click-Through Rate | Unique clicks ÷ Delivered | 2–5% |
| Conversion Rate | Orders placed within 48 hrs of click ÷ Clicks | Varies by product |
| Revenue per Email | Total revenue from campaign ÷ Emails delivered | Track trend over time |
| Bounce Rate | Hard + soft bounces ÷ Sent | <2% |
| Unsubscribe Rate | Unsubscribes ÷ Delivered | <0.5% |
| Spam Complaint Rate | Spam reports ÷ Delivered | <0.1% |
- Click E-mail Stats in Marketing → Stats.
- Select a Date Range or specific blast from the Campaign drop-down.
- Scroll down for the per-blast breakdown table.
- Click any campaign row to see recipient-level detail (who opened, who clicked, who bounced).

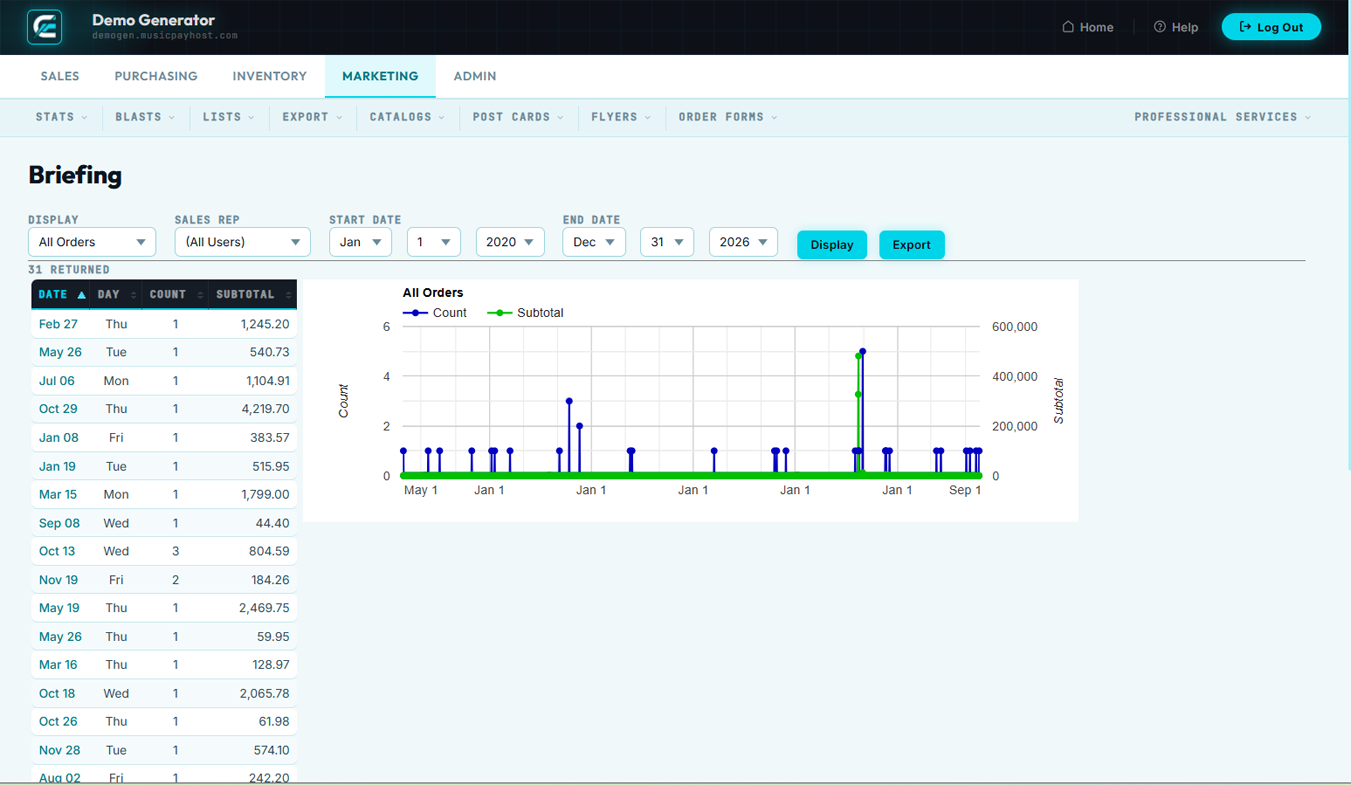
Order Stats
Order Stats provides a marketing-channel view of order performance — revenue, order count, and average order value by traffic source, campaign, coupon code, and customer segment.
- Click Order Stats in Marketing → Stats and select a Date Range.
- Review panels: By Channel (Organic, Paid, E-mail, Direct, Social, Referral), By Coupon, By Customer Segment (New vs. Returning), and a daily Trend Chart.
- Click any segment bar to drill into the underlying order list.
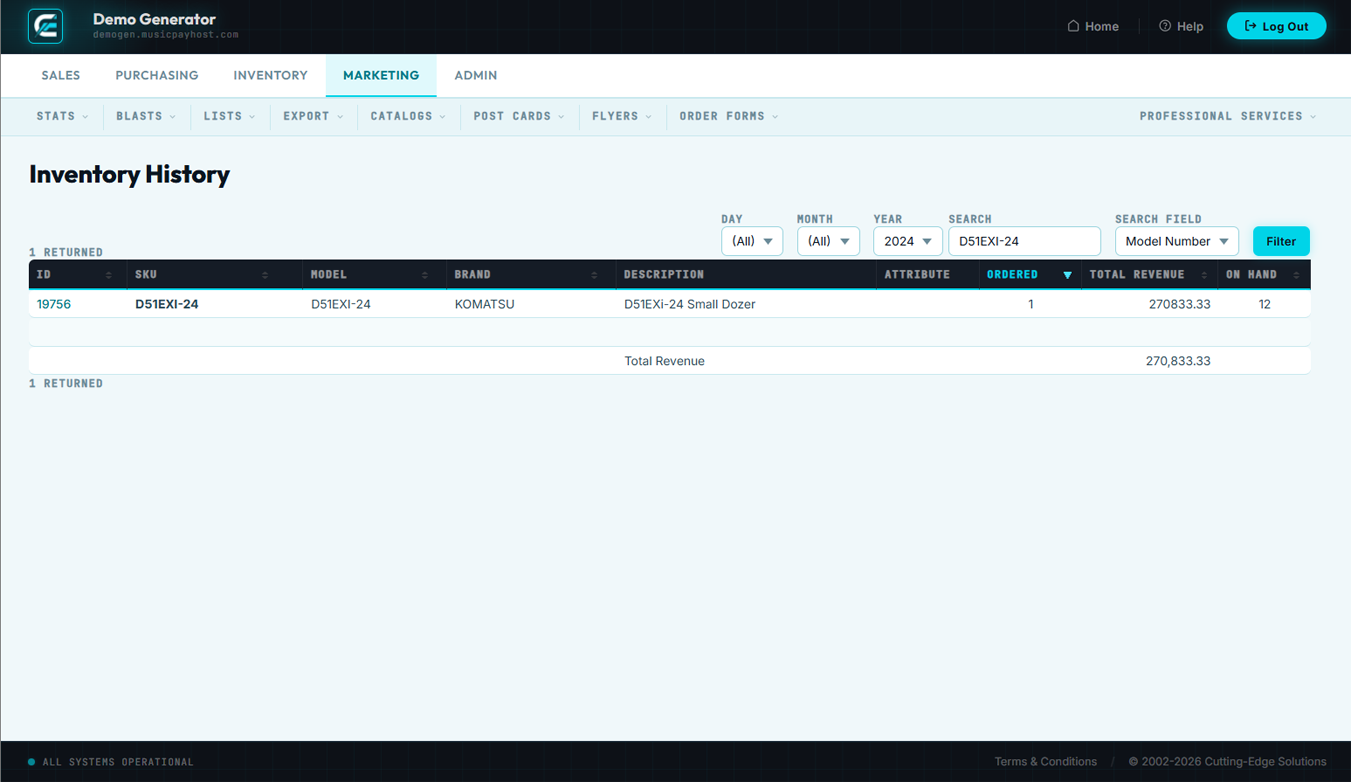
Product Stats
Product Stats ranks your products by sales performance — units sold, revenue generated, and page views — for any selected time period.
- Click Product Stats in Marketing → Stats and choose a Date Range.
- Sort by: Units Sold, Revenue, Views, Conversion Rate, or Returns.
- Filter by Class or Brand to compare performance within a category.
- Click a product row to view the sales trend chart for that SKU over time.
Customer Stats
Customer Stats provides insights into your customer base — acquisition trends, retention rates, lifetime value distribution, and geographic breakdown.
| Report | What It Shows |
|---|---|
| New vs. Returning | Monthly split between first-time buyers and repeat purchasers |
| Customer Lifetime Value | Distribution of total spend per customer; identify your top 10% |
| Acquisition Source | How new customers found you |
| Geographic Breakdown | Orders and revenue by state/country on an interactive map |
| Churn / Lapsed Customers | Customers who haven't ordered in 90/180/365 days |
| Cohort Analysis | Tracks purchasing behavior of customers acquired in the same month |
- Click Customer Stats in Marketing → Stats, select the report type and date range.
- Export any report to CSV using the Export button in the top-right.

Campaign Stats
Campaign Stats aggregates the performance of a named marketing campaign across all channels into a single cross-channel ROI view.
- Click Campaign Stats in Marketing → Stats.
- Select a campaign from the drop-down or browse the list.
- Dashboard shows: Impressions, Clicks, Orders, Revenue, Cost (if entered), and calculated ROI.
- To compare side by side, check up to four campaigns and click Compare.

Traffic Stats
Traffic Stats shows website visitor data including sessions, page views, bounce rate, and referral sources — integrated from your connected analytics account.
- Click Traffic Stats in Marketing → Stats and select a Date Range.
- Review summary panels: Sessions, Unique Visitors, Page Views, Avg. Session Duration, Bounce Rate.
- The Top Pages table shows which product and content pages receive the most visits.
- The Traffic Sources chart breaks down: Organic Search, Direct, Referral, Social, E-mail, Paid.
- Click any source segment to see top referring domains or campaigns within that source.
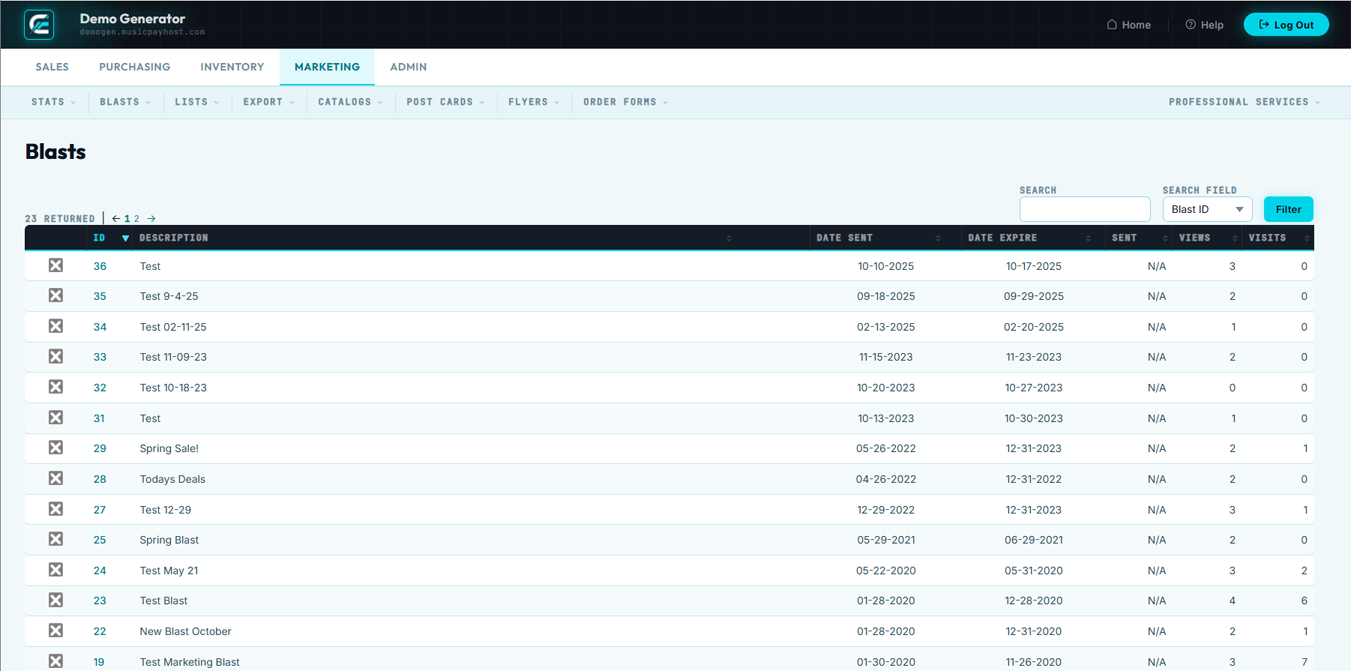
Browse Blasts
Browse Blasts is the history of all e-mail campaigns — sent, scheduled, and drafted.
- Click Browse Blasts in Marketing → Blasts.
- List shows: Campaign Name, Subject Line, List(s), Sent Date, Recipients, Open Rate, Click Rate, Status.
- Filter by Status: Sent, Scheduled, Draft, Paused, Cancelled.
- Click any blast row to open the full performance report.
- To reuse: click Clone — a new draft is created with the same template and settings.
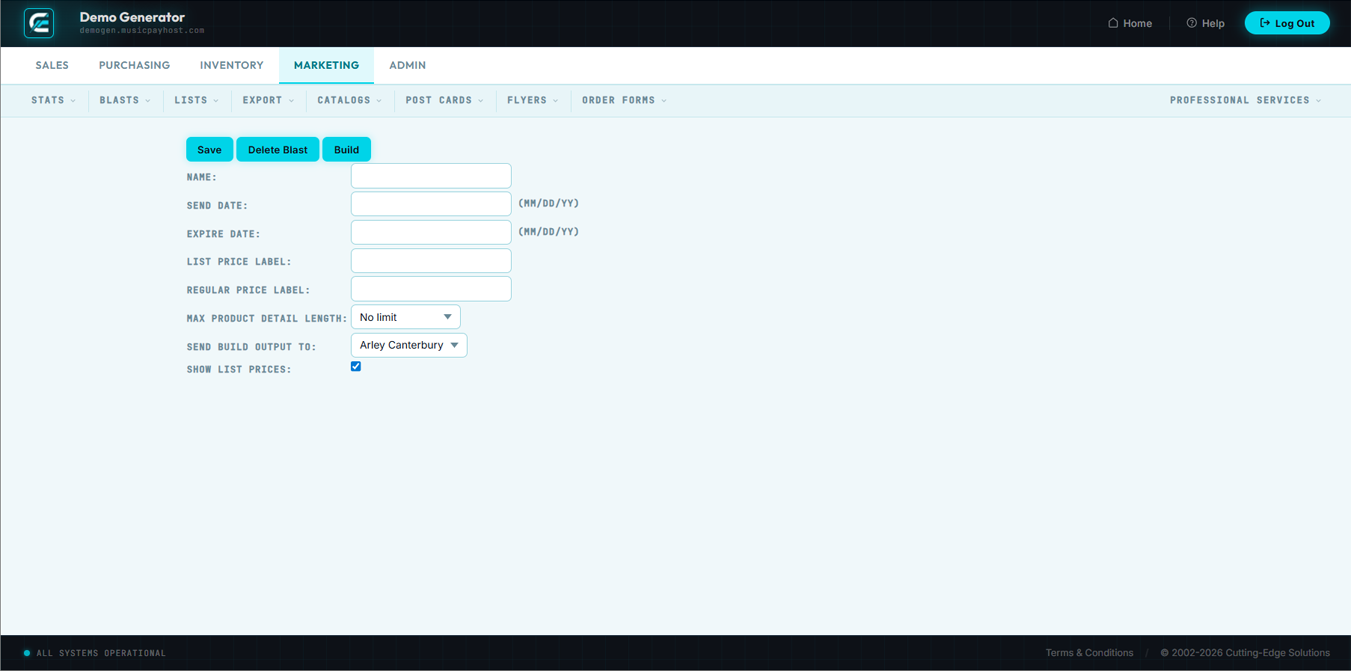
New Blast
Create and send a new e-mail campaign to one or more customer lists.
- Click New Blast in Marketing → Blasts.
- Enter a Campaign Name (internal only).
- Set From Name & From E-mail.
- Write a Subject Line and click Test Subject for a spam score preview.
- Enter Preview Text (50–100 characters shown in inbox previews).
- Select Lists: choose one or more. System de-duplicates recipients and excludes global unsubscribes automatically.
- Design Template: choose an existing template or use the drag-and-drop editor to add text, product grids, images, and buttons.
- Add Personalization using merge tags:
{{first_name}},{{last_order_date}},{{store_credit_balance}}. - Click Send Test to preview in your inbox before the full send.
- Click Send Now to deliver immediately, or click Schedule to set a future date and time.
Blast Templates
Blast Templates are reusable e-mail layouts that maintain brand consistency across campaigns.
- Click Blast Templates in Marketing → Blasts.
- Existing templates are listed with thumbnail previews. Click any to open the editor.
- To create: click + New Template, name it, build the layout, click Save Template.
- To delete: click template → Delete → confirm. Templates in use by scheduled blasts cannot be deleted.
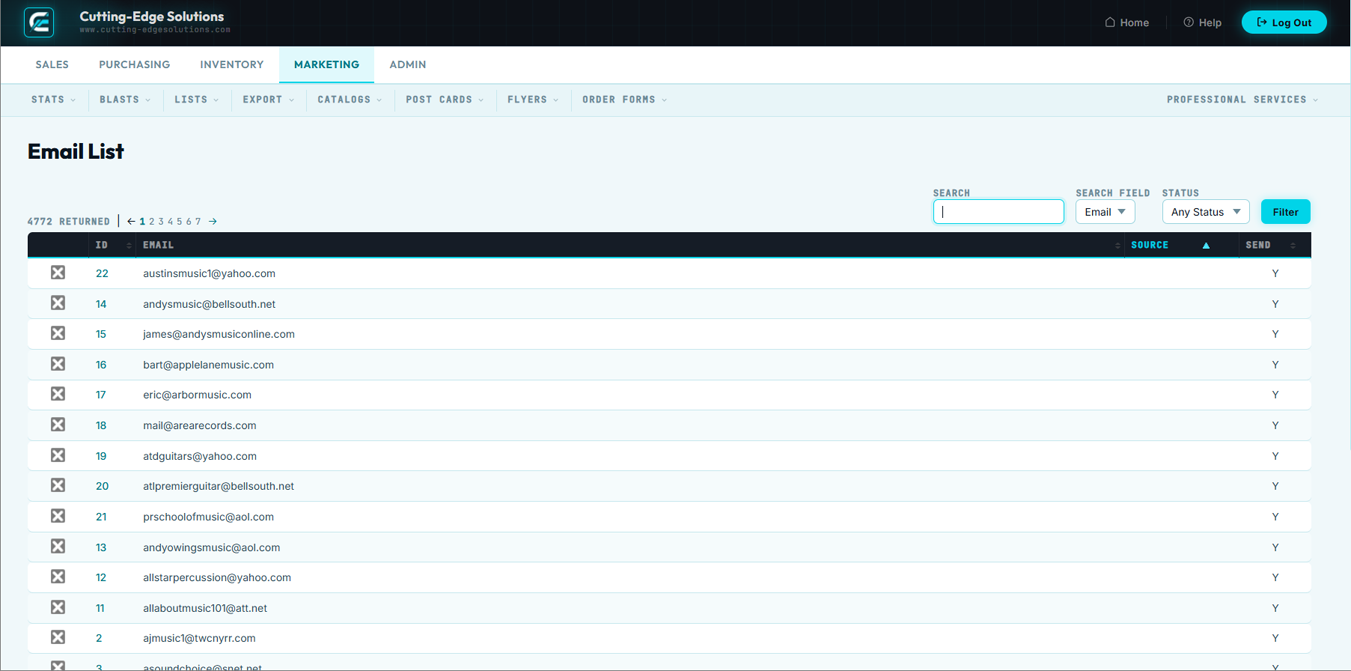
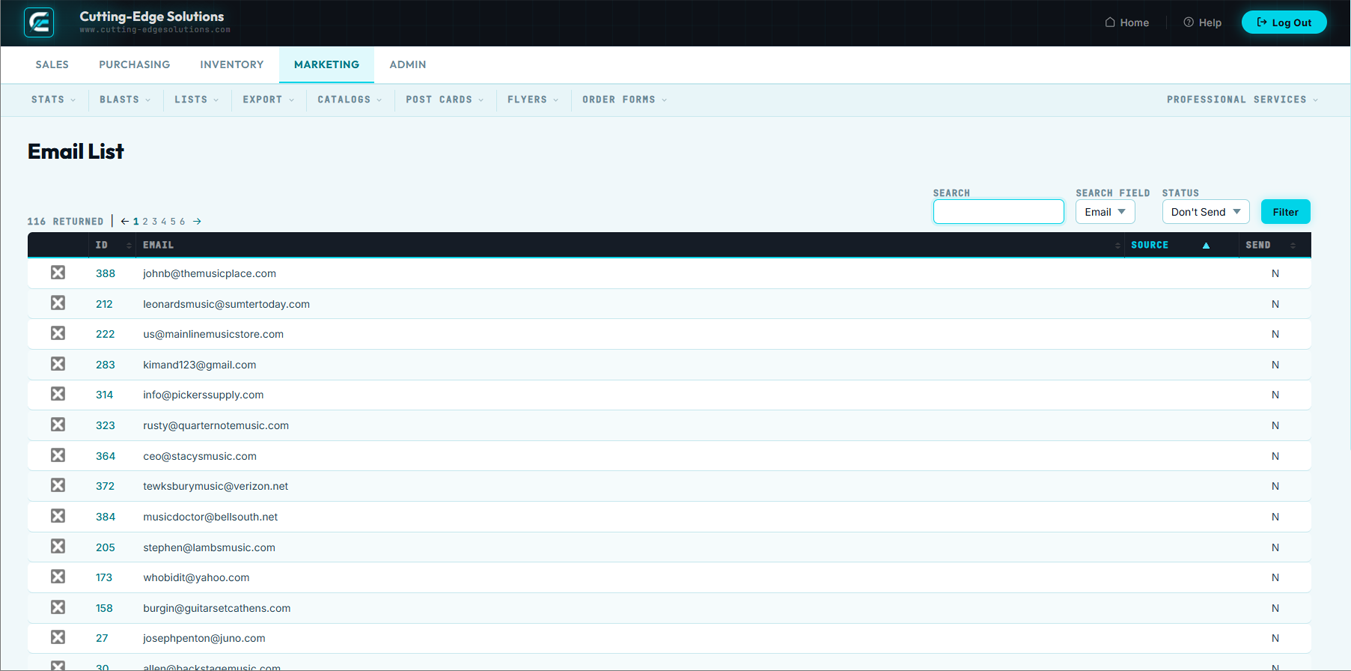
Browse Lists
Browse Lists shows all customer mailing lists — system-generated and custom segmented lists you have created.
- Click Browse Lists in Marketing → Lists.
- Table shows: List Name, Type (Static or Dynamic), Member Count, Created Date, Last Updated.
- Static Lists: members manually added or imported. Dynamic Lists: membership determined by rules, auto-updates.
- Click any list row to view members or edit settings.
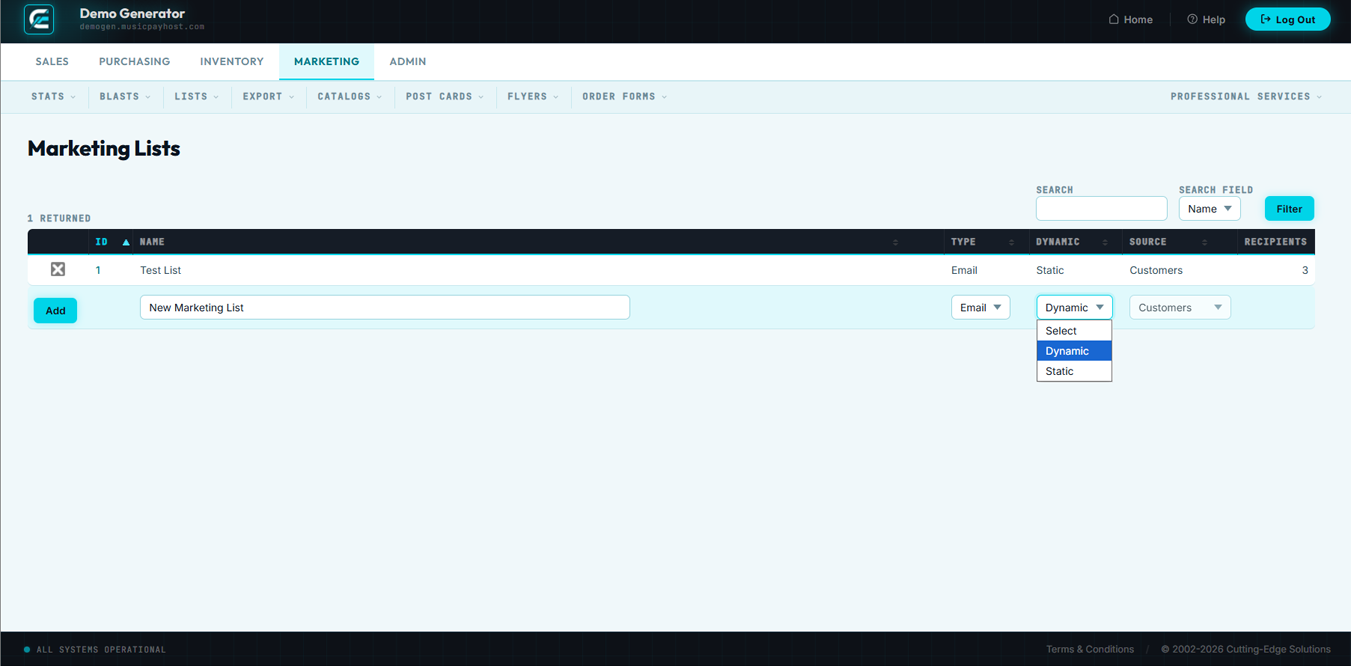
New List
Create a new mailing list — static or dynamic — to target a specific customer segment for campaigns.
- Click New List in Marketing → Lists.
- Enter a descriptive List Name and select the List Type: Static or Dynamic.
- For Dynamic Lists, build rules using the condition builder: Customer Group, Total Spent, Last Order Date, State/Province, Has purchased [product/class/brand]. Combine conditions with AND/OR logic.
- Click Preview Members to see how many customers match, then click Save List.
Edit List
Modify a list's name, description, or dynamic rules at any time. Changes to dynamic rules take effect immediately.
- Open the list from Browse Lists and click Edit List.
- Update name, description, or filter conditions.
- Click Preview Members to verify the result, then click Save Changes.

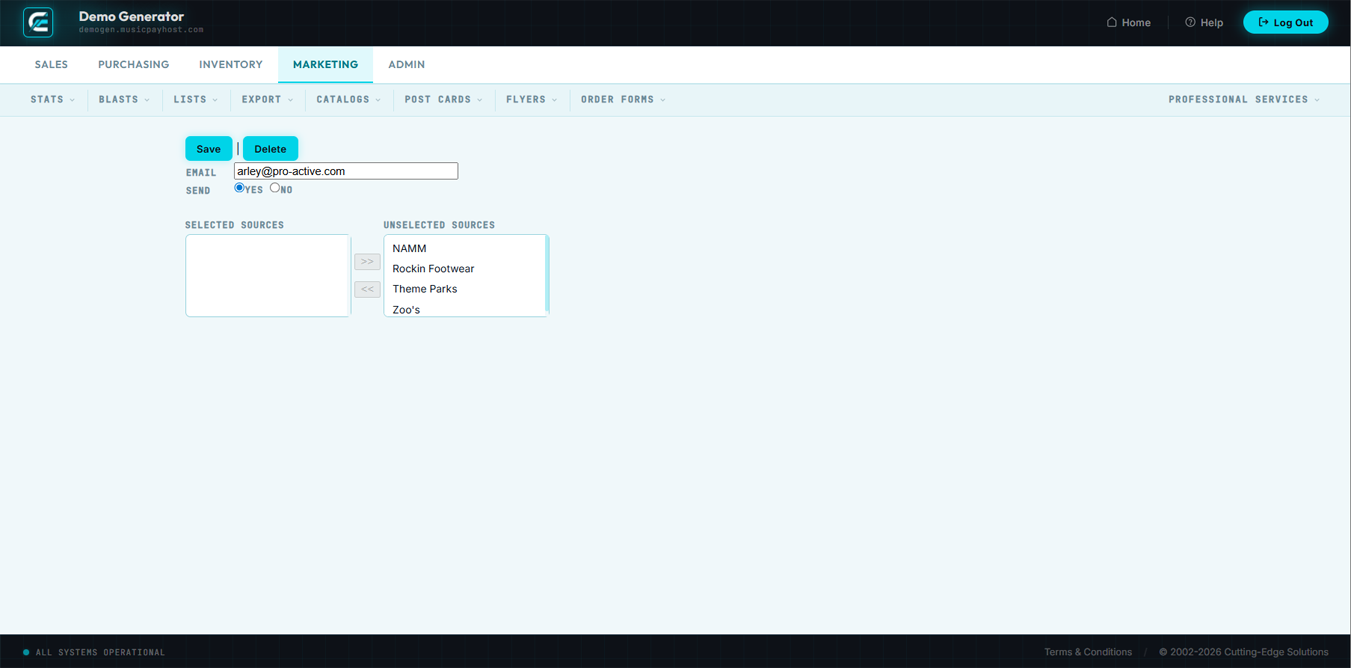
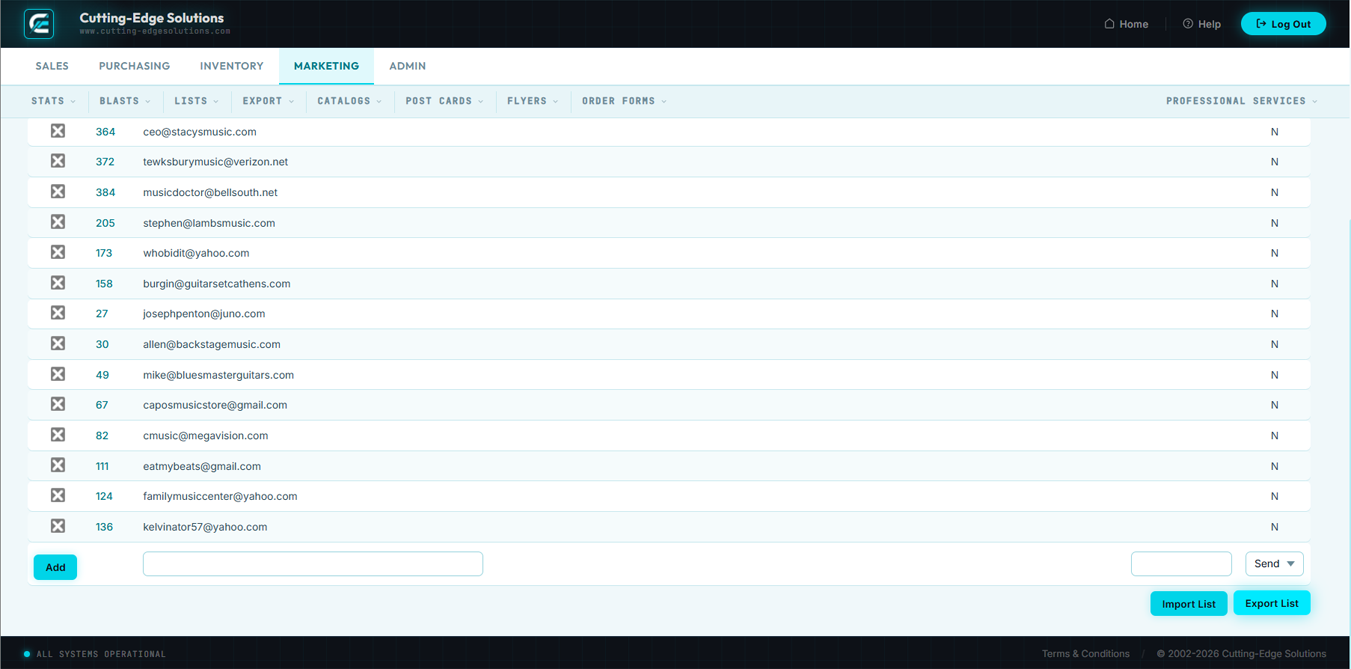
List Members
List Members shows every subscriber in a specific list, with options to add, remove, or import members for static lists.
- Open a list from Browse Lists and click the Members tab.
- Table shows: Name, E-mail, Date Added, Source (manual, import, rule).
- To add: click + Add Member, search by name or e-mail, click Add.
- To import: click Import Members and upload a CSV with e-mail addresses.
- To remove: click the × next to their name → confirm. They are removed from this list only.
Unsubscribes
The Unsubscribes list contains every customer who has opted out of marketing e-mails. This list is managed automatically — when a customer clicks "Unsubscribe" they are added here and excluded from all future blasts.
- Click Unsubscribes in Marketing → Lists.
- List shows: E-mail, Customer Name, Unsubscribe Date, Blast That Triggered It.
- Filter by date range to see recent unsubscribes after a specific campaign.
Export Lists
Export Lists downloads a CSV of all subscribers in one or more mailing lists for use with an external ESP, print mail house, or backup.
- Click Export Lists in Marketing → Export.
- Select lists using the checkboxes.
- Choose fields to include: E-mail, First Name, Last Name, Company, Phone, Address, Customer Group, Total Orders, Total Spent, Last Order Date.
- Choose Format: CSV or Tab-Delimited, then click Generate Export.
Export Customers
Export Customers generates a filtered export of your full customer database for CRM imports, accounting integrations, or custom analytics.
- Click Export Customers in Marketing → Export.
- Apply filters: Customer Group, Status, Date Range, State/Province, Country, Minimum Lifetime Spend.
- Choose fields to include and click Generate Export.

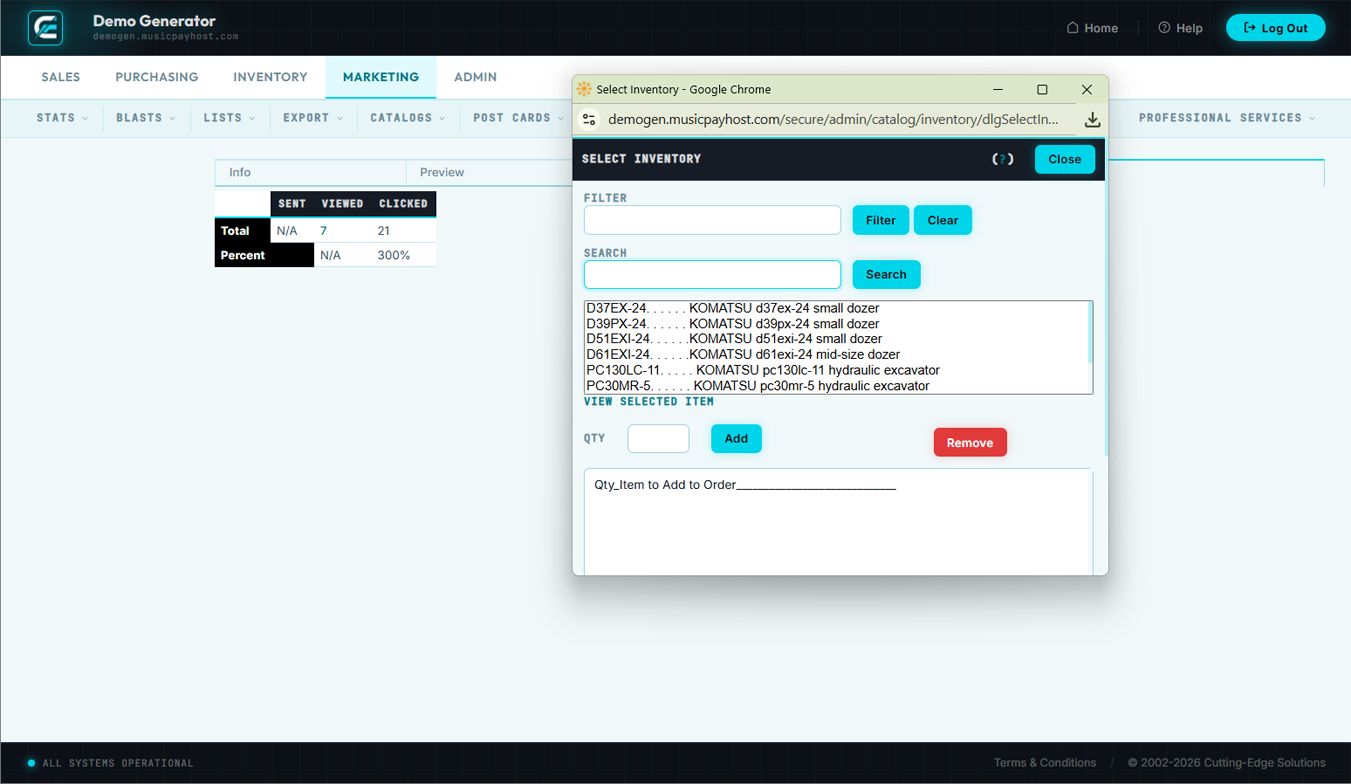
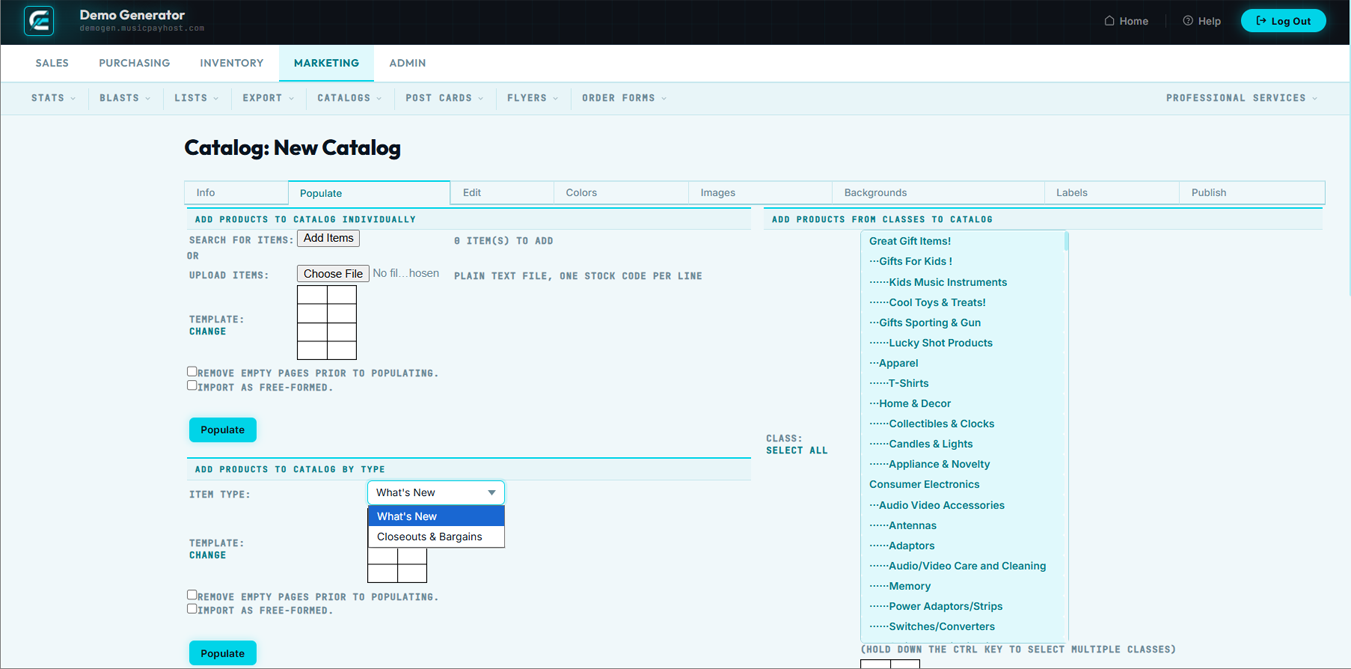
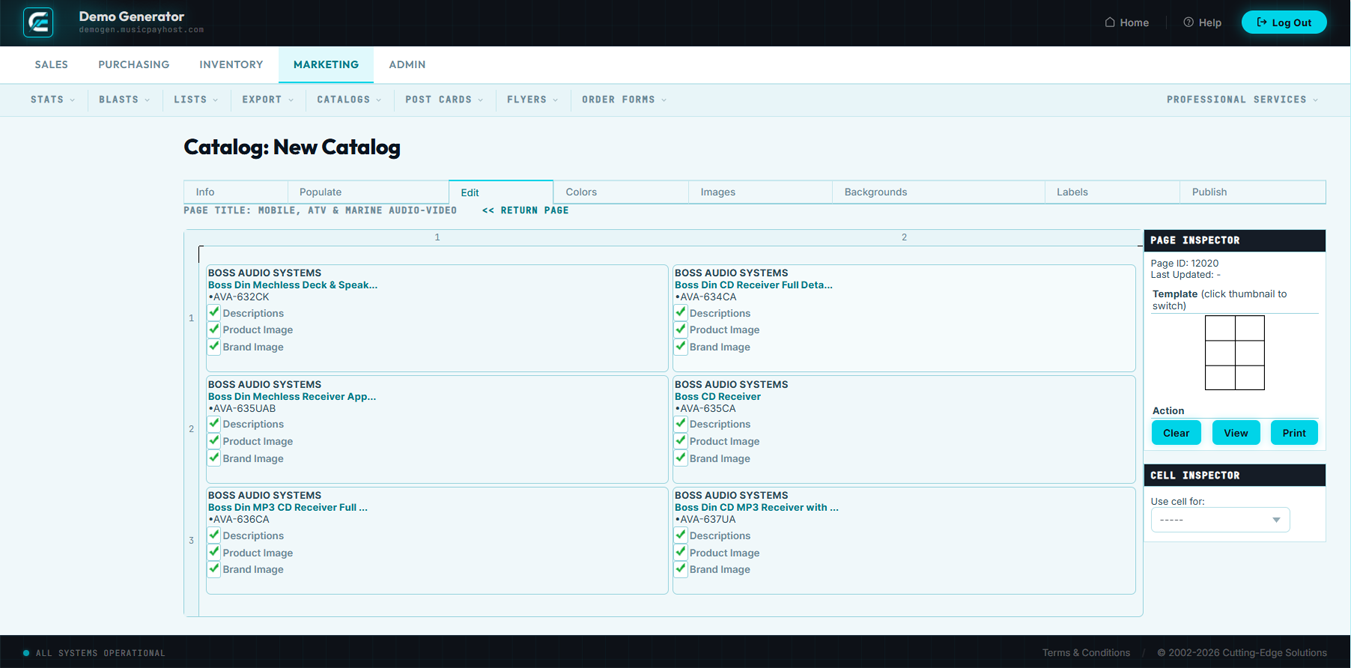
New Catalog
Build a new product catalog PDF by selecting which products to feature, choosing a layout template, and configuring cover art and pricing display options.
- Click New Catalog in Marketing → Catalogs.
- Enter a Catalog Name and select a Layout Template (1-, 2-, or 3-column grid).
- Add products by SKU, Class, or Brand. Drag rows to reorder.
- Configure the Cover Page: upload cover image, enter catalog title and tag line.
- Click Save & Generate PDF to produce the catalog. Preview before publishing.
Edit Catalog allows you to revise an existing catalog's content, layout, and product selection. Use this page to update pricing, add new products, or refresh the cover image before re-publishing.
- Navigate to Marketing → Catalogs → Edit Catalog and select the catalog to modify from the list.
- Update the Catalog Title and Tag Line fields as needed.
- Click Manage Products to add or remove SKUs from the catalog lineup.
- Replace the Cover Image by clicking Upload New Cover and selecting a replacement file.
- Adjust Pricing Display and Include Images toggles to match the new catalog purpose.
- Click Generate PDF Preview to verify all edits look correct.
- Click Save Changes to commit the updated catalog.
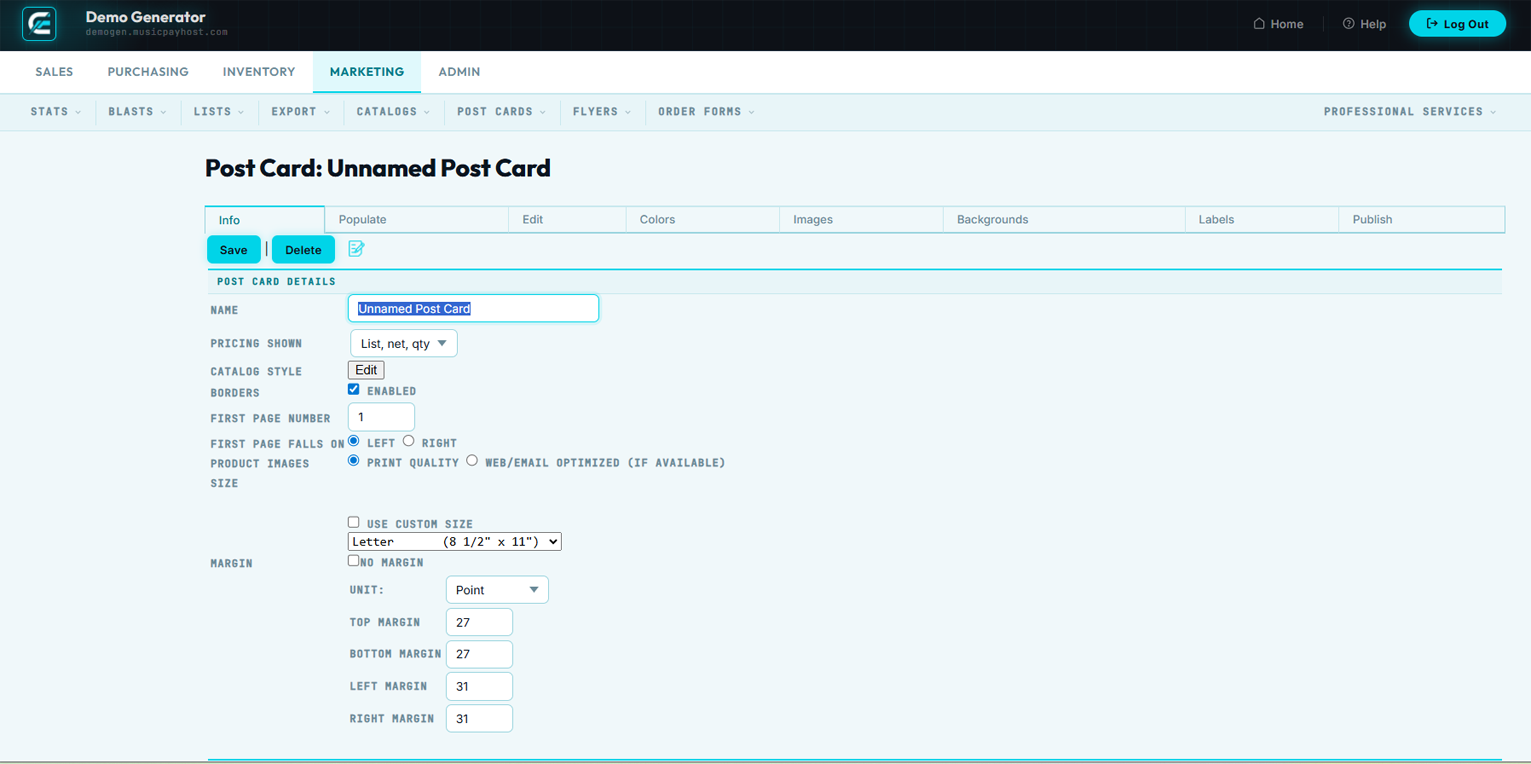
New Post Card creates a printable postcard marketing piece featuring selected products or promotions. Postcards can be mailed to customers or distributed at events.
- Navigate to Marketing → Post Cards → New Post Card.
- Enter a Post Card Name for internal reference.
- Select a Template from the available postcard layouts (standard 4×6, large 6×9, etc.).
- Upload a Front Image: the primary visual displayed on the postcard front.
- Enter Headline Text and Body Copy for the front panel.
- Configure the Back Panel: enter your business return address, offer details, and any call-to-action text.
- Select Featured Products to include on the back panel product strip (if the template supports it).
- Click Preview Postcard to review the front and back layout.
- Click Save Post Card to store the design for printing or export.
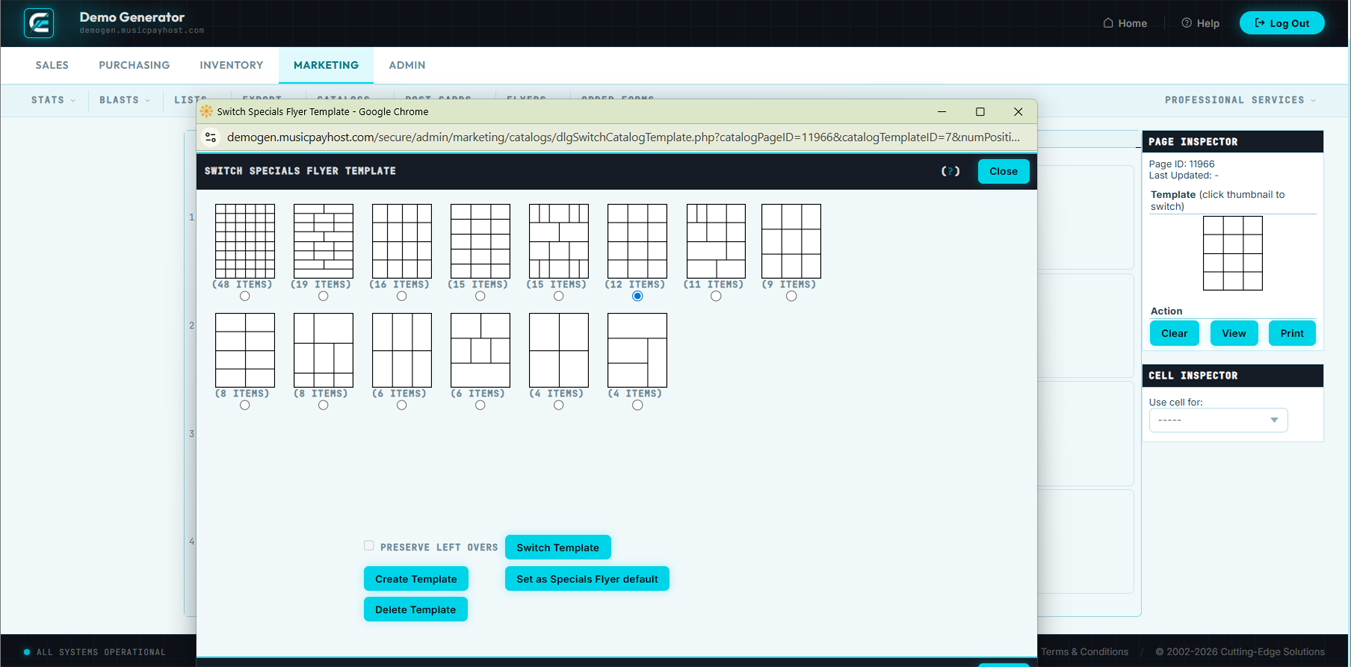
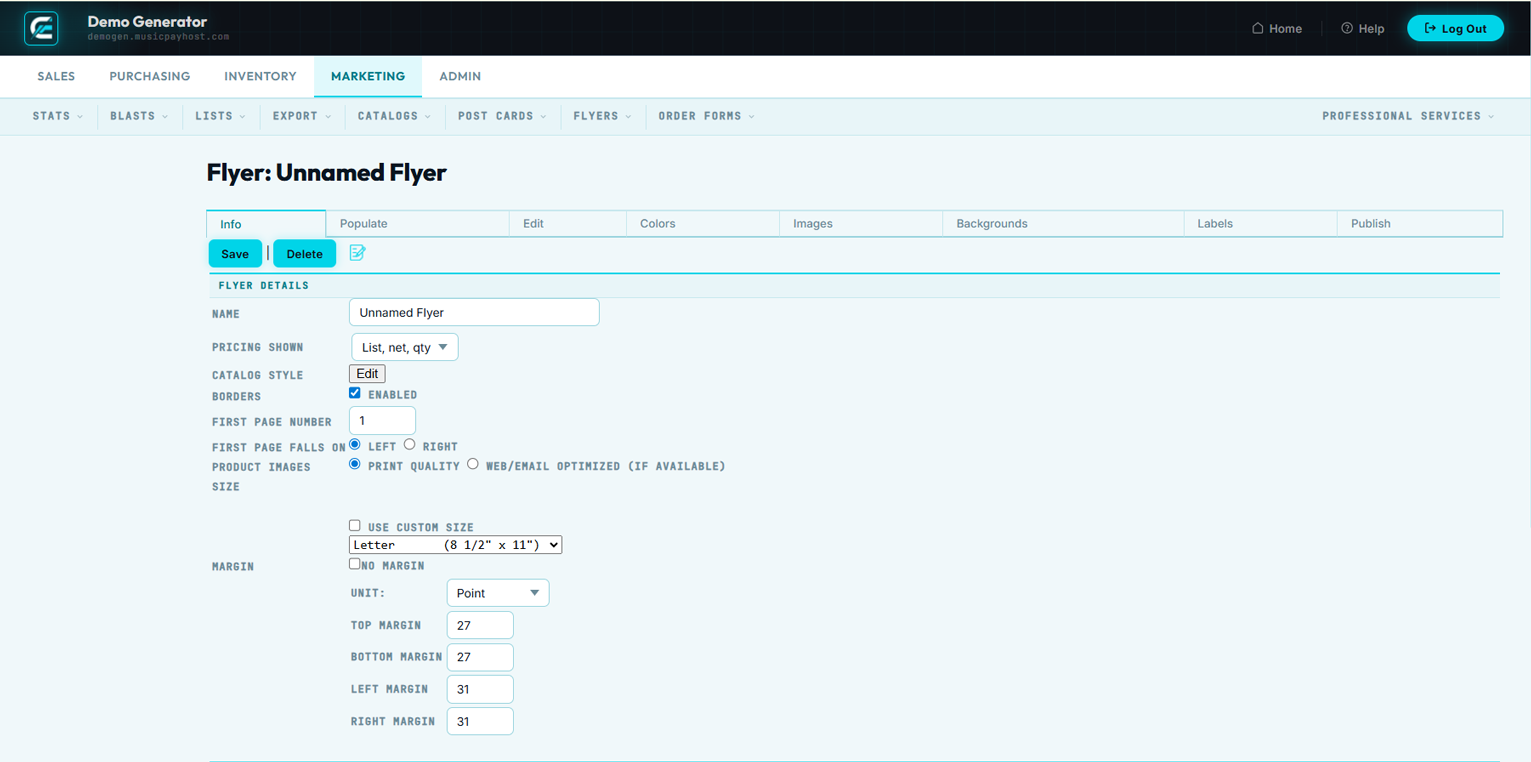
New Flyer generates a single-page promotional flyer highlighting featured products, sales events, or seasonal promotions. Flyers are designed for both print and digital distribution.
- Navigate to Marketing → Flyers → New Flyer.
- Enter a Flyer Name for internal identification.
- Choose a Flyer Template: single-column, two-column, or featured-hero layout.
- Upload a Banner Image for the top of the flyer.
- Enter the Flyer Title, Subtitle, and Promotional Message.
- Click Add Products and search for SKUs to feature; select up to 12 products depending on template.
- For each product, confirm that the Display Price and Product Image are correct.
- Enter Footer Text: business name, address, and any legal disclaimers required.
- Click Preview Flyer to review the complete layout.
- Click Save Flyer to finalize and make available for download or print.
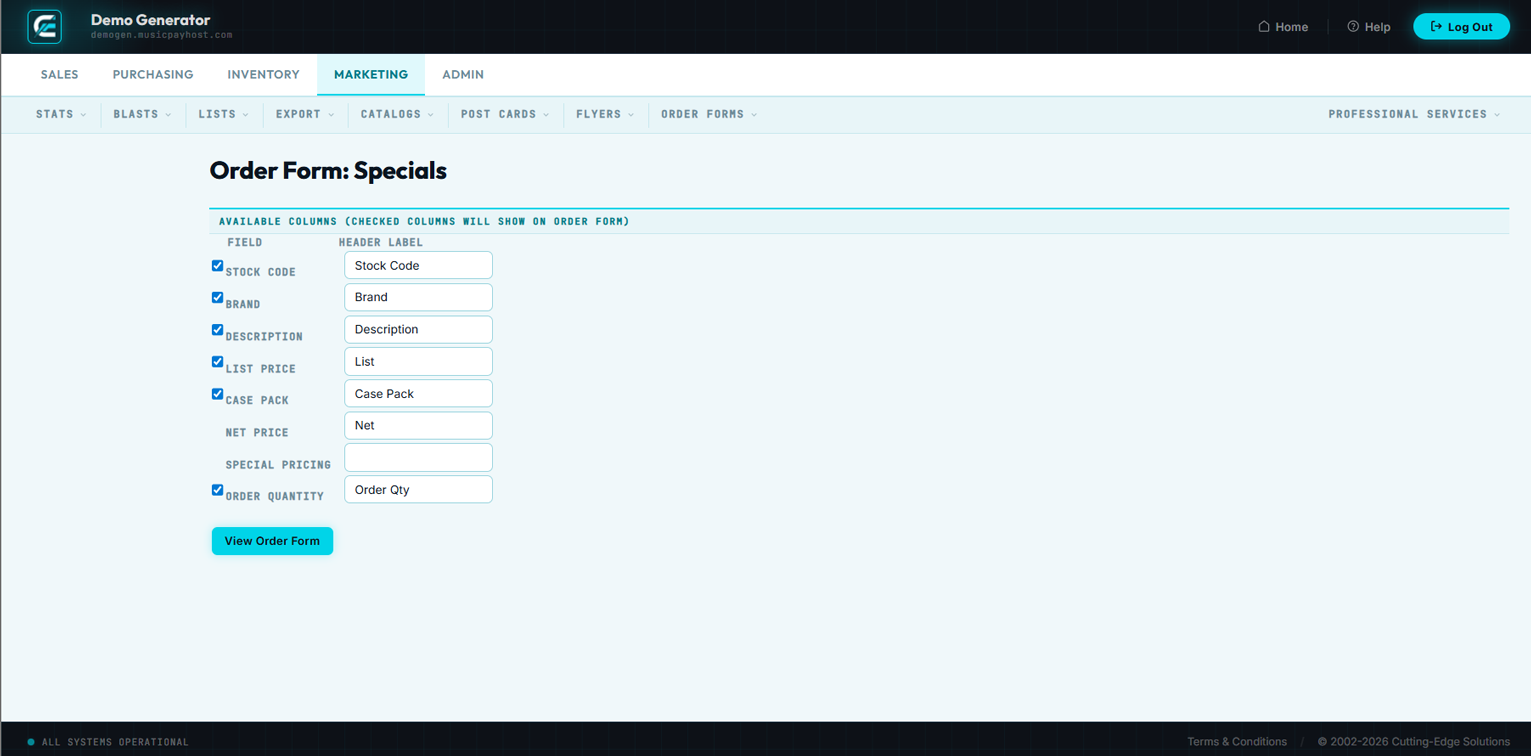
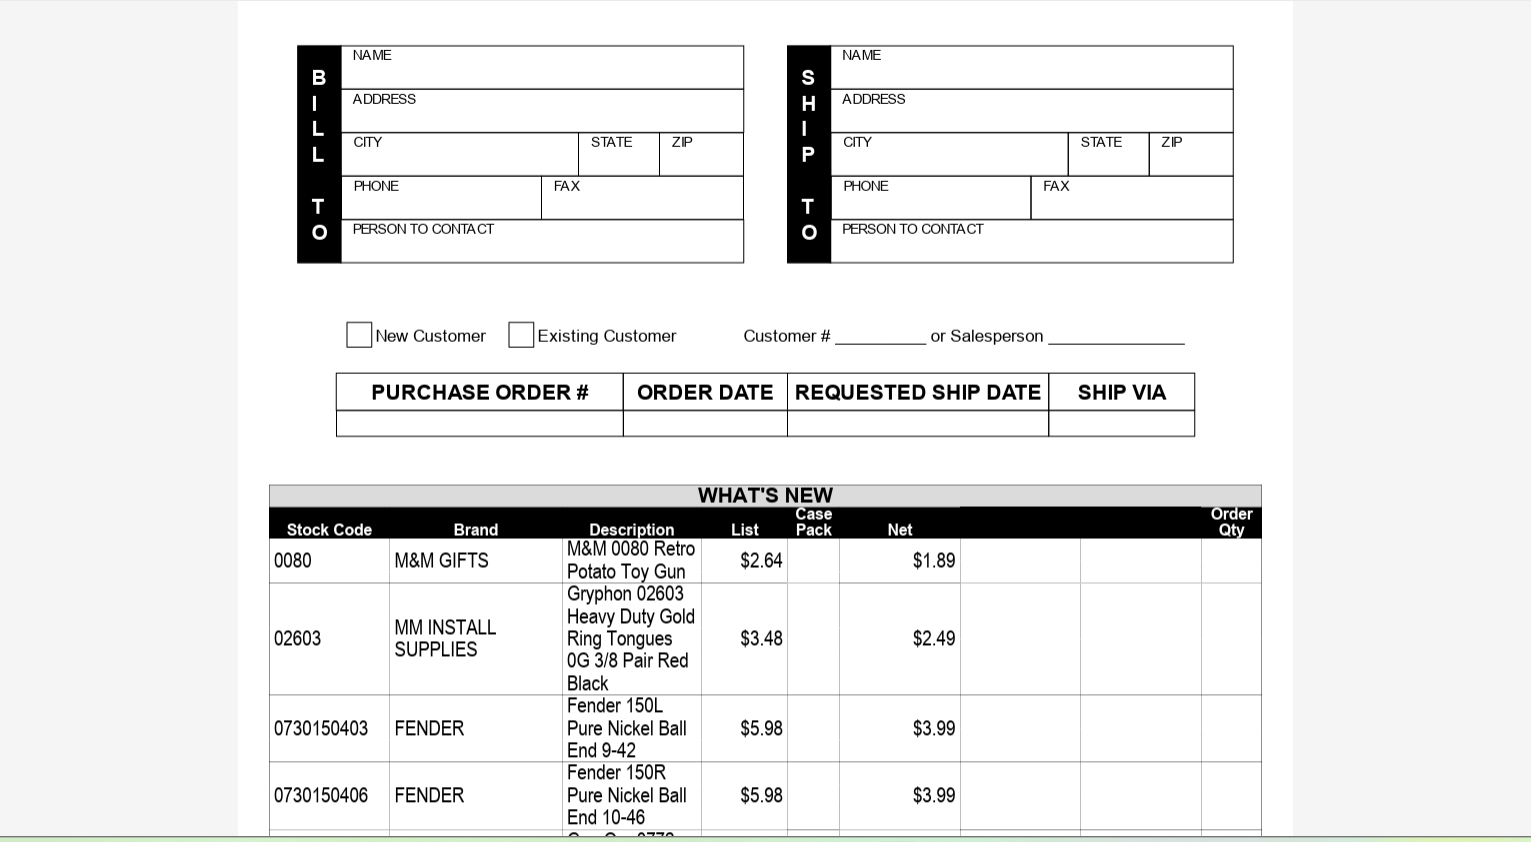
New Order Form creates a printable or fillable PDF order form that customers or sales reps can use to place orders offline. Order forms can be customized with your product catalog, pricing, and branding.
- Navigate to Marketing → Order Forms → New Order Form.
- Enter an Order Form Name and optional Description.
- Upload a Header Logo to brand the form with your company identity.
- Enter Contact Information: phone, email, and address to display at the top of the form.
- Click Add Products to populate the form's product table; search by SKU or product name and add rows.
- For each product row, confirm SKU, Product Name, Unit Price, and Unit of Measure.
- Configure Form Options: choose whether to include quantity columns, a notes field, and a signature line.
- Set the Terms and Conditions text block if required for your industry.
- Click Preview Order Form to review the generated PDF layout.
- Click Save Order Form to store the configuration.
Edit Order Form allows you to revise an existing order form — update product pricing, add or remove items, and refresh branding elements before re-publishing the form.
- Navigate to Marketing → Order Forms → Edit Order Form and select the form to modify.
- Update the Order Form Name, Description, or Header Logo as needed.
- Edit Contact Information if your phone, email, or address has changed.
- Click Manage Products to add new rows, remove discontinued items, or update pricing.
- Reorder product rows by dragging them into the desired sequence.
- Update Form Options and Terms and Conditions text if required.
- Click Preview Order Form to verify all changes.
- Click Save Changes to commit the updated form.

The Preview & Export page generates a PDF version of your order form for review, download, or distribution to customers and sales representatives.
- Navigate to Marketing → Order Forms → Preview Order Form and select the form from the list.
- The system renders a live PDF preview in your browser.
- Review all product rows, pricing, branding, and contact details for accuracy.
- Click Download PDF to save the form to your local machine for printing or email distribution.
- Alternatively, click Print to send directly to a printer.
- To share digitally, copy the Shareable Link displayed on this page and distribute via email or your website.
| Task | Where to Go | Key Notes |
|---|---|---|
| View e-mail campaign stats | Marketing → Stats → E-mail Stats | Track opens, clicks, and unsubscribes per blast |
| View order statistics | Marketing → Stats → Order Stats | Revenue and order count trends by date range |
| View product performance | Marketing → Stats → Product Stats | Top sellers and low performers |
| View customer stats | Marketing → Stats → Customer Stats | New vs. returning customer breakdown |
| View campaign stats | Marketing → Stats → Campaign Stats | Compare multiple blast campaigns |
| View traffic sources | Marketing → Stats → Traffic Stats | Referral, direct, and search breakdown |
| Send e-mail blast | Marketing → Blasts → New Blast | Select list, choose template, schedule or send immediately |
| Create blast template | Marketing → Blasts → Blast Templates | Reusable designs for future campaigns |
| Build a mailing list | Marketing → Lists → New List | Manual entry or import from CSV |
| Manage list members | Marketing → Lists → List Members | Add, remove, and view individual subscribers |
| Review unsubscribes | Marketing → Lists → Unsubscribes | Cannot be re-subscribed without customer consent |
| Export mailing list | Marketing → Export → Export Lists | Download CSV for external use |
| Export customer data | Marketing → Export → Export Customers | Filter by date range before export |
| Create product catalog | Marketing → Catalogs → New Catalog | PDF format; preview before publishing |
| Create postcard | Marketing → Post Cards → New Post Card | Use 300 DPI images for print quality |
| Create flyer | Marketing → Flyers → New Flyer | Limit to 6 products for best layout |
| Create order form | Marketing → Order Forms → New Order Form | Group products by category |
| Preview/export order form | Marketing → Order Forms → Preview Order Form | Always preview after editing |
Admin
System settings, user accounts, network stores, showcases, and data imports for the Generator platform.
The Admin Settings area controls every global configuration parameter for the Generator platform. Changes made here affect all storefronts, users, and processes system-wide. Review each settings category carefully before making changes in a production environment.
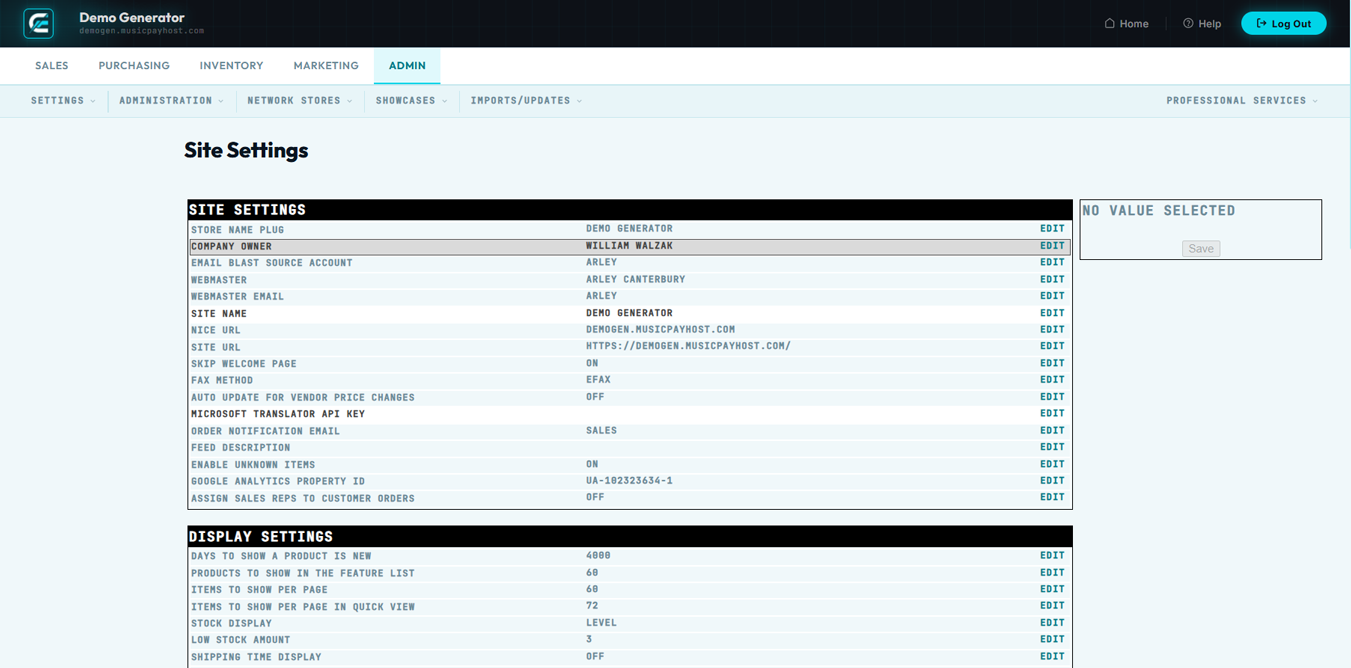
General Settings controls site-wide defaults including date/time format, currency, and language settings.
- Navigate to Admin → Settings → Site.
- Set the Default Currency (e.g., USD, CAD, EUR) from the dropdown.
- Choose the Date Format and Time Zone appropriate for your primary business location.
- Set the Default Language for the storefront interface.
- Configure the Items Per Page default for all browse/list screens.
- Click Save General Settings to apply changes.

Store Information contains your business identity data — name, address, phone, and contact email — used throughout the platform for invoices, packing slips, and customer communications.
- Navigate to Admin → Settings → Store Information.
- Enter your Store Name as it should appear on all customer-facing documents.
- Enter the complete Business Address: street, city, state/province, ZIP/postal code, and country.
- Enter the Business Phone and Support Email.
- Upload your Store Logo for use on invoices and order confirmations.
- Click Save Store Information.

Email Settings controls outbound email delivery configuration, including SMTP server details, sender name, and the email address used for all system notifications and customer correspondence.
- Navigate to Admin → Settings → Email Settings.
- Choose the Mail Delivery Method: PHP Mail, SMTP, or Sendmail.
- If using SMTP, enter the SMTP Host, Port, Username, and Password.
- Set the From Name (appears as sender name in customer inboxes) and From Email.
- Enter a Reply-To Email for customer replies.
- Click Send Test Email to verify the configuration is working.
- Click Save Email Settings.

Payment Settings manages which payment gateways are active, their API credentials, and global transaction options such as authorization-only versus capture-on-order.
- Navigate to Admin → Settings → Payment Settings.
- Enable or disable payment gateways using the Active toggle next to each gateway.
- For each active gateway, click Configure and enter the required API Key, Secret, and Merchant ID.
- Set the Transaction Mode: Test or Live. Always use Test mode during initial setup.
- Choose Authorization Only or Authorize and Capture depending on your fulfillment workflow.
- Enable Card Saving if your gateway supports tokenized card storage.
- Click Save Payment Settings.

Shipping Settings configures the carriers, rate calculation methods, and shipping zones used when calculating freight for customer orders.
- Navigate to Admin → Settings → Shipping Settings.
- Enable or disable shipping carriers (UPS, FedEx, USPS, etc.) using the Active toggles.
- For each active carrier, click Configure and enter the carrier Account Number and API credentials.
- Define Shipping Zones: specify geographic regions and which carriers/rates apply to each zone.
- Set Free Shipping Thresholds by zone if applicable.
- Configure Handling Fees: flat fee or percentage added per shipment.
- Click Save Shipping Settings.

Tax Settings manages tax rates, tax classes, and jurisdiction rules for all transactions processed through the platform.
- Navigate to Admin → Settings → Tax Settings.
- Enable or disable Automatic Tax Calculation; if enabled, choose your tax service provider.
- If using manual rates, click Add Tax Rule and define the Region, Tax Class, and Rate (%).
- Assign Tax Classes (Taxable, Tax-Exempt, Reduced Rate) to product categories in Inventory → Classes.
- Set Tax Display: prices shown inclusive or exclusive of tax on the storefront.
- Click Save Tax Settings.

SEO Settings controls global meta tags, URL structures, sitemap generation, and robots.txt configuration to help search engines index your storefront effectively.
- Navigate to Admin → Settings → SEO Settings.
- Enter the default Meta Title and Meta Description used for pages that don't have their own SEO data.
- Configure the URL Structure: clean URLs vs. query-string URLs.
- Enable Canonical URLs to prevent duplicate content issues.
- Click Regenerate Sitemap to rebuild your XML sitemap after adding products or pages.
- Edit the robots.txt content to control crawler access to admin and private areas.
- Click Save SEO Settings.

Social Media Settings stores your social network profile URLs and controls Open Graph meta tags used when products or pages are shared on social platforms.
- Navigate to Admin → Settings → Social Media Settings.
- Enter the full URLs for each social platform (Facebook, Instagram, Twitter/X, Pinterest, LinkedIn, YouTube, etc.).
- Upload a Default Social Share Image used when pages without specific images are shared.
- Configure Open Graph Settings: site name, default description, and image dimensions.
- Enable or disable the Social Share Buttons that appear on product detail pages.
- Click Save Social Media Settings.

Checkout Settings configures the customer checkout flow — guest checkout, required fields, terms acceptance, and order review steps.
- Navigate to Admin → Settings → Checkout Settings.
- Enable or disable Guest Checkout (allows orders without account creation).
- Configure Required Fields at checkout: phone number, company name, PO number, etc.
- Enable Terms and Conditions Acceptance checkbox if required by your legal team.
- Enable or disable the Order Review Step before payment submission.
- Configure Address Validation: use carrier address verification or allow unvalidated addresses.
- Set the Minimum Order Amount if applicable.
- Click Save Checkout Settings.

Inventory Settings controls how the platform manages stock levels, backorders, and low-stock notifications globally across all products.
- Navigate to Admin → Settings → Inventory Settings.
- Enable or disable Inventory Tracking globally (individual products can override this).
- Set the Low Stock Threshold: the quantity level that triggers a low-stock notification.
- Configure Backorder Behavior: prevent purchase, allow with notification, or allow silently.
- Enable Stock Reservations to hold inventory during the checkout session.
- Set the Reservation Duration in minutes.
- Click Save Inventory Settings.

Customer Settings manages account creation rules, password policies, loyalty programs, and customer group defaults.
- Navigate to Admin → Settings → Customer Settings.
- Set Account Approval: automatic approval or manual admin review for new accounts.
- Configure Password Policy: minimum length, complexity requirements, and expiration.
- Enable or disable the Loyalty/Points Program and set the earn/redeem ratios.
- Set the Default Customer Group assigned to new registrations.
- Configure Customer Communication Preferences: default opt-in/opt-out for marketing emails.
- Click Save Customer Settings.

Notification Settings configures which system events trigger email notifications, and to whom those notifications are sent (admin team, customers, or both).
- Navigate to Admin → Settings → Notification Settings.
- Review the list of Notification Events (New Order, Order Shipped, Low Stock, New Customer, etc.).
- For each event, toggle whether the Admin team receives an email notification.
- For customer-facing events (Order Confirmation, Shipping Notice), toggle Customer Notification on/off.
- Enter the Admin Notification Email(s) — multiple addresses can be separated by commas.
- Click Customize Template next to any event to edit the email subject and body.
- Click Save Notification Settings.

API Settings manages API keys and access tokens used by third-party integrations, mobile apps, and external data feeds to communicate with the Generator platform.
- Navigate to Admin → Settings → API Settings.
- Click Generate New API Key to create a key for a new integration.
- Enter a Key Label to identify the integration (e.g., "ERP Connector", "Mobile App").
- Set the Permission Scope: Read Only, Read/Write, or Full Access.
- Set an optional Expiration Date for time-limited integrations.
- Copy the generated key immediately — it will not be shown again after saving.
- To revoke a key, click Revoke next to it in the key list.

Security Settings controls admin session policy, two-factor authentication, IP allowlisting, and brute-force login protection for the platform's admin panel.
- Navigate to Admin → Settings → Security Settings.
- Enable Two-Factor Authentication (2FA) for all admin users.
- Set the Session Timeout: the number of idle minutes before an admin session expires.
- Configure IP Allowlist: restrict admin panel access to specific IP addresses or CIDR ranges.
- Set Maximum Login Attempts before an account is temporarily locked.
- Enable Login Notifications to alert admin users of new sign-ins from unrecognized devices.
- Click Save Security Settings.

Maintenance mode takes the storefront offline for customers while allowing admin access for updates, data imports, or configuration changes.
- Navigate to Admin → Settings → Maintenance.
- Toggle Maintenance Mode to ON.
- Enter a Maintenance Message displayed to customers on the storefront (e.g., "We'll be back shortly — thank you for your patience.").
- Set an optional Expected Return Time to display on the maintenance page.
- Perform your required updates or data changes.
- Return to Maintenance settings and toggle Maintenance Mode back to OFF.
- Click Save.

The Users page lists all admin panel accounts. From here you can add new staff members, edit existing user profiles, reset passwords, and deactivate accounts that are no longer needed.
- Navigate to Admin → Administration → Users.
- The user list displays Name, Email, Role, Last Login, and Status for each account.
- Click Add User to create a new admin account: enter First Name, Last Name, Email, and assign a Role.
- Set a temporary password and check Require Password Change on First Login.
- To edit an existing user, click their name and update any fields as needed.
- To deactivate an account, click Deactivate — the user will no longer be able to log in but their activity history is preserved.
- Click Save after any changes.

Roles & Permissions defines what each type of admin user can view and do within the platform. Assign roles to users to enforce the principle of least privilege — staff should only have access to what their job requires.
- Navigate to Admin → Administration → Roles & Permissions.
- The roles list shows all defined roles and a summary of their permission sets.
- Click Add Role to create a new role: enter a Role Name and optional Description.
- In the permissions matrix, check or uncheck each module (Sales, Purchasing, Inventory, Marketing, Admin) and the specific actions allowed (View, Create, Edit, Delete).
- Click Save Role to create the role.
- To modify an existing role, click its name, adjust permissions, and click Save Changes.
- Assign roles to users via the Users page.

The Activity Log records every action taken by admin users — logins, order edits, product changes, settings updates, and more. Use it to audit changes and investigate discrepancies.
- Navigate to Admin → Administration → Activity Log.
- Use the Date Range filter to narrow results to a specific time window.
- Filter by User to see all actions taken by a specific staff member.
- Filter by Action Type (Login, Edit, Delete, Create, Export, Settings Change) to focus on a category.
- Each log entry shows: Date/Time, User, Action, Module, and Record ID affected.
- Click any log entry to view the full detail, including before/after values for edits.
- Click Export Log to download the filtered results as a CSV file.

The Backups page manages manual and scheduled database backups of the platform. Regular backups protect your business data from accidental deletion, corruption, or hosting failures.
- Navigate to Admin → Administration → Backups.
- The backup list shows all available backups with Date, Size, Type (Manual or Scheduled), and Status.
- Click Create Backup Now to generate an immediate manual backup.
- To configure Scheduled Backups, click Schedule Settings and set the frequency (daily, weekly) and retention count.
- Click Download next to any backup to save it to your local machine.
- To restore from a backup, click Restore — this will overwrite the current database. Only do this under guidance from your system administrator.
- Delete old backups by clicking Delete to free storage space.

The Error Log captures system-level PHP errors, failed integrations, and unhandled exceptions. Review this log regularly to identify and resolve platform issues before they affect customers.
- Navigate to Admin → Administration → Error Log.
- The log displays entries sorted by most recent, showing Date/Time, Error Type, File, Line Number, and a brief Message.
- Click any error entry to expand the full stack trace.
- Use the Filter by Type dropdown to view only Fatal Errors, Warnings, or Notices.
- Click Clear Log to remove all current entries after resolving outstanding issues.
- Click Export Log to download a copy for your developer or hosting provider.

Cache Management controls the platform's caching layer. Clearing caches forces the system to rebuild stored data, ensuring customers and staff see the most current product, pricing, and page content.
- Navigate to Admin → Administration → Cache Management.
- Review the list of cache types: Page Cache, Product Cache, Category Cache, Session Cache, and Configuration Cache.
- Click Clear next to a specific cache type to flush only that cache.
- Click Clear All Caches to flush every cache simultaneously.
- The status column shows each cache's Last Cleared timestamp and current Size.

Scheduled Tasks (cron jobs) automate recurring platform processes such as sending abandoned cart emails, generating reports, syncing inventory feeds, and purging expired sessions.
- Navigate to Admin → Administration → Scheduled Tasks.
- The task list shows each task's Name, Frequency, Last Run, Next Run, and Status.
- Click Run Now next to any task to execute it immediately outside of its scheduled window.
- Click Edit next to a task to change its frequency or enable/disable it.
- Review the Last Run Result column — a red indicator means the last execution failed. Click it to see the error detail.
- Contact Cutting-Edge Solutions support to add new scheduled tasks or modify core system tasks.

System Information displays technical details about the server environment, platform version, and installed components. This data is primarily used by developers and support staff when diagnosing issues.
- Navigate to Admin → Administration → System Information.
- Review the Platform Version and Build Date to confirm you are running the latest release.
- Check PHP Version, Database Version, Server OS, and Web Server details.
- Review PHP Configuration values (memory limit, max upload size, max execution time) relevant to import operations.
- Click Copy System Report to copy a formatted summary to your clipboard for use when contacting support.

Network Stores is the hub for managing multiple storefronts within a single Generator installation. Each network store shares the same product catalog and back-end but can have its own branding, pricing, and domain.
- Navigate to Admin → Network Stores.
- The list displays all network stores with their Store Name, Domain, Status, and Last Modified date.
- Click a store name to open its management dashboard.
- Use the Status toggle to activate or deactivate a network store without deleting it.

New Network Store creates an additional storefront within the Generator network, inheriting the shared product catalog while allowing independent branding and configuration.
- Navigate to Admin → Network Stores → New Network Store.
- Enter the Store Name for internal identification.
- Enter the Domain or subdomain this store will use (e.g., wholesale.yourdomain.com).
- Select the Default Customer Group assigned to customers who register on this store.
- Choose the Default Price List — the pricing tier displayed to this store's customers.
- Upload a Store Logo and set the Store Color Theme for independent branding.
- Configure the Default Language and Currency for this store.
- Click Create Network Store to provision the new storefront.

Manage Network Store provides a consolidated dashboard for a specific network store — allowing you to view its orders, customers, settings, and performance metrics independently from the main store.
- Navigate to Admin → Network Stores and click the name of the store you wish to manage.
- The management dashboard displays the store's Recent Orders, Active Customers, and Revenue Summary.
- Click Store Settings to access configuration options specific to this network store.
- Click View Orders to see orders placed through this storefront only.
- Click View Customers to see customers registered through this store.
- Use Deactivate Store to take this storefront offline without deleting it.

Network Store Settings allows you to override global platform settings for a specific network store — customizing its email configuration, checkout options, SEO metadata, and more independently of the main store.
- Navigate to Admin → Network Stores → [Store Name] → Store Settings.
- Update the Store Name, Domain, Logo, and Color Theme as needed.
- Override Email Settings for this store: configure a different From Name, From Email, and SMTP if this store uses a separate email identity.
- Adjust Checkout Settings — guest checkout, required fields, and minimum order amount — independently for this store.
- Override SEO Settings: set store-specific meta titles, descriptions, and sitemap configuration.
- Set Payment Methods available on this store — you can restrict to a subset of the global gateways.
- Click Save Network Store Settings.

Showcases are curated product display pages — landing pages that highlight a specific collection, brand, or promotion. They can be linked from your homepage, navigation menus, or marketing campaigns.
- Navigate to Admin → Showcases.
- The showcase list shows all existing showcases with their Name, URL Slug, Product Count, and Status.
- Click a showcase name to edit it, or click New Showcase to create one.
- Toggle the Status to activate or deactivate a showcase without deleting it.

New Showcase creates a branded product landing page featuring a curated selection of products, a custom banner, and descriptive copy for promotional or seasonal campaigns.
- Navigate to Admin → Showcases → New Showcase.
- Enter a Showcase Name for internal reference and as the page heading.
- Enter a URL Slug (e.g., summer-sale-2026) — this becomes the showcase's web address.
- Upload a Banner Image for the top of the showcase page.
- Enter the Showcase Description displayed below the banner.
- Click Add Products and search for items to include; add as many as needed.
- Drag products to reorder their display sequence on the showcase page.
- Set the Status to Active or Inactive.
- Click Save Showcase.

Edit Showcase allows you to update an existing showcase's banner, product selection, description, and URL slug. Use this to refresh seasonal showcases for new campaigns.
- Navigate to Admin → Showcases and click the showcase name to edit.
- Update the Showcase Name, URL Slug, and Banner Image as needed.
- Edit the Showcase Description to reflect the current promotion.
- Click Manage Products to add or remove items from the showcase.
- Reorder products by dragging rows into the desired sequence.
- Toggle Status to activate or deactivate the showcase.
- Click Save Changes.

The Imports & Updates section provides CSV-based tools for bulk loading and updating platform data. Use imports to onboard large product catalogs, migrate customer records, or apply mass price and inventory updates without editing records one at a time.

Import Products uploads a CSV file to create new product records or update existing ones in bulk. This is the primary tool for onboarding large catalogs or syncing products from a supplier feed.
- Navigate to Admin → Imports & Updates → Import Products.
- Click Download Template to get the required CSV column structure.
- Populate the template with your product data: SKU, Product Name, Description, Price, Category, Brand, Weight, UPC, and Image URL (minimum required fields).
- Save your completed file as a UTF-8 encoded CSV.
- Click Choose File and select your CSV.
- Select the Import Mode: Insert New Only, Update Existing Only, or Insert and Update.
- Click Validate CSV — the system checks for format errors and reports any rows with missing required fields.
- Review the validation report and fix any errors in your CSV before proceeding.
- Click Run Import to execute. A progress bar shows completion status.
- Review the Import Summary: records inserted, records updated, records skipped, and errors.

Update Prices imports a CSV containing SKU and price columns to mass-update retail, sale, or cost prices without affecting any other product data fields.
- Navigate to Admin → Imports & Updates → Update Prices.
- Click Download Template to get the price update CSV template (columns: SKU, Retail Price, Sale Price, Cost).
- Populate with your updated pricing data. Leave a price column blank to leave that price unchanged.
- Click Choose File and select the CSV.
- Select which Price Fields to update: Retail Price, Sale Price, Cost, or all three.
- Click Validate CSV and review any errors.
- Click Run Price Update to apply changes.
- Review the Update Summary for confirmation of records updated.

Update Inventory imports a CSV containing SKU and quantity columns to set or adjust on-hand stock levels for all products simultaneously — ideal for post-count adjustments or supplier feed syncs.
- Navigate to Admin → Imports & Updates → Update Inventory.
- Click Download Template for the inventory update CSV (columns: SKU, Quantity On Hand, Warehouse Location).
- Populate with your physical count or feed data.
- Choose the Update Method: Set Absolute Quantity (replaces current stock with the value in the CSV) or Adjust by Delta (adds/subtracts the value from current stock).
- Click Choose File and select the CSV.
- Click Validate CSV and resolve any errors.
- Click Run Inventory Update.
- Review the Update Summary.

Import Customers uploads a CSV of customer records to create or update customer accounts in bulk — useful for migrating from another platform or onboarding a wholesale account list.
- Navigate to Admin → Imports & Updates → Import Customers.
- Click Download Template for the customer CSV (columns: Email, First Name, Last Name, Company, Phone, Address, City, State, ZIP, Country, Customer Group).
- Populate the CSV with your customer data. Email is the unique key used to match existing records.
- Select the Import Mode: Insert New Only, Update Existing, or Insert and Update.
- Click Choose File and select the CSV.
- Click Validate CSV and review errors.
- Click Run Import.
- Review the Import Summary.

Import Orders loads historical order data from a CSV into the Generator platform — used when migrating from another e-commerce system and needing to preserve order history.
- Navigate to Admin → Imports & Updates → Import Orders.
- Click Download Template for the order CSV structure (columns: Order Number, Order Date, Customer Email, SKU, Quantity, Unit Price, Shipping, Tax, Order Status).
- Populate with your historical order data.
- Click Choose File and select the CSV.
- Click Validate CSV. The system checks for valid SKUs, customer emails, and required fields.
- Review and resolve all validation errors before proceeding.
- Click Run Import.
- Review the Import Summary to confirm records imported successfully.

Import Vendors uploads a CSV of vendor/supplier records to bulk-create or update vendor accounts used in the Purchasing module.
- Navigate to Admin → Imports & Updates → Import Vendors.
- Click Download Template for the vendor CSV (columns: Vendor Name, Contact Name, Email, Phone, Address, City, State, ZIP, Country, Account Number, Payment Terms).
- Populate with your vendor data. Vendor Name is the primary matching key.
- Select Import Mode: Insert New Only, Update Existing, or Insert and Update.
- Click Choose File and select the CSV.
- Click Validate CSV and resolve errors.
- Click Run Import.
- Review the Import Summary.

| Task | Where to Go | Key Notes |
|---|---|---|
| Change site currency or time zone | Admin → Settings → General Settings | Affects all storefronts and documents |
| Update business address/logo | Admin → Settings → Store Information | Appears on all invoices and packing slips |
| Configure outbound email | Admin → Settings → Email Settings | Send test email after any SMTP change |
| Add or configure payment gateway | Admin → Settings → Payment Settings | Confirm Test vs. Live mode before saving |
| Configure shipping carriers | Admin → Settings → Shipping Settings | Define zones and handling fees |
| Set tax rates | Admin → Settings → Tax Settings | Consult tax professional for jurisdiction rules |
| Update SEO meta tags | Admin → Settings → SEO Settings | Regenerate sitemap after bulk product adds |
| Configure checkout flow | Admin → Settings → Checkout Settings | Enable guest checkout for B2C stores |
| Manage low-stock thresholds | Admin → Settings → Inventory Settings | Enable reservations during promotions |
| Enable 2FA / IP restrictions | Admin → Settings → Security Settings | Verify all admin IPs before enabling IP lock |
| Enable maintenance mode | Admin → Settings → Maintenance | Enable before large imports |
| Add admin staff user | Admin → Administration → Users | Deactivate rather than delete departing staff |
| Create role with limited access | Admin → Administration → Roles & Permissions | Use least-privilege principle |
| Audit staff actions | Admin → Administration → Activity Log | Filter by user and action type |
| Create manual backup | Admin → Administration → Backups | Download backup before any major change |
| Check system errors | Admin → Administration → Error Log | Export for developer/support use |
| Clear page/product cache | Admin → Administration → Cache Management | Clear after imports and price updates |
| View cron job status | Admin → Administration → Scheduled Tasks | Check Last Run Result for failures |
| Get system info for support | Admin → Administration → System Information | Copy System Report before contacting support |
| Add new network storefront | Admin → Network Stores → New Network Store | Assign separate customer group and price list |
| Configure network store independently | Admin → Network Stores → [Store] → Store Settings | Override global settings per store |
| Create product showcase page | Admin → Showcases → New Showcase | Prepare seasonal showcases in advance |
| Bulk import products | Admin → Imports & Updates → Import Products | Validate CSV with test batch first |
| Mass update pricing | Admin → Imports & Updates → Update Prices | Faster than full product import for price-only changes |
| Mass update inventory | Admin → Imports & Updates → Update Inventory | Use Absolute mode carefully — can zero stock |
| Import customer records | Admin → Imports & Updates → Import Customers | Email is the unique match key |
| Import historical orders | Admin → Imports & Updates → Import Orders | Import before go-live for complete history |
| Import vendor records | Admin → Imports & Updates → Import Vendors | Vendor Name is the primary match key |